
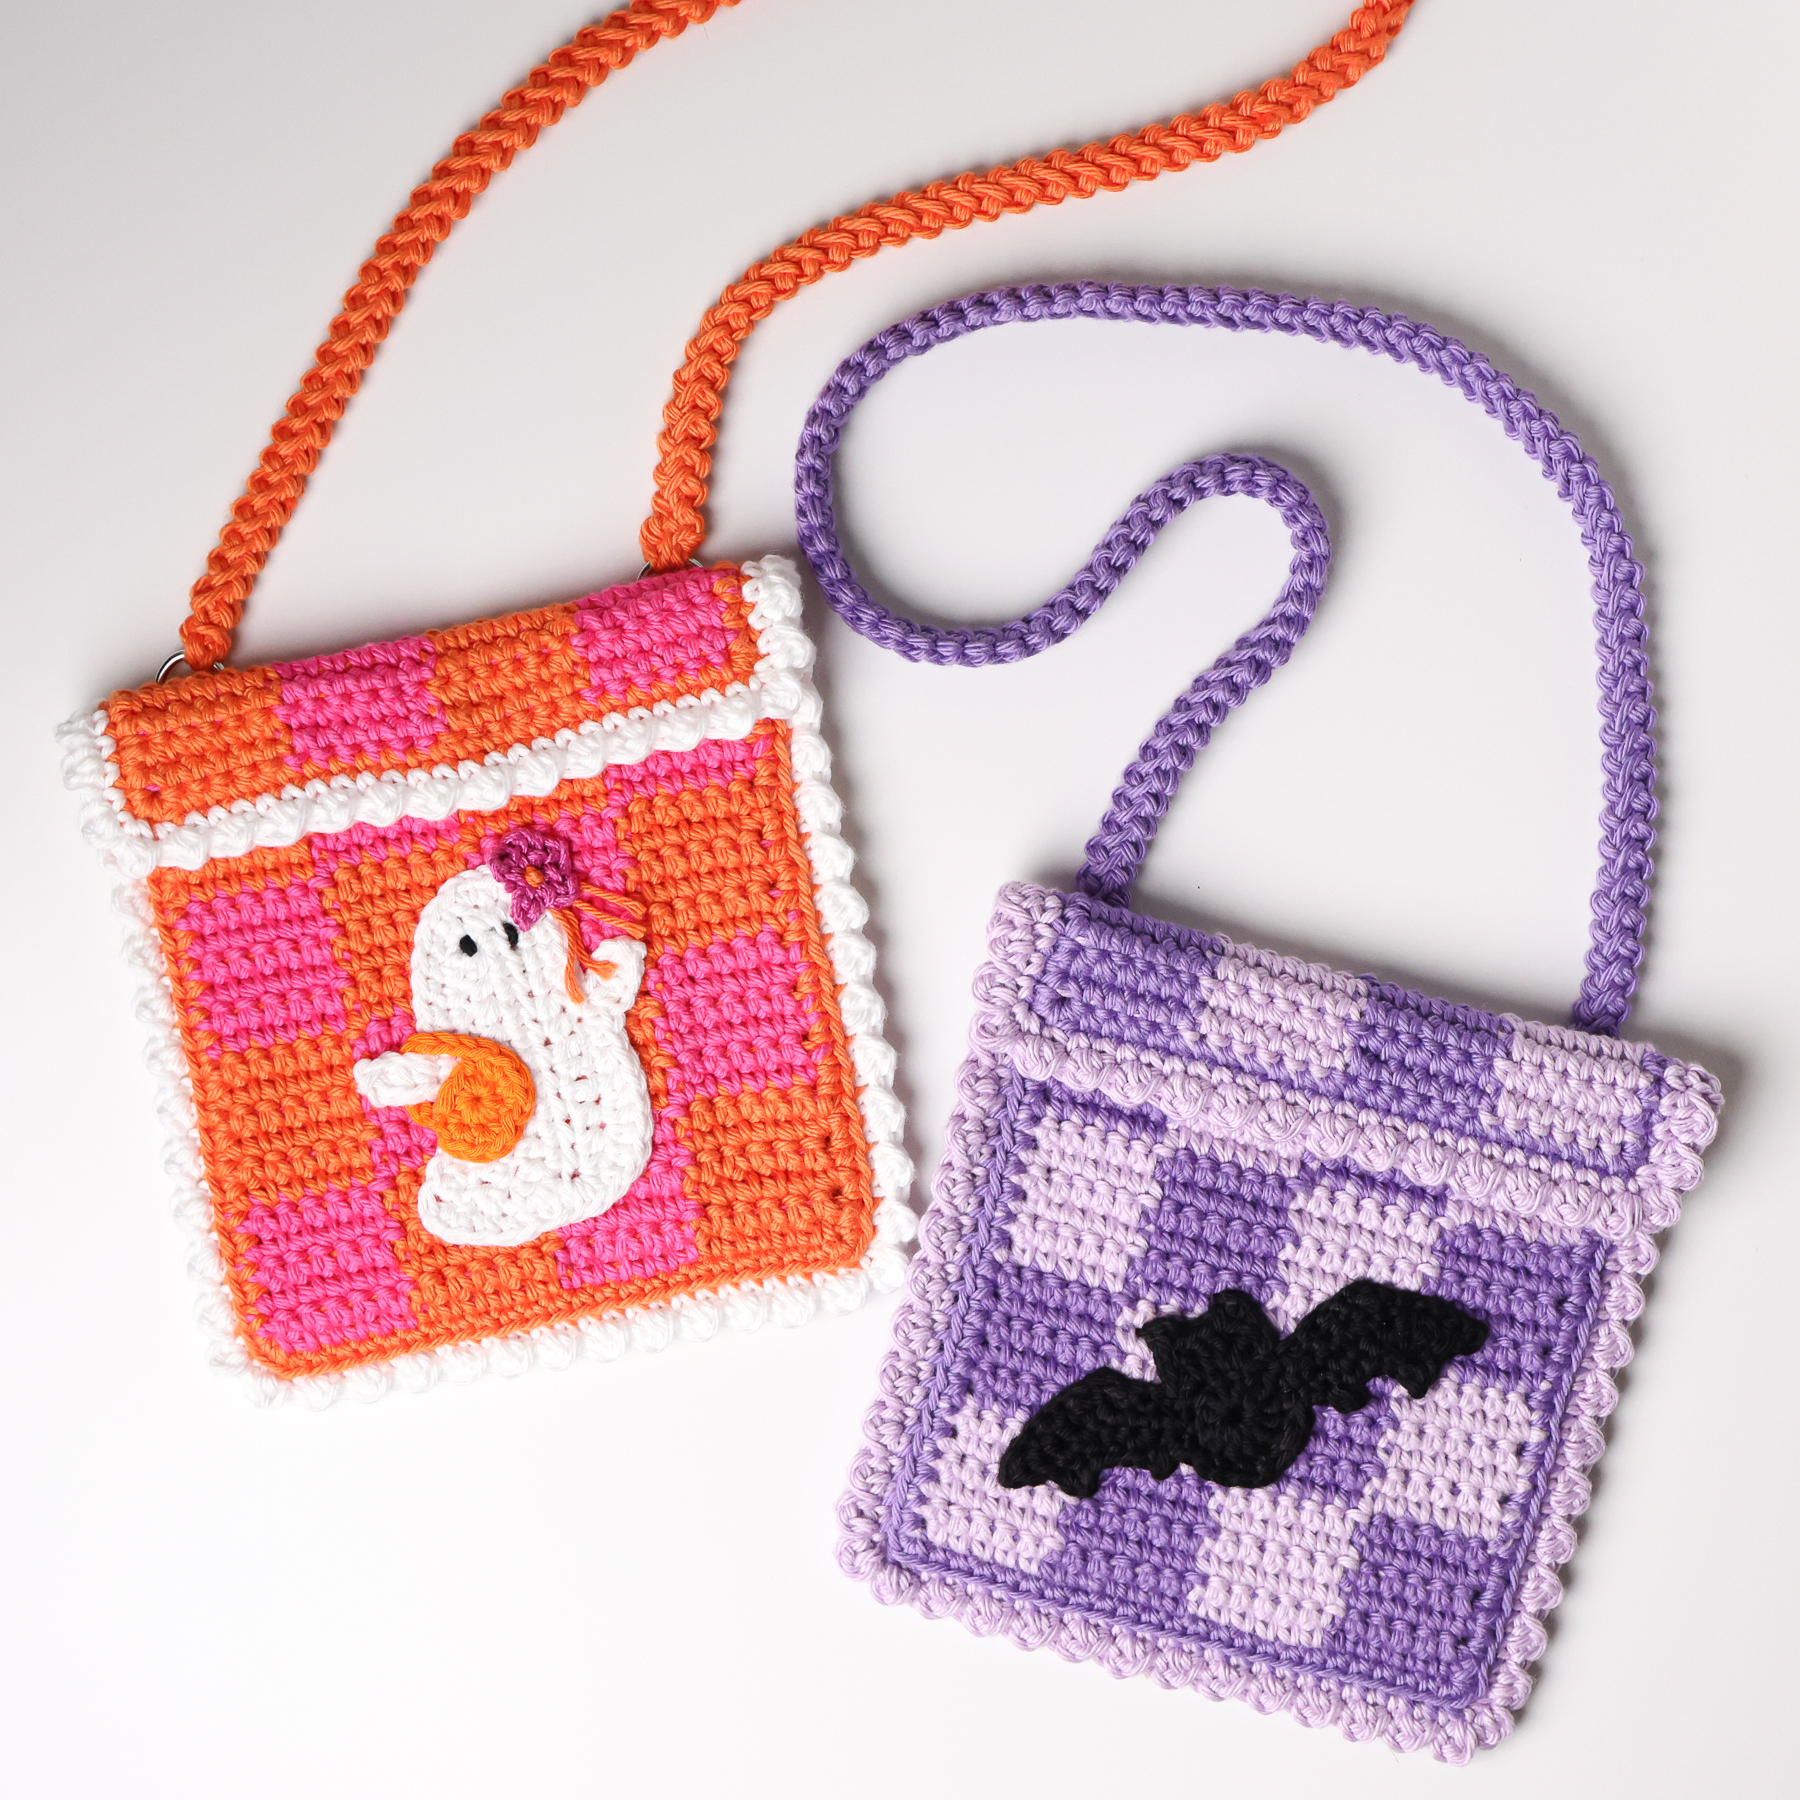
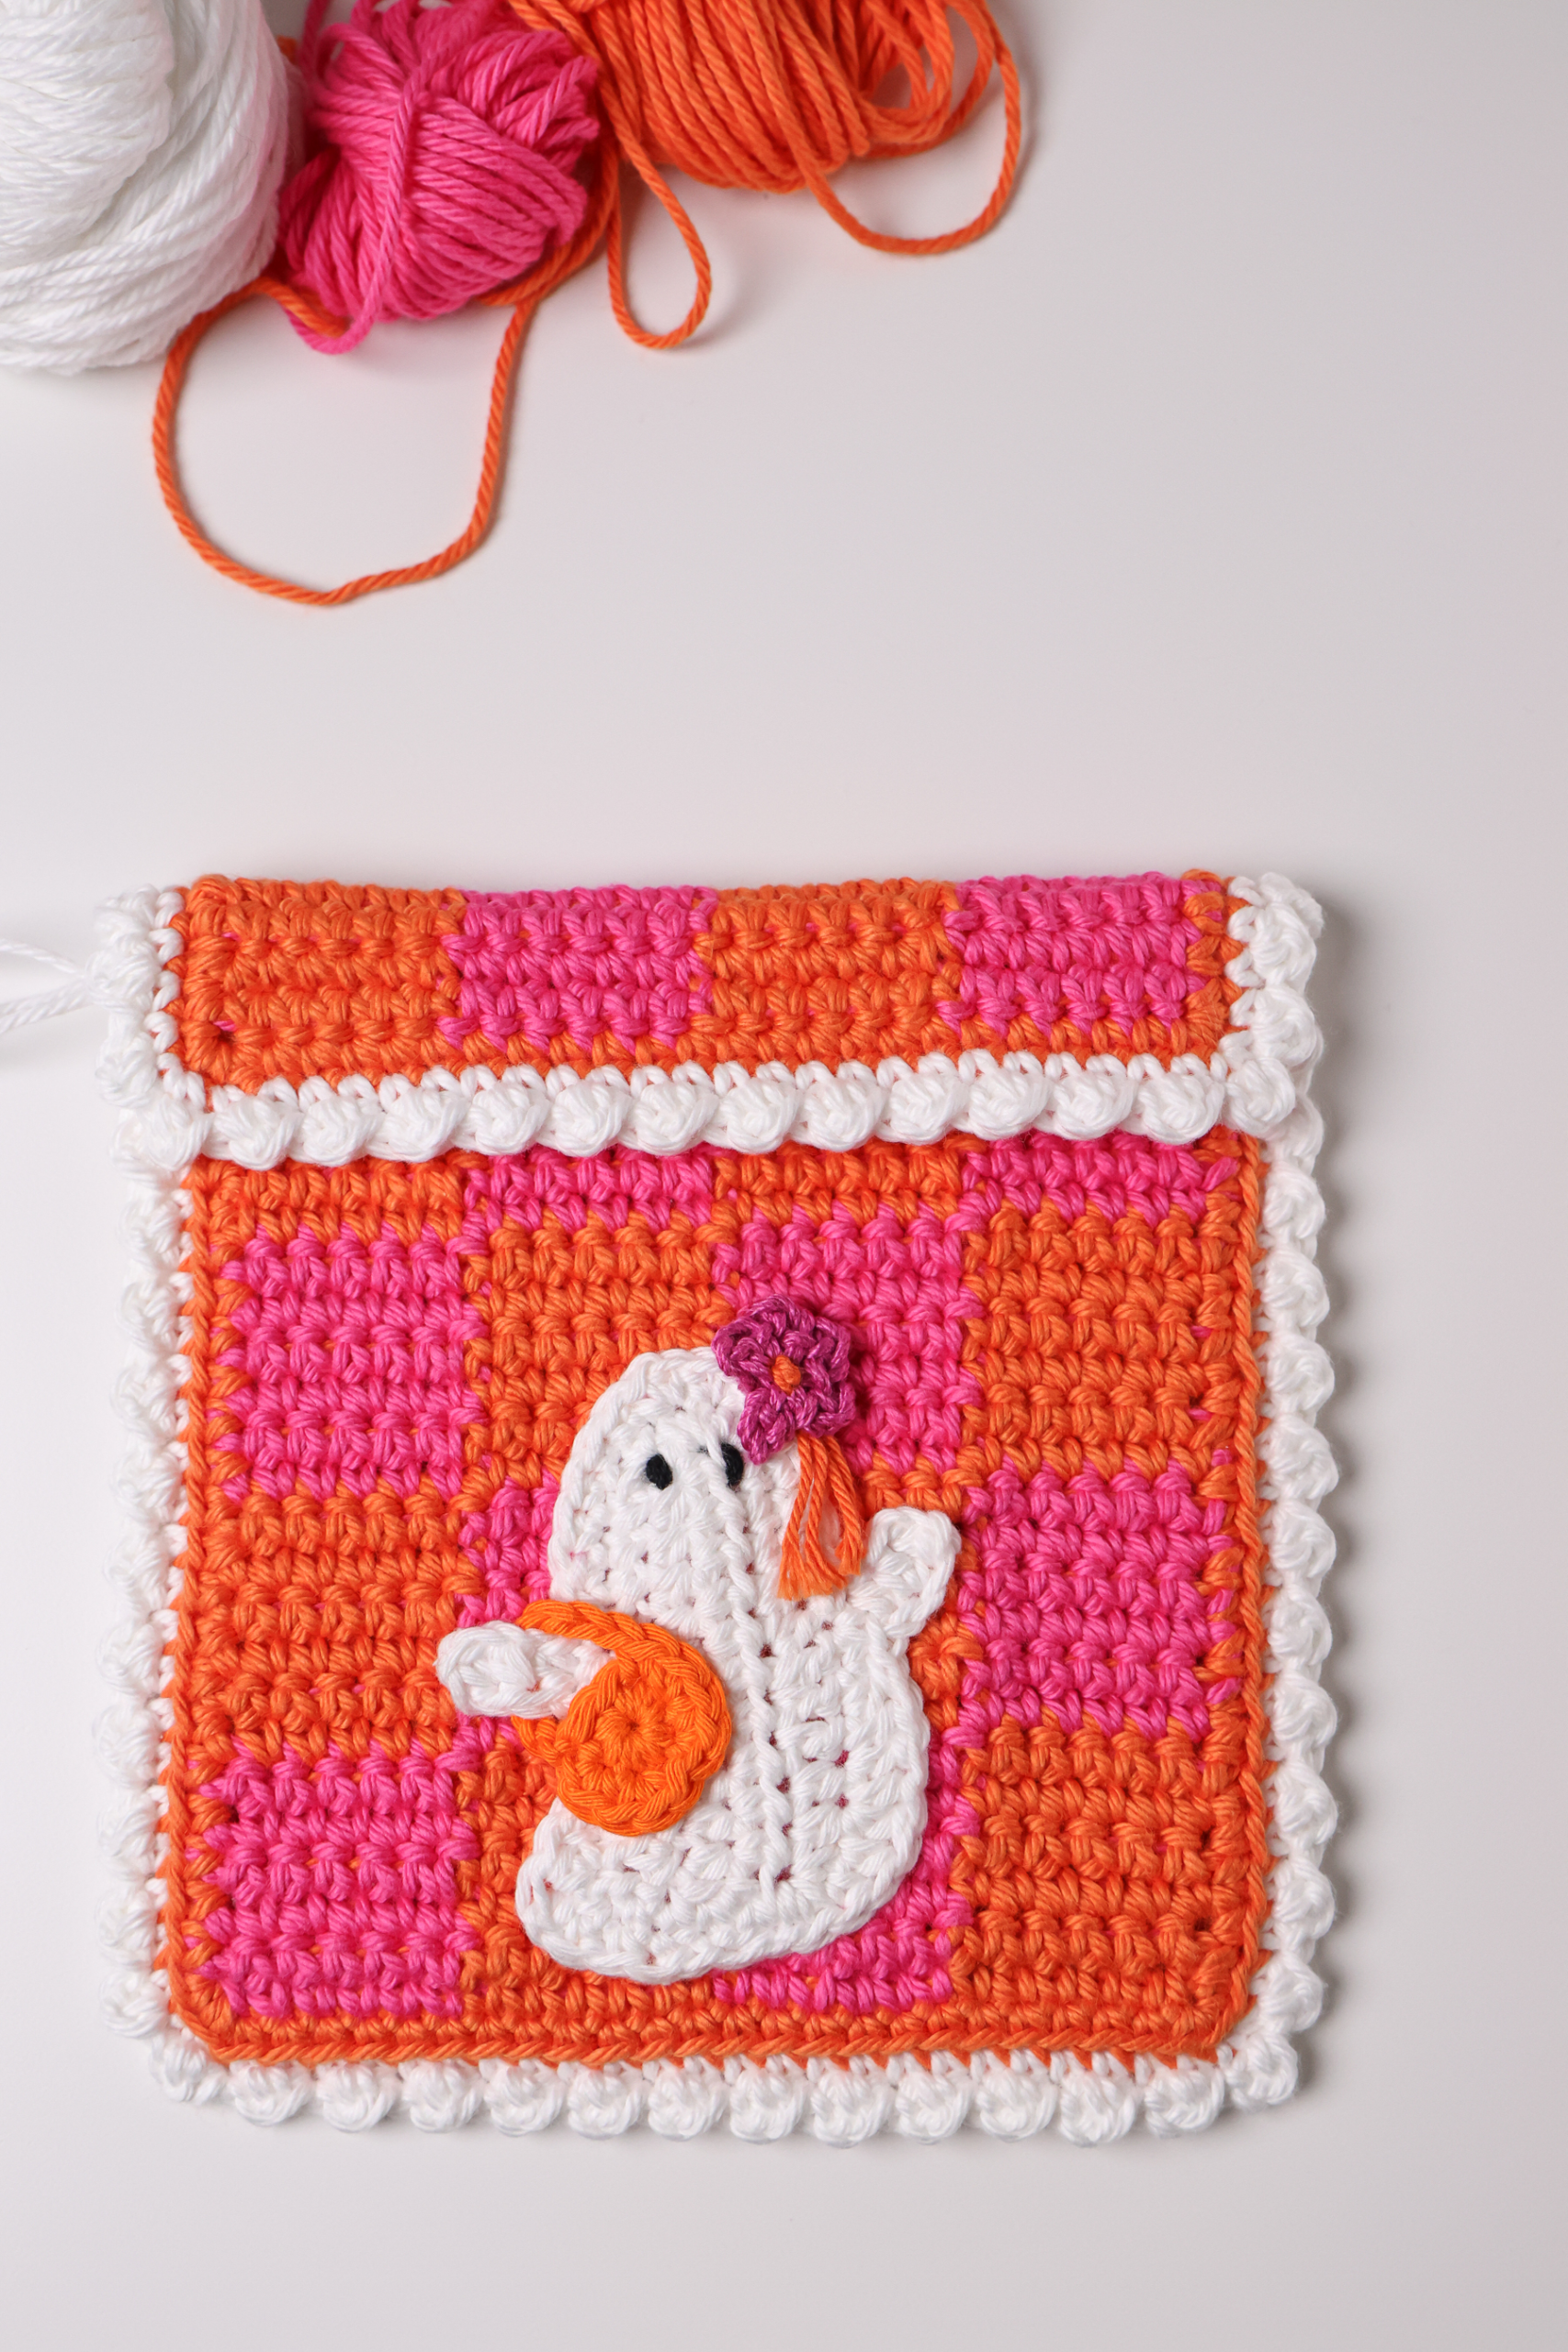
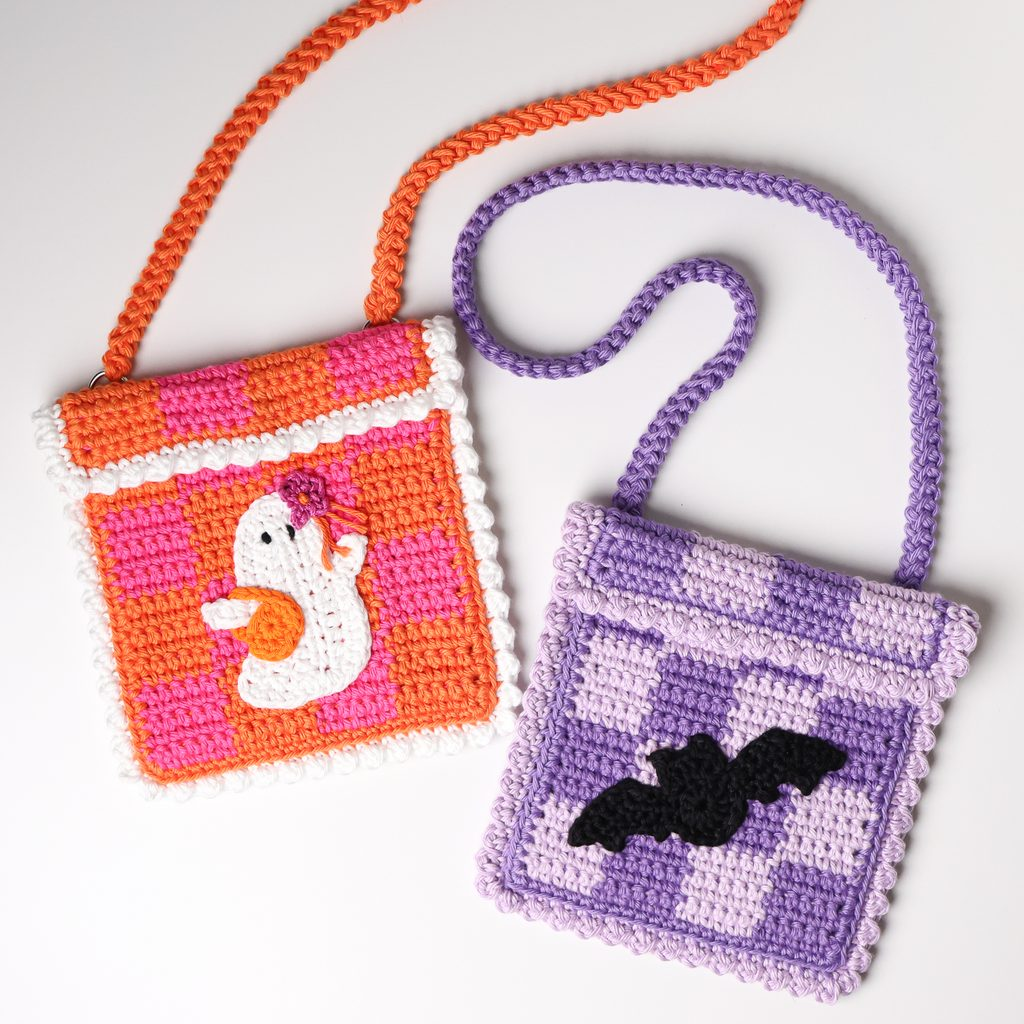
The classic checkered look is one of our favorite designs. Over the years we’ve used it to make placemats, bags, blankets, coasters, and so much more, but we’ve never written any of those as patterns! We had a few Halloween-themed designs brewing in our minds and one of those is this cute little checkered bag, featuring our Ghost & Bat Appliques.
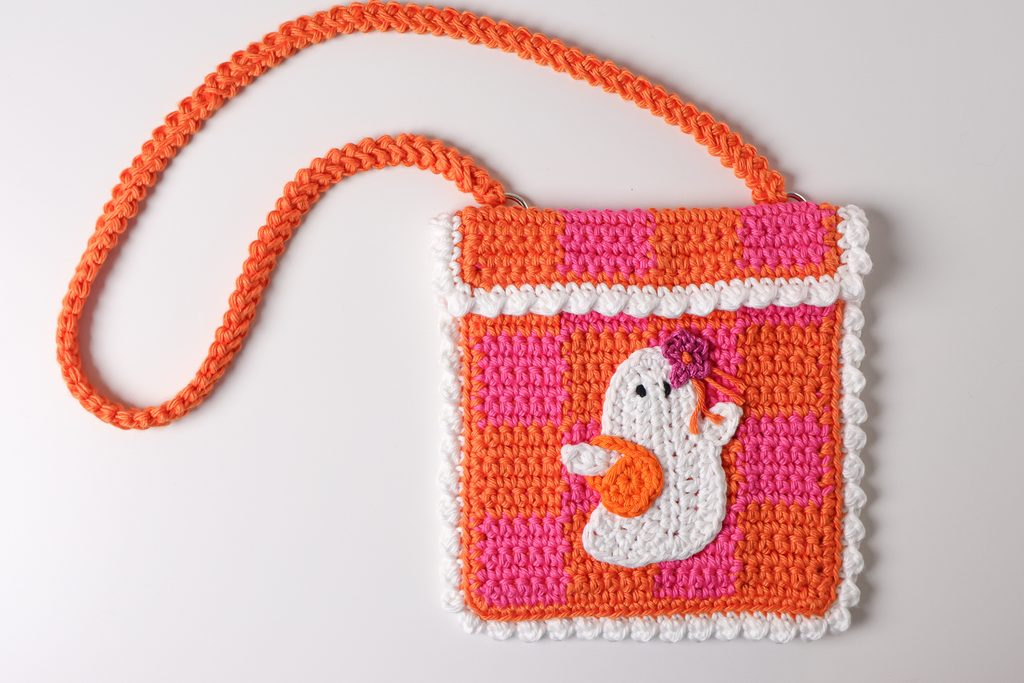
Now, this bag doesn’t have to have the ghost/bat appliques to be cute (but seriously, how adorable are they?!). It doesn’t have to have an applique at all! Depending on your colors, your mood, the season, whatever, you can adapt this pattern however you like.
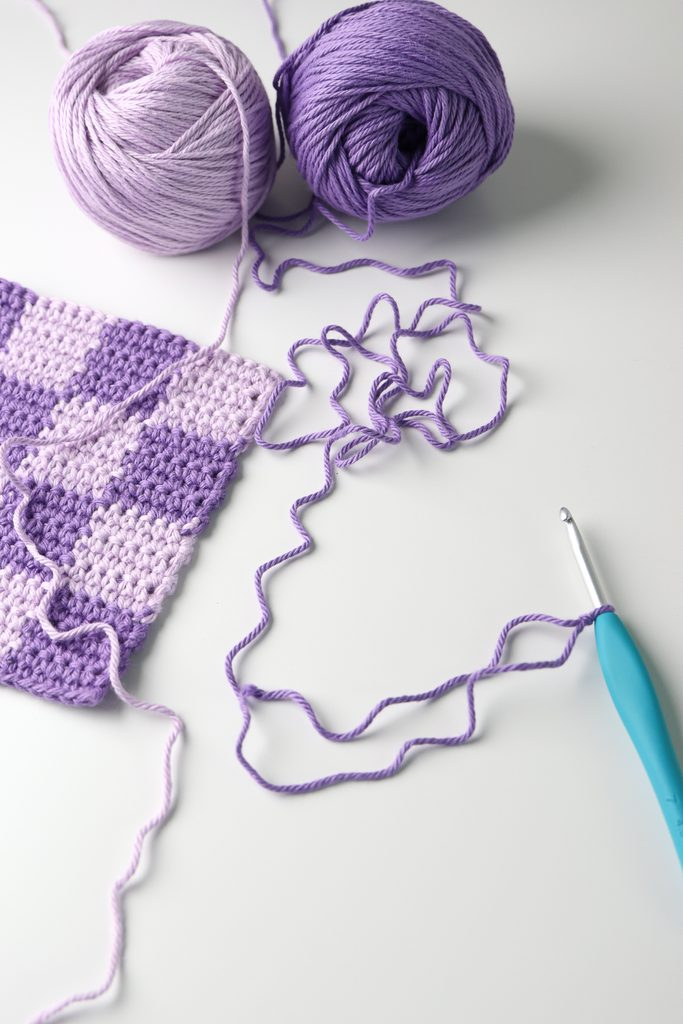
If you’re new to color work, don’t worry! This is a great project to start with since it only uses 2 colors! Even better, we have a tutorial that you can reference if you learn better that way. You can find it embedded below with the pattern as well.
Our favorite yarn to use when making crochet bags is 100% cotton yarn. All yarn details are included with the pattern, but you can substitute it with a yarn of your choice. We used I Love This Cotton from Hobby Lobby, a Worsted (#4) cotton yarn. Just know, your yarn choice and your tension may cause your results to be different than ours, so keep that in mind!
Our Favorite Halloween Applique Tutorials
You can add any small applique to this bag, or skip it all together! For this small bag, we recommend an applique that’s no bigger than 4″ x 4″ (10 x 10 cm). Here are a few of our favorite Halloween applique tutorials:
Even More Appliques
Several of our pattern collections also include appliques that would look super cute on these bags as well. Here are some of our favorites, including the Halloween Applique Collection that includes even more details than the tutorials above!
Owl Pattern Collection
Santa Pattern Collection
Reindeer Pattern Collection
Penguin Pattern Collection
Star Pattern Collection
Any small applique will work beautifully!
This post may contain affiliate links. We only recommend products we would use ourselves and all opinions expressed here are our own. Read our full privacy policy and disclosures here.
Materials Needed
- Worsted (#4), I Love This Cotton (100% Cotton), 180 yards (165 m) per 100 g (3.5 oz) skein
- Color A, Orange/Amethyst – 85 yards (78 m)
- Color B, Hot Rose/Orchid – 60 yards (55 m)
- Color C, White/Orchid – 15 yards (14 m)
- US 7 (4.5 mm) & G/6 (4 mm) hooks – we love Clover Amour hooks
- scissors
- stitch markers
- tapestry needle
- D-rings (2) – 1/2″ (13 mm)
- Magnetic Snap – 5/8″ (14 mm)
- Needle & thread for sewing the snap
Abbreviations
US terms
- ch = chain
- dc = double crochet
- rep = repeat
- sc = single crochet
- sl st = slip stitch
- sts = stitches
Size
Finished bag measures 6.5″ (17 cm) wide by 7″ (18 cm) tall with a customizable length strap.
Notes & Special Stitches
- 2 sc: make 2 single crochets in the next stitch
- sc 2: make 1 single crochet in the next two stitches
- (xyz): all stitches are worked into the same stitch/space
- {xyz}: repeat those stitches a certain number of times
- Stitch counts: Stitch counts are listed in brackets [ ] at the end of the row/round.
- Turning Chain: Ch 1 at the beginning of the Row/Round does not count as a stitch.
Gauge
18 rows of 18 sc measures 4″ (10 cm) wide by 4″ (10 cm) tall.
Pattern
Checkered Panels
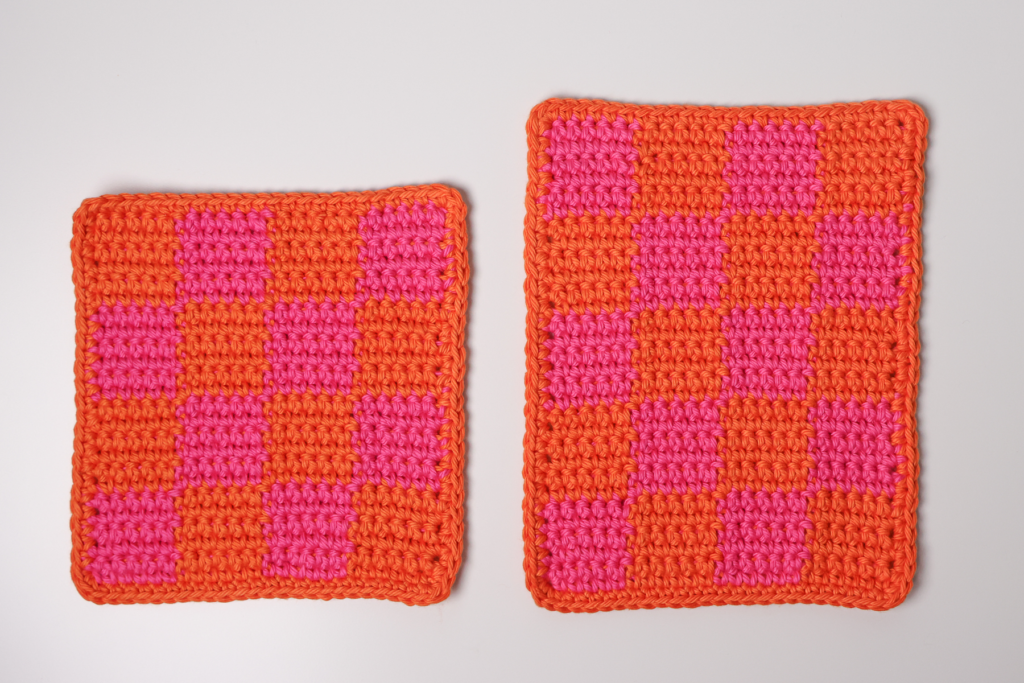
The 2 bag panels are made by crocheting a checkered pattern with Color A and B that is 4 blocks wide, 4 blocks tall for the front panel, and 5 blocks tall for the back panel. Each block = 6 sc wide and 6 rows tall.
For clean color changes, change your yarn as you complete the 6th sc of each block, when you have 2 loops left on your hook. Drop your current yarn and pull through the 2 loops with your new yarn to complete the 6th sc.
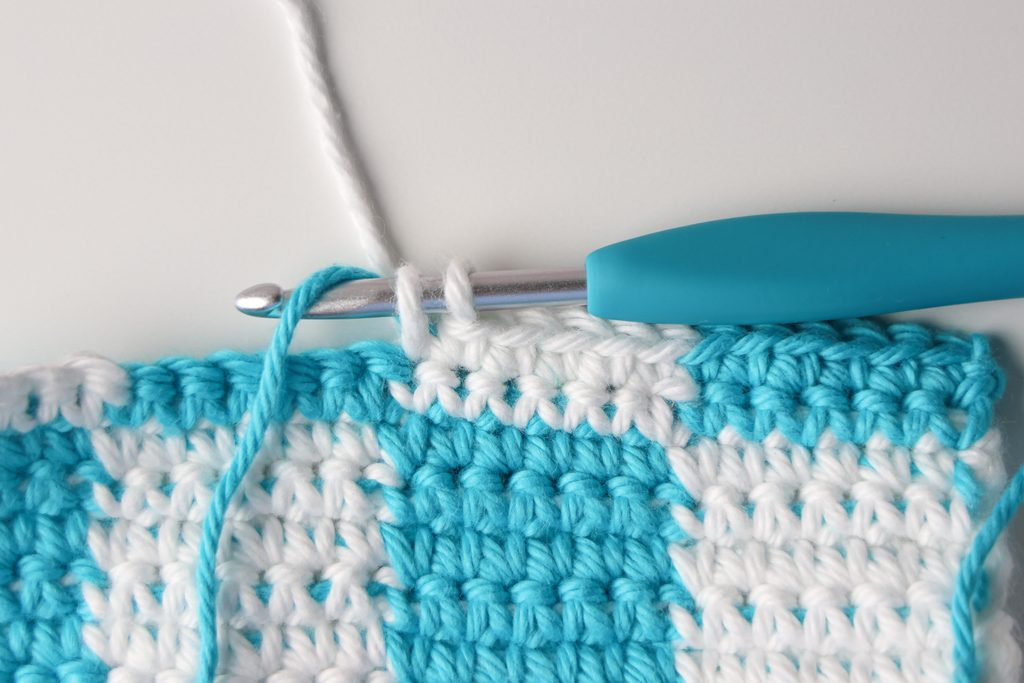
You can carry your inactive yarn by crocheting over every stitch or by floating it across the wrong side, crocheting over it every few stitches.
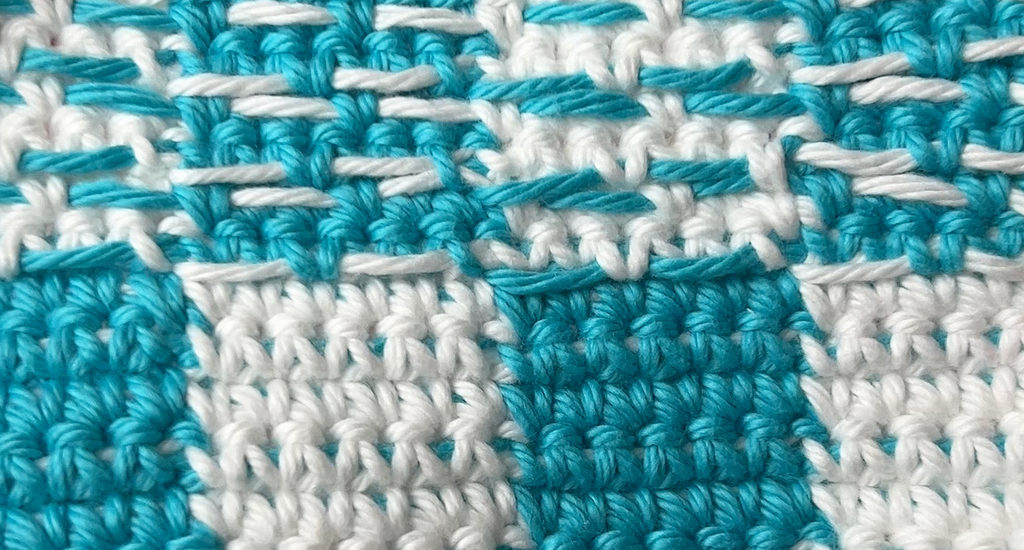
For a better look at these different techniques and how to achieve the checkered pattern, you can follow along with our tutorial here:
Front Panel
With a US 7 (4.5 mm) hook and Color A, Ch 25.
Row 1 (RS): Beginning in the 2nd ch from hook, sc 6. Change to Color B, sc 6. Change to Color A, sc 6. Change to Color B, sc 6. Ch 1 and turn. [24 sc]
Row 2 (WS): With Color A, sc 6. Change to Color B, sc 6. Change to Color A, sc 6. Change to Color B, sc 6. Ch 1 and turn.
Row 3: With Color B, sc 6. Change to Color A, sc 6. Change to Color B, sc 6. Change to Color A, sc 6. Ch 1 and turn.
Row 4: With Color A, sc 6. Change to Color B, sc 6. Change to Color A, sc 6. Change to Color B, sc 6. Ch 1 and turn.
Row 5: With Color B, sc 6. Change to Color A, sc 6. Change to Color B, sc 6. Change to Color A, sc 6. Ch 1 and turn.
Row 6: With Color A, sc 6. Change to Color B, sc 6. Change to Color A, sc 6. Change to Color B, sc 6. Change to Color A as you finish your final sc of the row. Ch 1 and turn.
Your first color block is complete! Now, we’ll switch the order to create the next block of our checkered pattern.
Rows 7-12: Repeat Rows 2 & 3. Change to Color B as you finish your final sc in Row 12.
For the Front Panel, work two more color blocks.
Rows 13-18: Repeat Rows 3 & 4. Change to Color A as you finish your final sc in Row 18.
Rows 19-24: Repeat Rows 2 & 3.
Cut Color B yarn only.
If you haven’t already, ch 1 and turn. Next, work a single crochet border around the entire panel, working a single crochet in each stitch and row end, adding 1 extra single crochet in each corner as follows:
Border (RS): With Color A, sc 23. Then, work 2 sc in last st (mark the last sc). Rotate your work and single crochet along the row ends. Beginning in the same st, work 1 sc in each row end for a total of 24 sc. Rotate your work and continue along the back side of the chain. Work 2 sc in the first ch (mark the first one), sc 22, then work 2 sc in the last ch (mark the last sc). Rotate your work. Beginning in the same ch, work 1 sc in the next 23 row ends and 2 sc in the last row end (mark the last sc), for a total of 25 sc. End with an Invisible Finish or sl st to the first sc to join. [100 sc]
Fasten off and weave in ends.
Back Panel
The Back Panel is identical to the Front Panel, except you will crochet 1 additional checkered block, for a total of 30 rows.
So, Repeat Rows 1-24 of the Front Panel. Then, change to Color B as you finish your final sc in Row 24.
Rows 25-30: Repeat Rows 3 & 4. Change to Color A as you finish your final sc in Row 30.
Cut Color B yarn only.
If you haven’t already, ch 1 and turn. Next, work a single crochet border around the entire panel, working a single crochet in each stitch and row end, adding 1 extra single crochet in each corner as follows:
Border (RS): With Color A, sc 23. Then, work 2 sc in last st (mark the last sc). Rotate your work and single crochet along the row ends. Beginning in the same st, work 1 sc in each row end (mark the 6th sc), for a total of 30 sc. Rotate your work and continue along the back side of the chain. Work 2 sc in the first ch (mark the first one), sc 22, then work 2 sc in the last ch (mark the last sc). Rotate your work. Beginning in the same ch, work 1 sc in each row end (mark the 25th sc), and 2 sc in the last row end (mark the last sc), for a total of 31 sc. End with an Invisible Finish or sl st to the first sc to join. [112 sc]
Fasten off and weave in ends.

Joining Panels
If you plan to add an applique to your bag, do it now! The back panel will fold over the top 5-6 rows of the front panel, so position it accordingly. I like to position it centered with the bottom 3 blocks.


With WS facing each other, match up your panels along the bottom edge, lining up your marked stitches. As we join panels, you will crochet through both panels every stitch. Attach Color C yarn in the top left marked stitch of the front panel and the 6th stitch on the back panel as follows:
Switch to a US G/6 (4 mm) hook.
Round 1 (RS): With Color C, sl st through both panels, under both loops of the marked stitches.
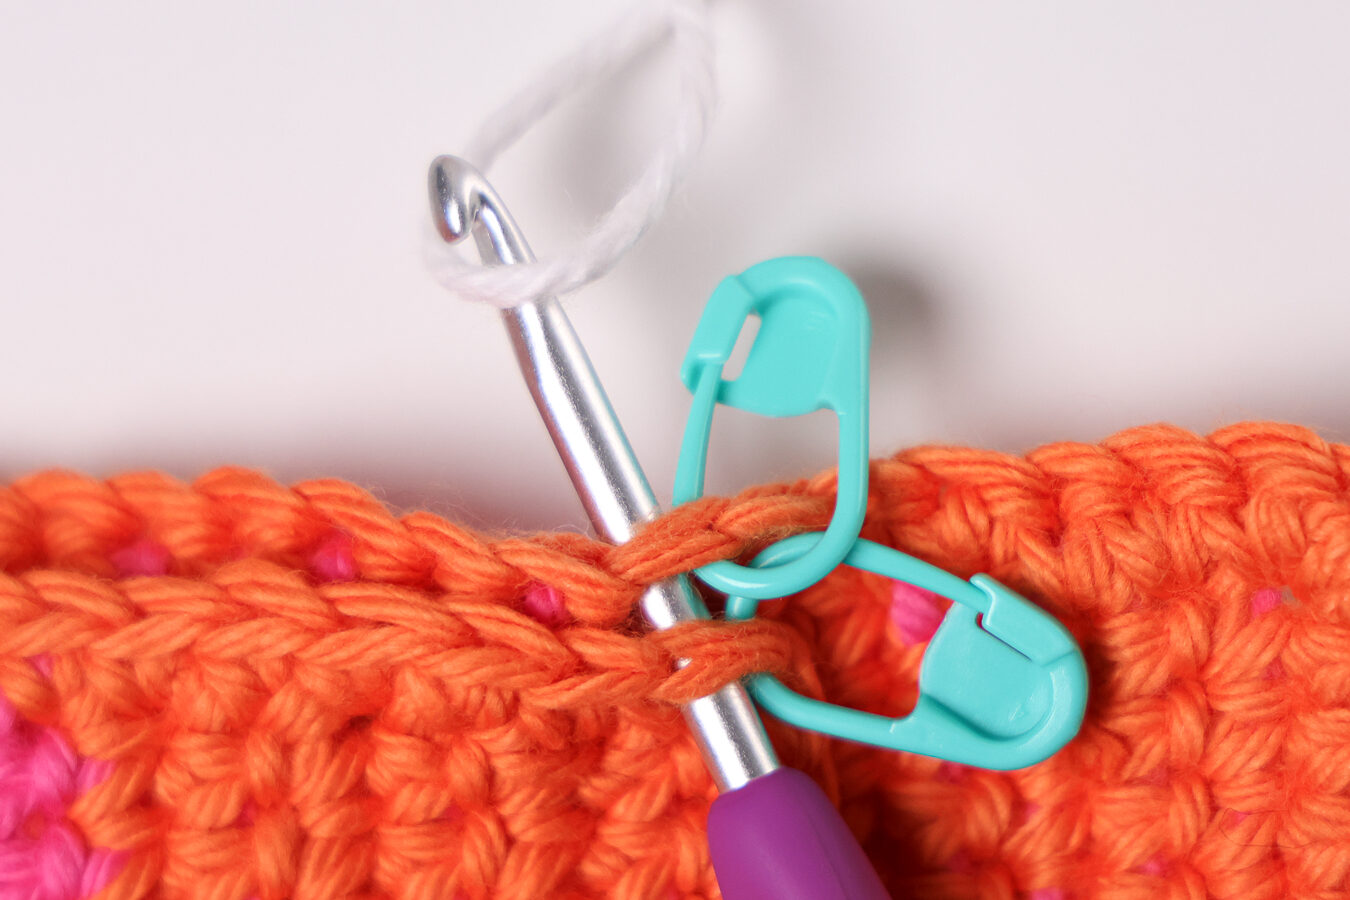

Sc blo 24.
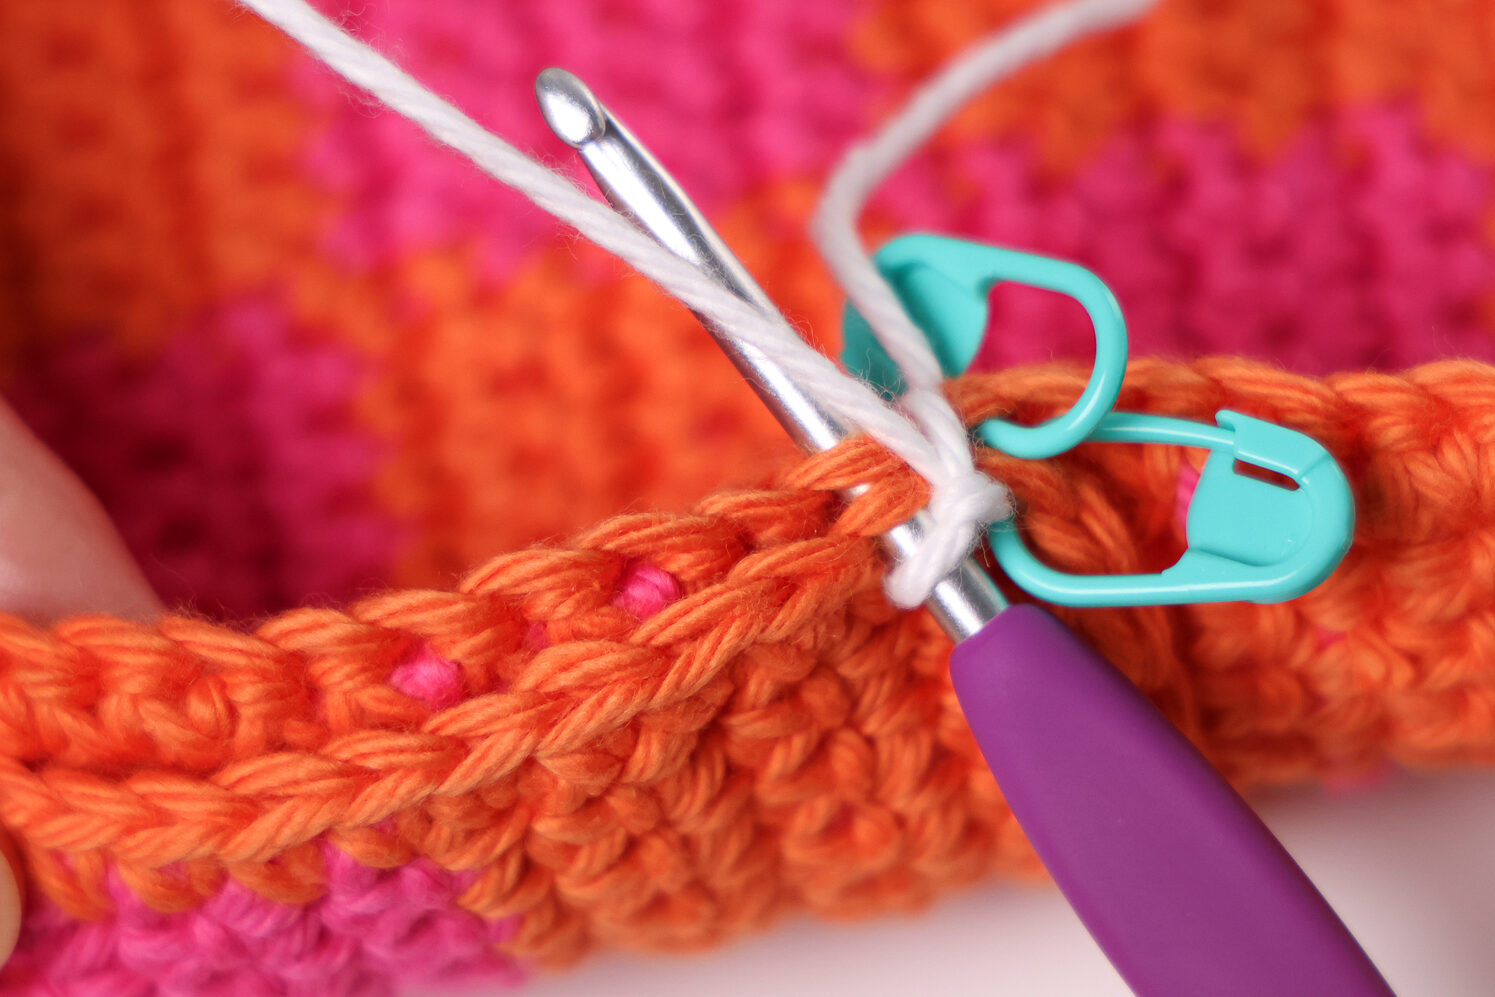


2 sc blo in the next marked stitches.
Sc blo 24 across the bottom of the panels.
2 sc blo in the next marked stitches.
Sc blo 24 across the side.
In the next marked stitches, sl st through both loops. Ch 1 and turn. [76 sc, 2 sl sts]
Round 2 (WS): Sl st in the sc, dc in next st, {sl st in next st, dc in next st} rep 11 times, (sl st, dc) in next st, (sl st, dc) in next st, {sl st in next st, dc in next st} rep 12 times, (sl st, dc) in next st, (sl st, dc) in next st, {sl st in next st, dc in next st} rep 12 times. [80 sts]


Continue by adding sc along the back panel only.
Round 1 (back panel): Sc in next back panel st (the marked stitch that you slip stitched into in Round 1), sc 5, 2 sc in next st marked st, sc 24, 2 sc in next marked st, sc 6, ending in the marked st on the back panel. Sl st to the first sl st of Round 2. Ch 1 and turn. [40 sts]
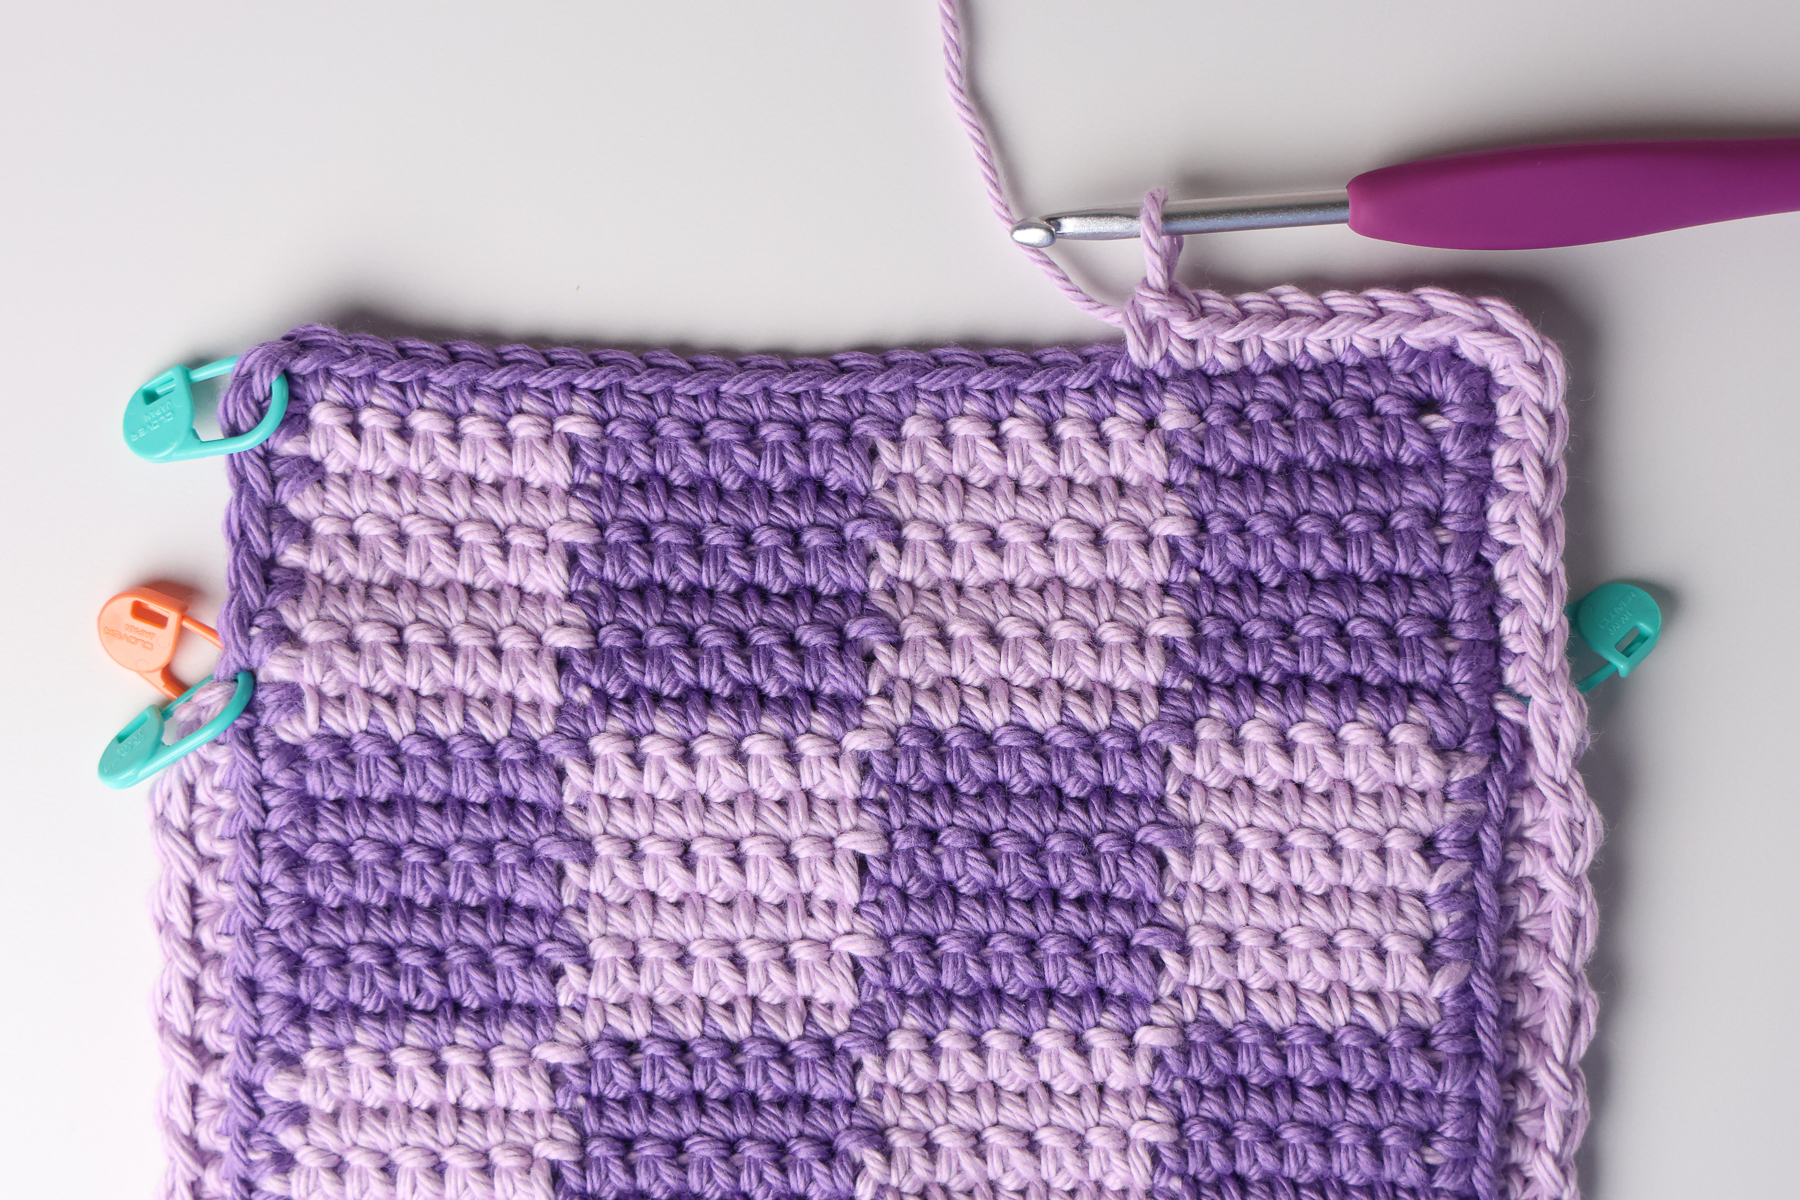
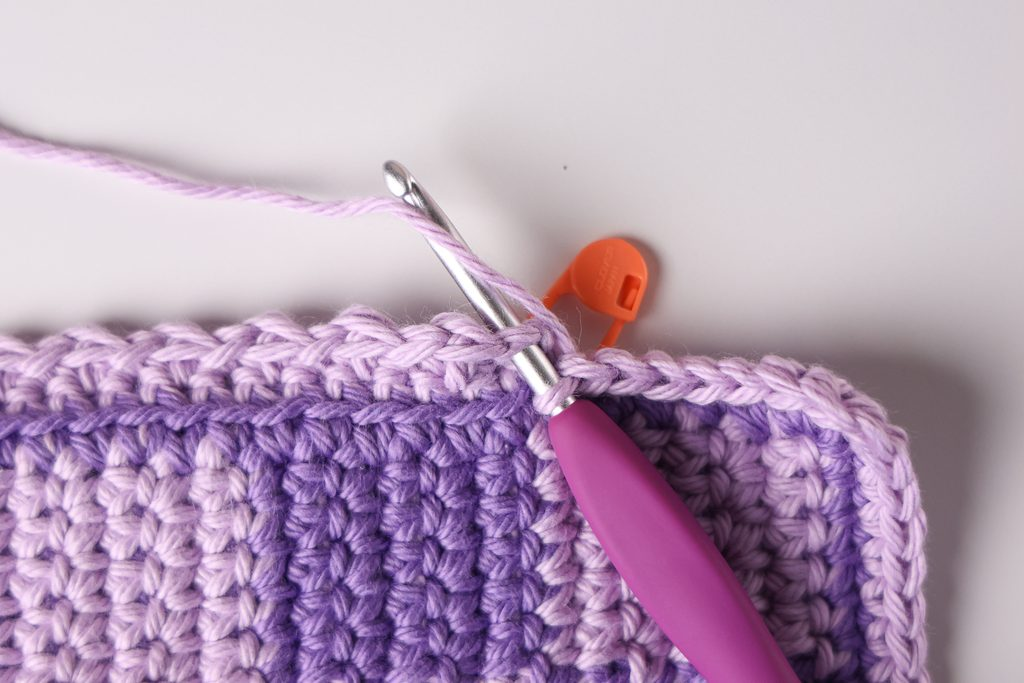
Round 2 (back panel): Sl st in the sc, dc in next st, {sl st in next st, dc in next st} rep 2 times, (sl st, dc) in next st, (sl st, dc) in next st, {sl st in next st, dc in next st} rep 12 times, (sl st, dc) in next st, (sl st, dc) in next st, {sl st in next st, dc in next st} rep 3 times, sl st in same st. [44 sts]
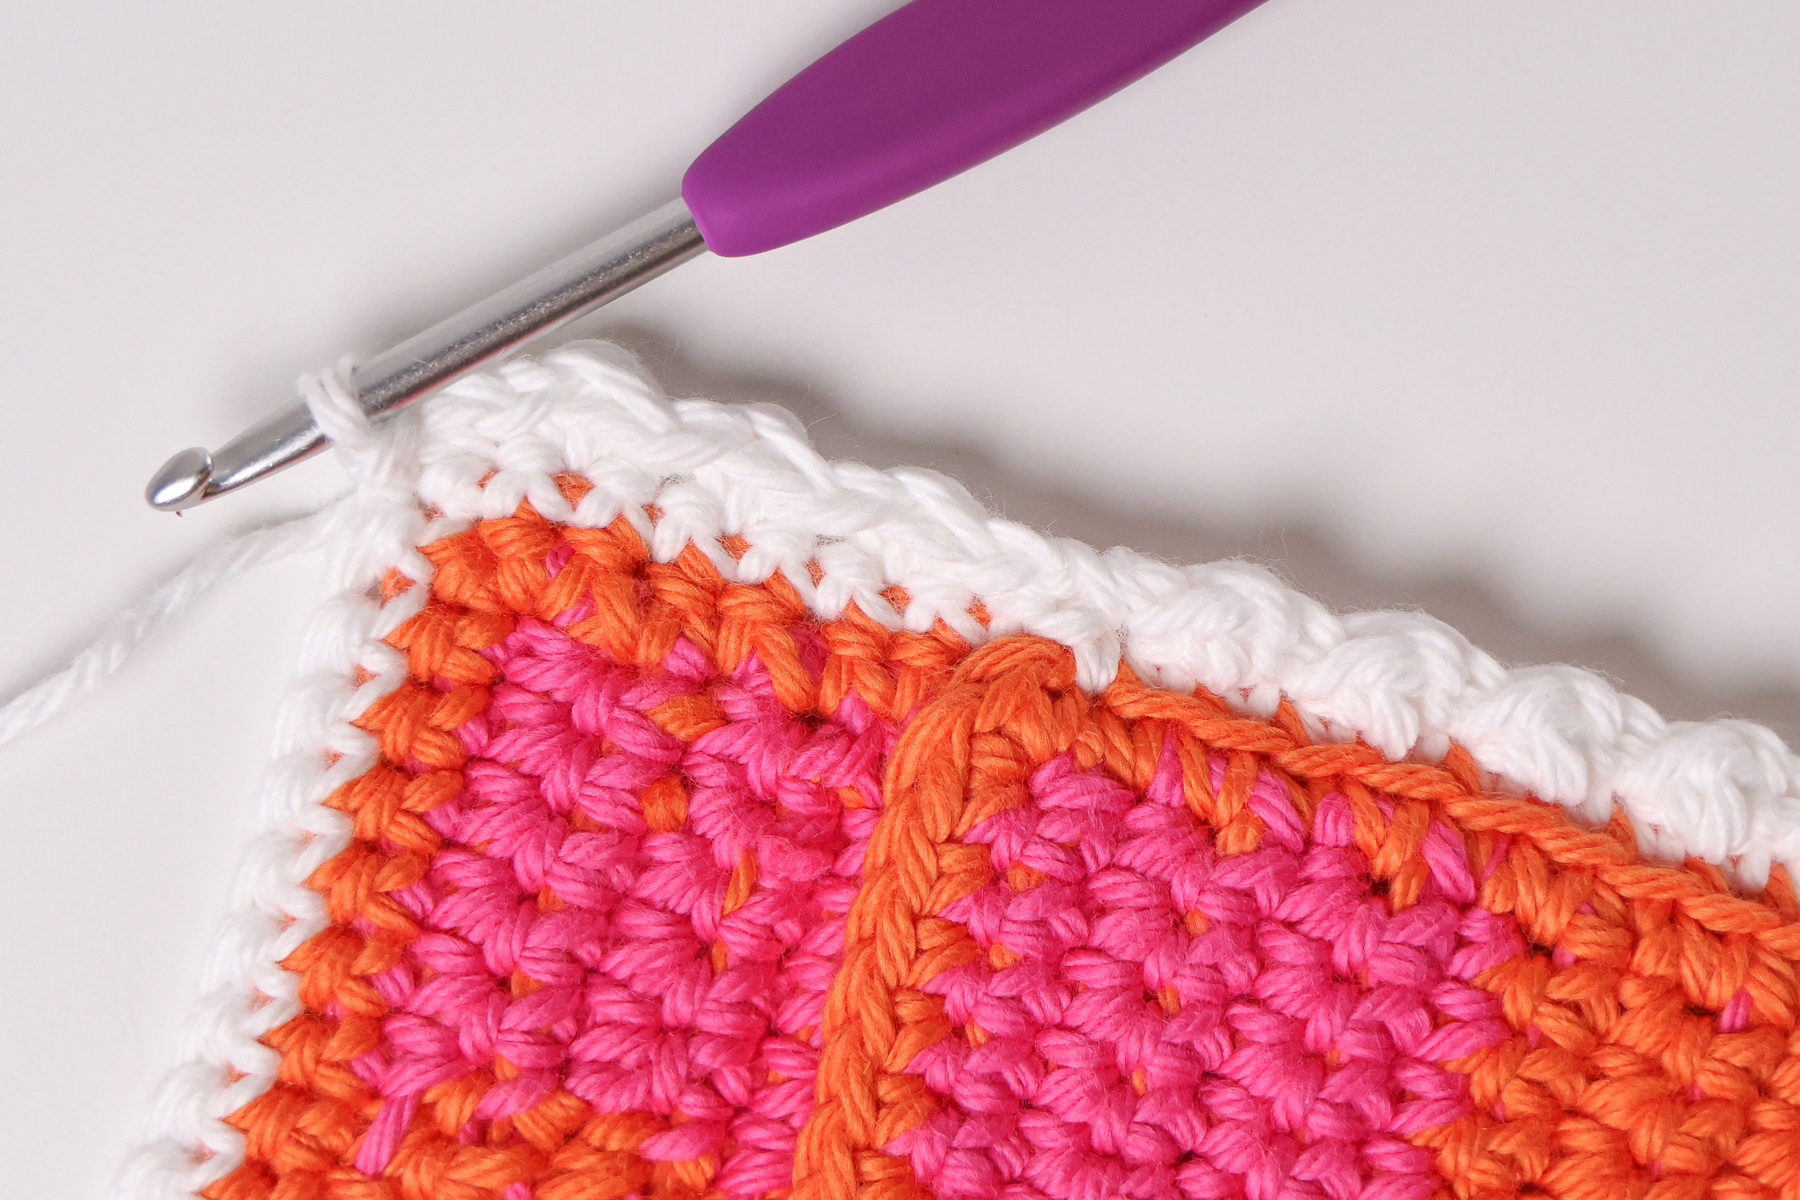
Fasten off, cut yarn, and weave in your ends.
Strap – HDC Romanian Cord
Leave a 6″ (15 cm) tail at the beginning for attaching later.
With Color A, ch 2, hdc in 2nd ch from hook, rotate your work to the left so you see the bottom of the chain, hdc through the back loop of the 2nd ch made (skipped ch) from top to bottom.


{Rotate your work, hdc through 3 loops on side} rep until you reach 26″ (66 cm) or your desired strap length, keeping stretch in mind.


Fasten off and leave a 6″ (15 cm) tail for attaching to your bag or D rings.
Optional D Rings
Attach the D ring horizontally along the back side of the bag. Using the yarn that matches and a tapestry needle, sew the D ring to the back side of the bag, going over the flat edge of the ring. Weave in ends.
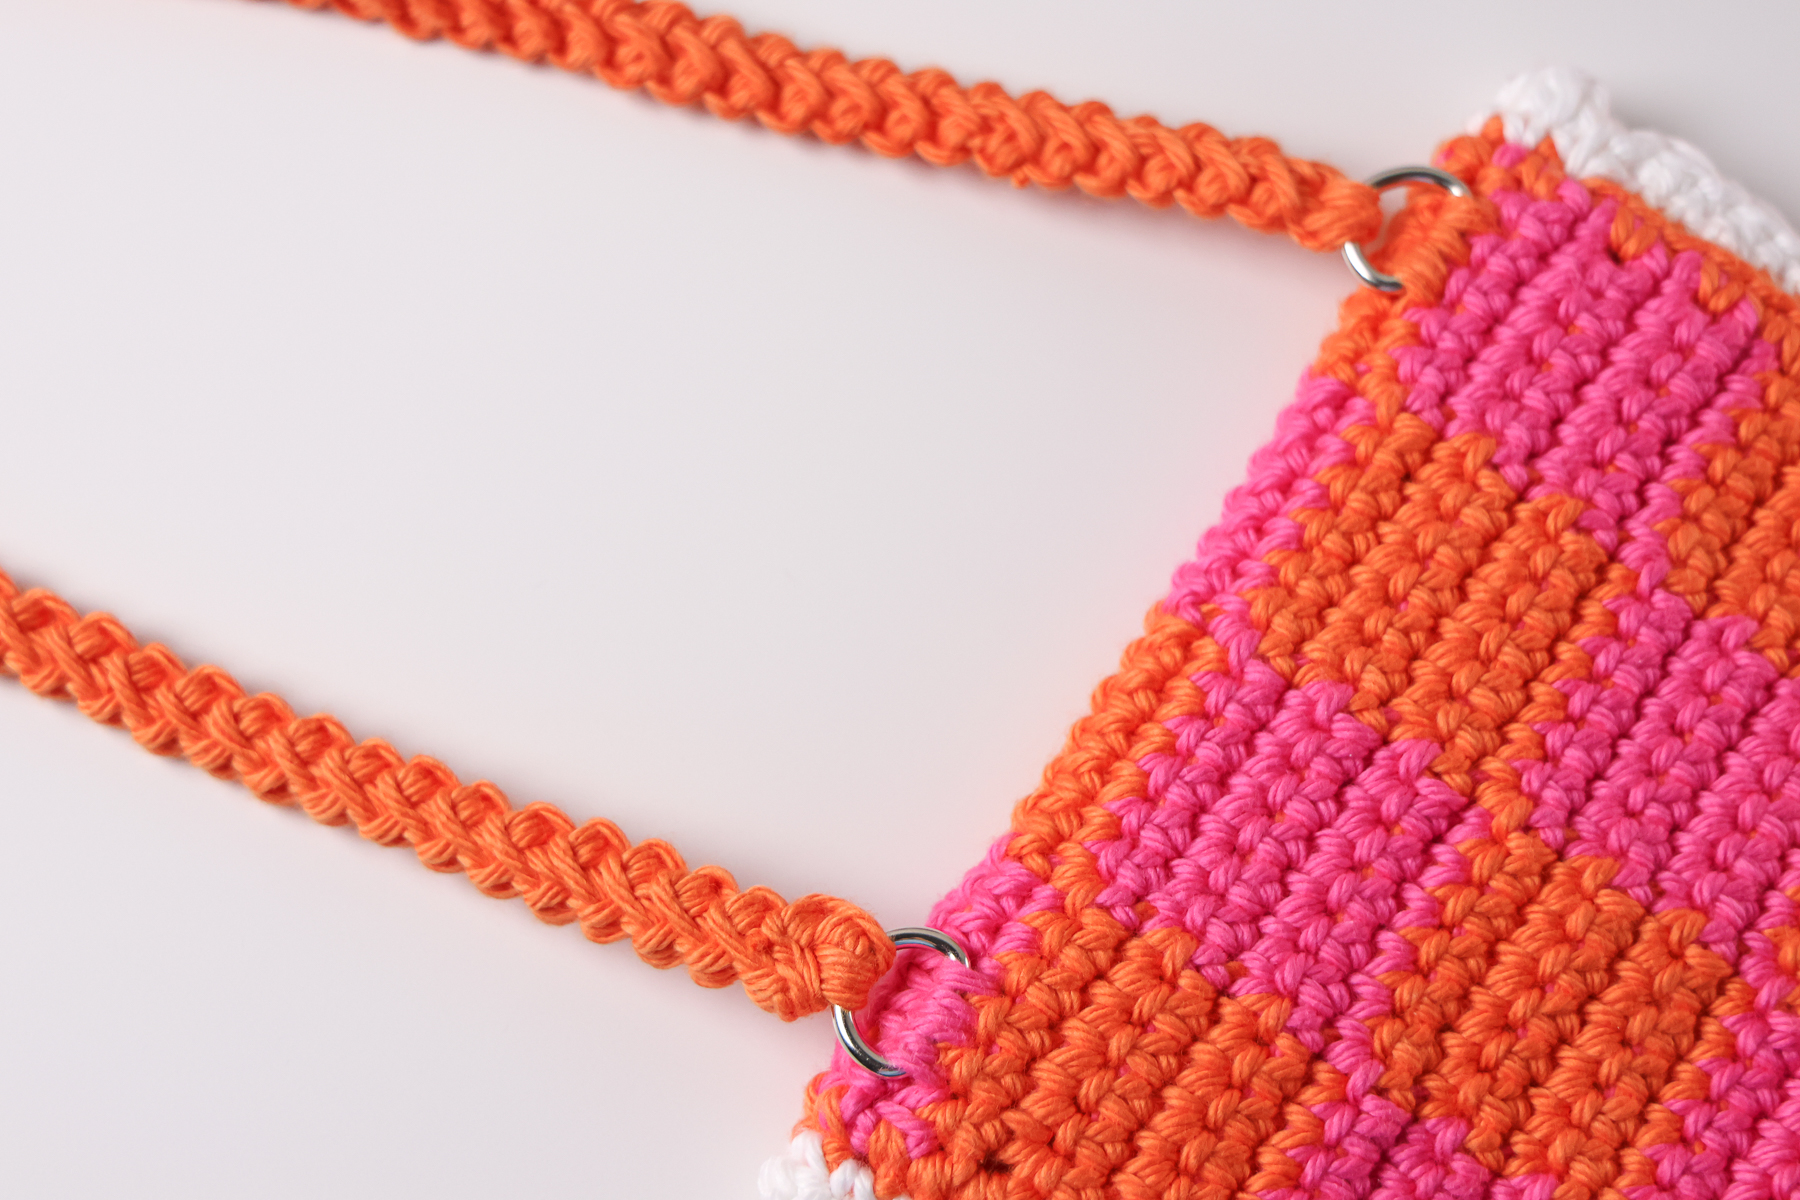
With a tapestry needle, whip stitch the strap along the back side of the bag or directly to the D rings once they’ve been attached.
Magnetic Snap
Place one side of the snap on the underside of the bag flap (back panel) and hand stitch in place.
Take side 2 of snap, line it up and place it where it will meet, and hold in place. Close snap to see if position and placement are correct. Unsnap and hand stitch side 2.
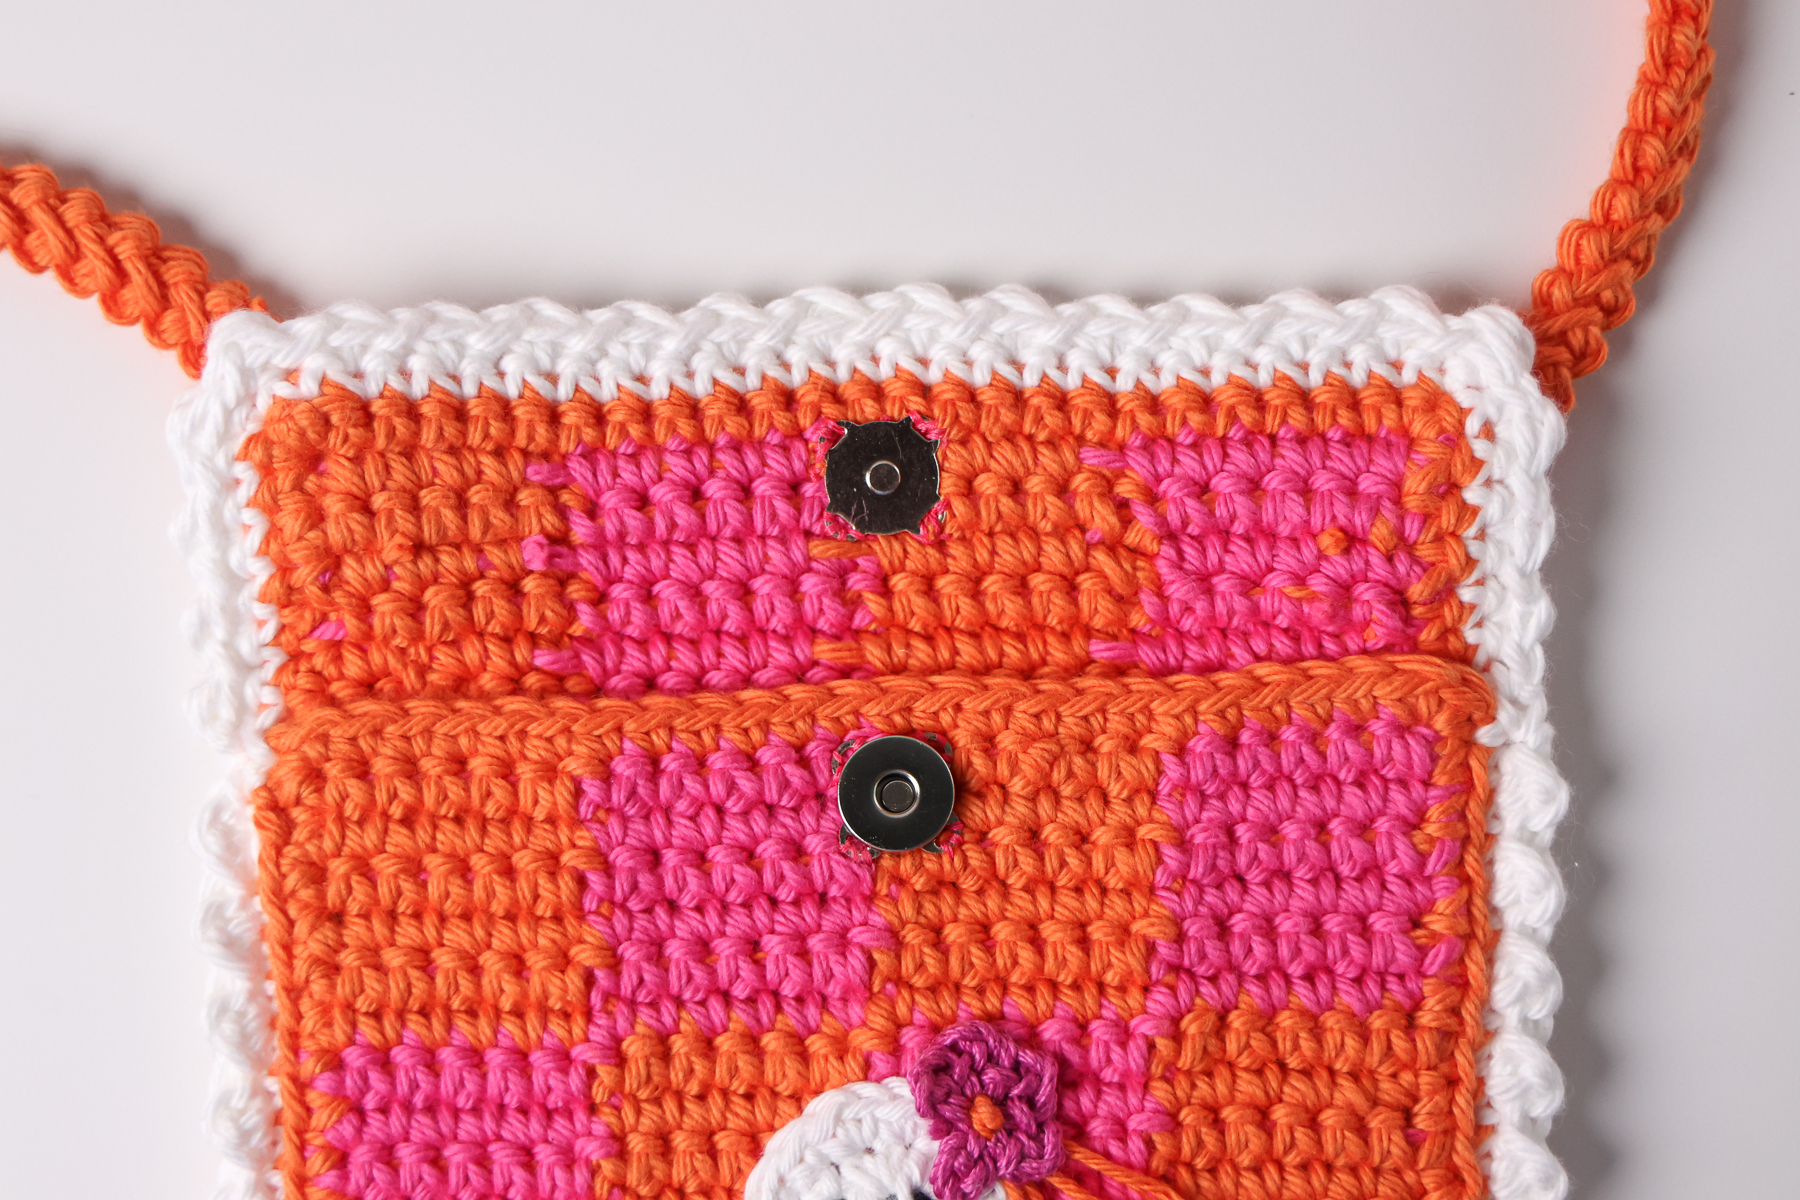
Weave in any remaining ends and you’re all set!
Want more fall projects? Check out our Favorite Spooky Halloween Projects post OR our other patterns & tutorials:

Alpine Pumpkin
No responses yet