The Easy Ribbed Scarf is one of those projects that’s just as relaxing to make as it is to wear. Worked lengthwise using half double crochet in the back loop only, this scarf creates a soft, stretchy ribbed texture that naturally forms subtle stripes as you stitch. Pair it with a variegated yarn and you get the ultimate striped look, with no yarn changing.


If you’re looking for a simple, cozy, scarf that works up beautifully and doesn’t require too many special techniques, this is a great go-to. The pattern is beginner-friendly, easy to memorize, and perfect for mindless crocheting while you watch your favorite show or listen to a great audiobook or podcast.
HDC BLO

Half Double Crochet Back Loop Only (hdc blo) is a simple variation of the classic hdc stitch. By working into just the back loop of each stitch, you create a stretchy, ribbed texture with beautiful definition. It’s an easy technique that adds interest without being complicated, making it perfect for beginner-friendly projects.
The photo below shows your work from the top view where you can see the “v” made by the previous row stitches. The bar closest to you (on the bottom) is the front loop, and the bar furthest from you (on the top, marked in yellow) is the back loop.

After working a few hdc blo, you’ll notice a new “v” form at the front of the work leaning slightly forward, while the back loop forms a ridge behind it, giving the fabric depth.

This post may contain affiliate links. We only recommend products we would use ourselves and all opinions expressed here are our own. Read our full privacy policy and disclosures here.
Materials Needed
- Worsted (#4), Caron Blossom Cakes (61% Cotton, 39% Acrylic), 481 yards (440 m) per 227 g (8 oz) skein
- Azalea – 1 skein or 360 yds
- US I/9 (5.5 mm) hook & US 7 (4.5 mm) hook – we love Clover Amour hooks
- scissors
- tapestry needle
Abbreviations
US terms
- blo = back loop only
- ch = chain
- hdc = half double crochet
- rep = repeat
- sl st = slip stitch
- sts = stitches
- yo = yarn over
Gauge
13 rows of 14 hdc blo = 4″ x 4″ (10 x 10 cm)
Size
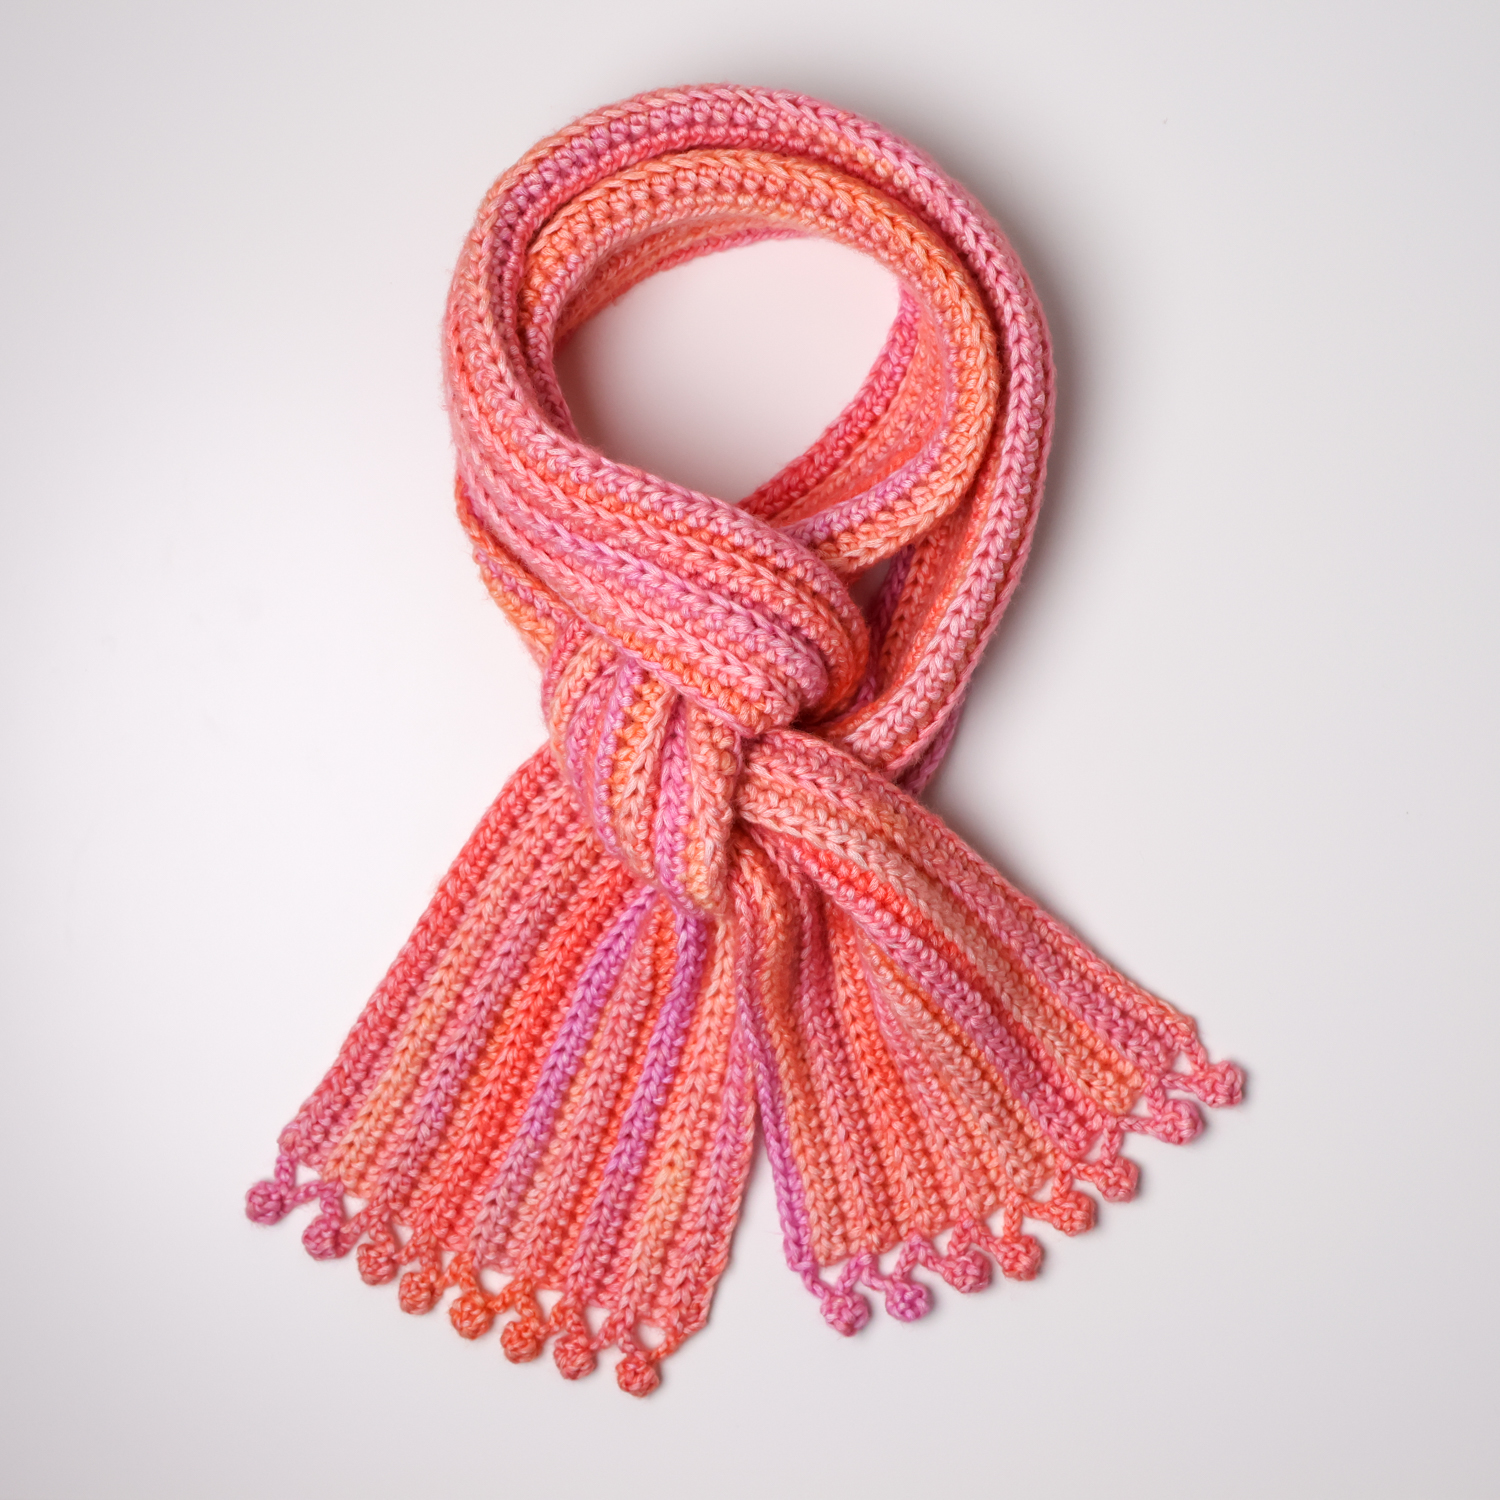
Our finished scarf measures approximately 72″ x 6″ (183 x 15 cm) including bobbles. This scarf can easily be adjusted in length and width simply by adding/removing chains and crocheting more/fewer rows.
It can also be made using a variety of yarn weights and hook sizes. Try using a Bulky (#5) yarn and 6-7mm hook!
Notes & Special Stitches
- {xyz}: repeat those stitches a certain number of times
- Bobble: yo, insert hook in ch, yo, pull up a loop, yo, pull through 2 (2 loops on hook), yo, insert hook in same ch, yo, pull up a loop, yo, pull through 2 (3 loops on hook), yo, insert hook in same ch, yo, pull up a loop, yo, pull through 2 (4 loops on hook), yo, pull through all 4 loops, ch 1
Pattern
With 5.5 mm hook, Ch 245 or until you reach your desired length.
Tip: a typical scarf length is equal to your height. Just add more chains to make it longer for an oversized scarf or do fewer chains for a shorter scarf.
Row 1: Hdc in 2nd ch from hook and in each ch across. Turn.

Row 2: Ch 2, hdc blo in each st across. Turn.


Rows 3-17: Repeat Row 2 until you reach your desired scarf width – 6-8″ (15-20 cm) is recommended. Note: In order for the bobble edging to work, you must work an odd number of rows.
Cut yarn and fasten off, or continue to add an edge.
Bobble Edging

Continue with the same yarn, but switch to a 4.5 mm hook.
Rotate and begin working along the short edge of your scarf. Sl st into the last row end.
{Ch 6, Bobble in 3rd ch from hook, sl st back in 3rd ch. Ch 3, sk 1 row end, sl st in next row end.} rep until you reach the last row end. Fasten off and weave in the ends.
To add the edging to the opposite side, attach new yarn with a sl st in the first row end and repeat above instructions.
See photos below for step-by-step Bobble instructions.


Looking for more beginner-friendly patterns and tutorials? Check these out:


3 Responses
JUST came across your beautiful crochet
I’m relatively new to crocheting. I used the same yarn and same size hook. I loosely cast on 145, per directions . The length of that cast on is measuring 35 inches. However, your directions say the scarf may be 72 inches. Did I do something wrong or should I cast on approximately 300 stitch stitches?
I understand the pattern may be shorter or longer depending on preference.
Oh my goodness, I’m so glad you commented! 145 was a typo – it should be 245 chains (I’ve since changed it). Sounds like you’re doing it right!!