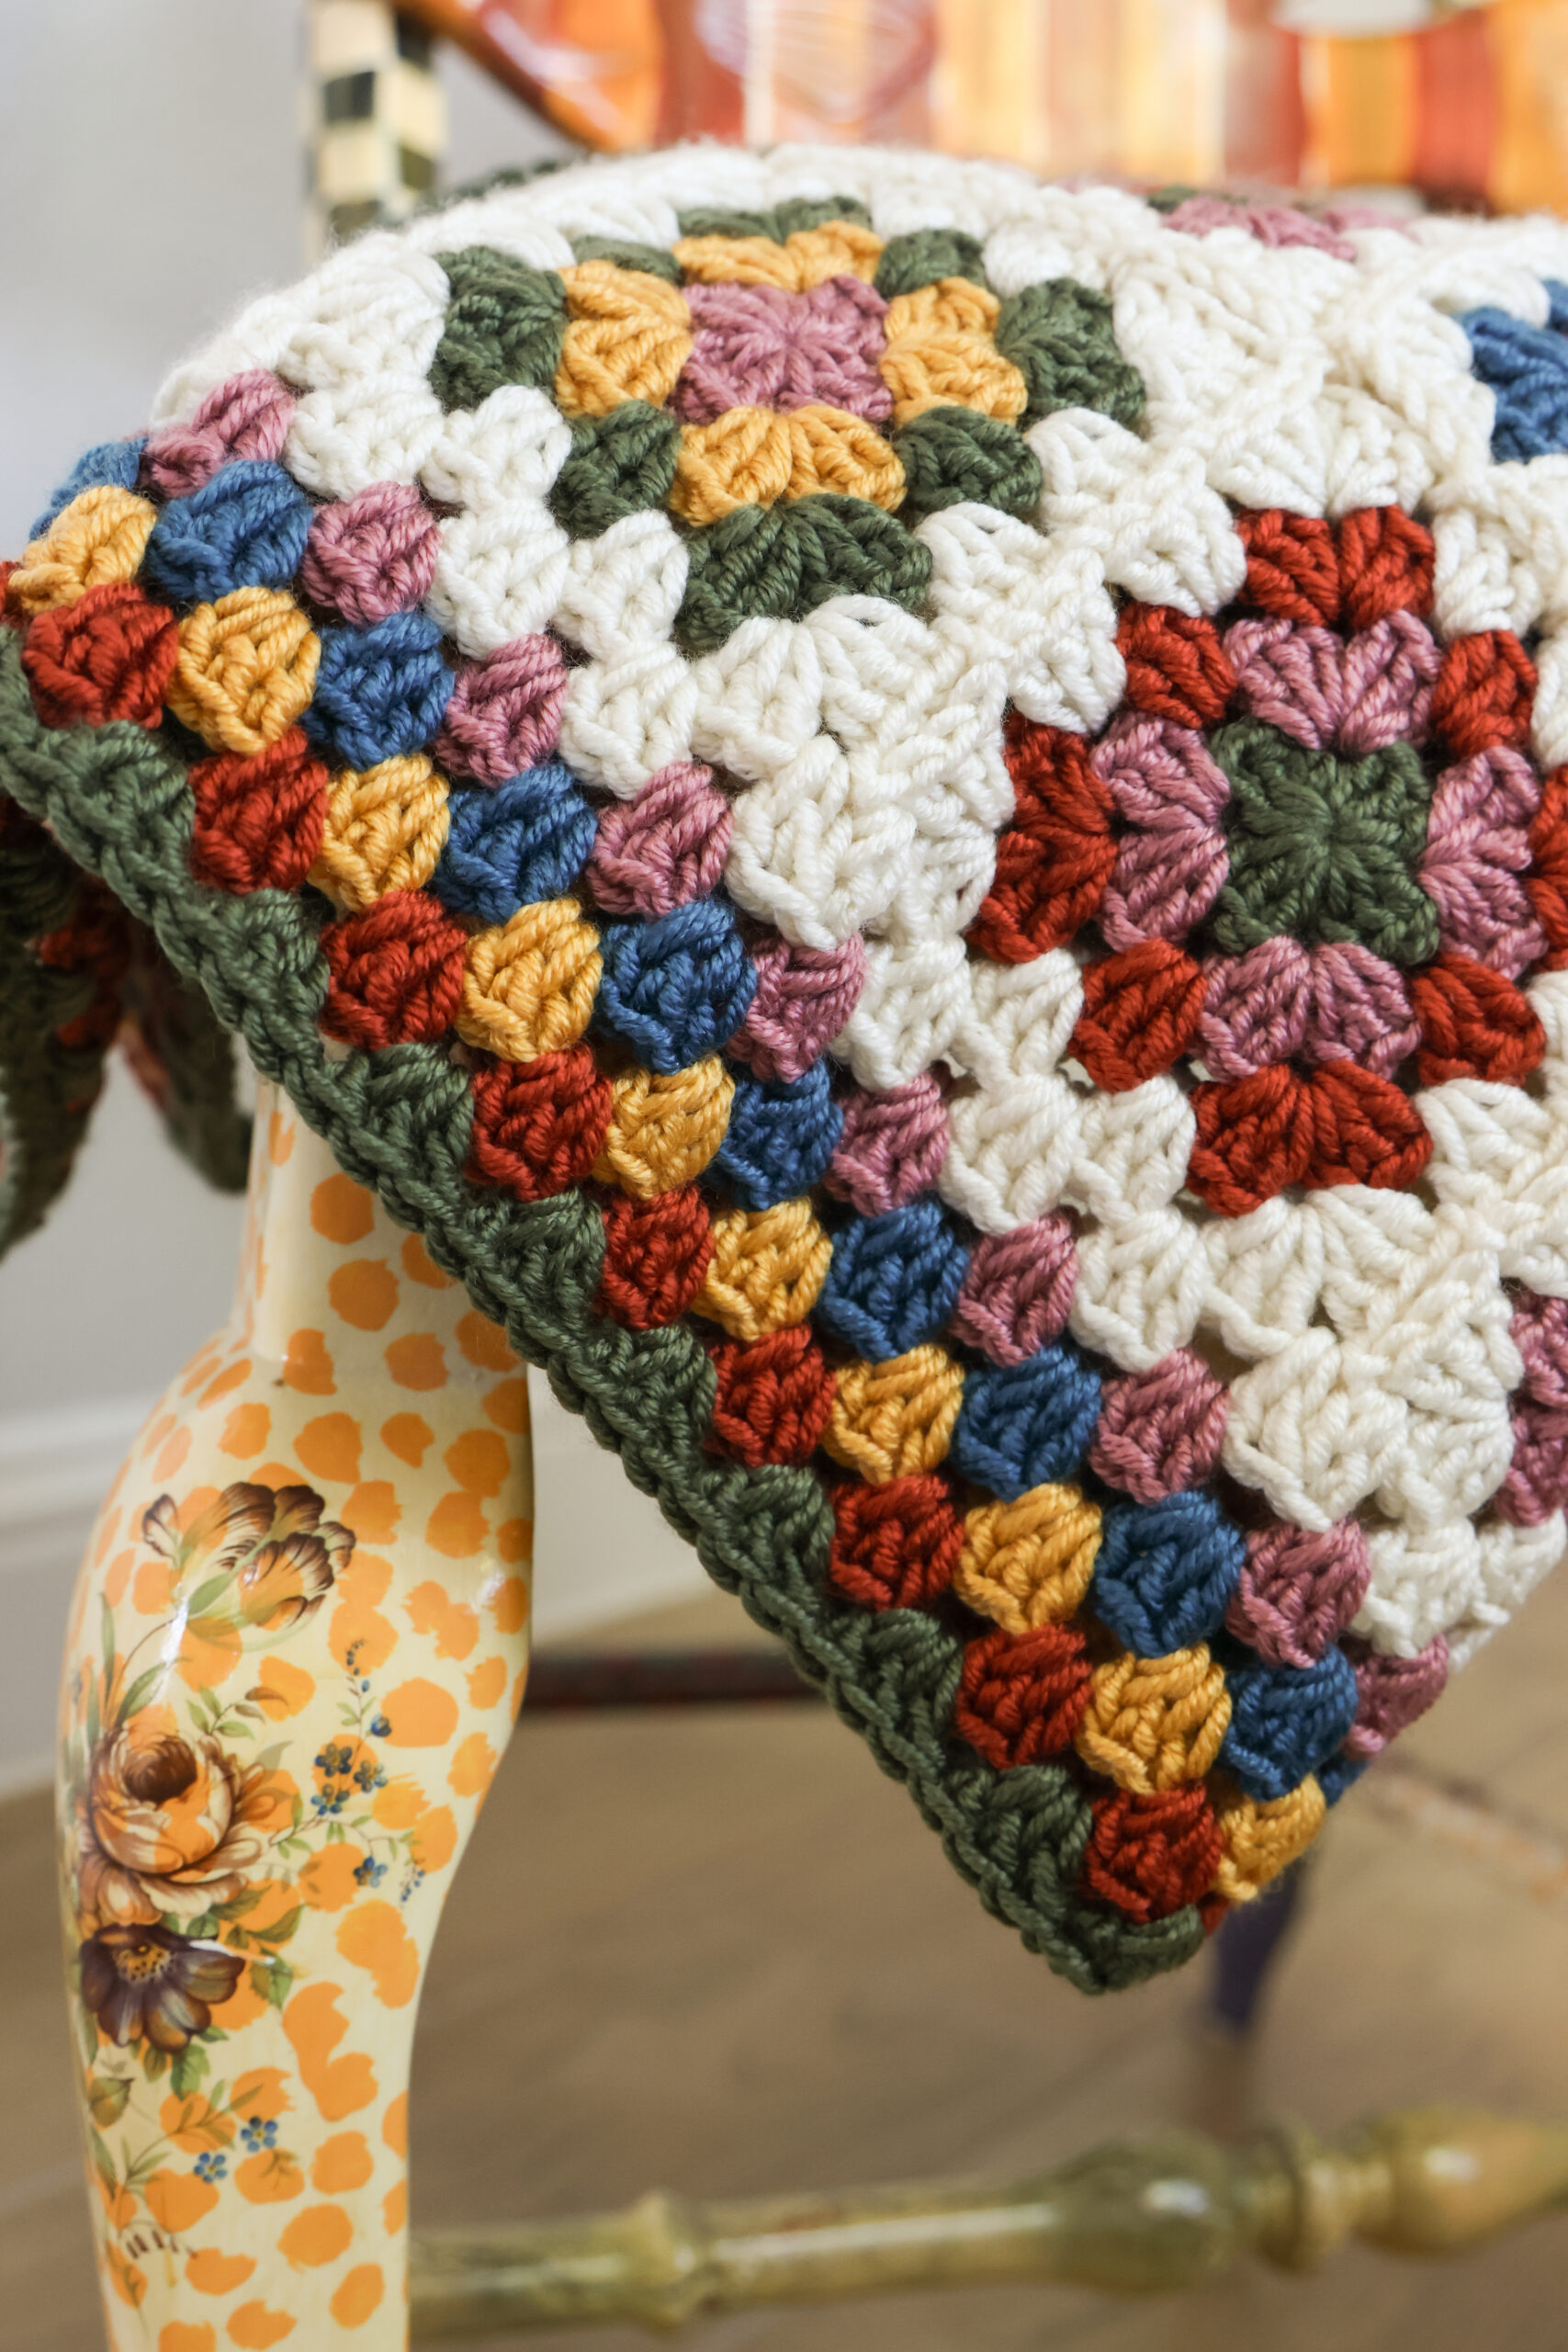
There’s just something timeless about a granny square blanket. Whether it’s a sweet baby blanket for the newest little one, a colorful throw for the couch, or a larger blanket to cuddle up in at the end of the day, granny squares make it possible to create exactly what you need.
Granny squares are one of the most versatile motifs in crochet. You can work them up quickly, mix and match colors, and even experiment with different stitch styles and patterns. The best part? You don’t have to commit to working a whole blanket at once if you don’t want to. Just make one square at a time, and before you know it, you’ll have a full stack ready to piece together!

One of the sweetest things about crochet is how it can connect us to people we love. The Keepsake Granny Square Baby Blanket was born out of one of those moments. A childhood friend of mine was expecting her first baby, and another friend from our childhood reached out and asked if I could make something special for her.
She sent me some color palette inspo to get started, but beyond that, I had the freedom to create something from the heart. I decided on a granny square blanket – something classic, full of color, and just the right size to wrap up a newborn in. Every stitch carried both the joy of a new life and the sweetness of long-time friendships, which makes this design especially close to my heart.
This post may contain affiliate links. We only recommend products we would use ourselves and all opinions expressed here are our own. Read our full privacy policy and disclosures here.

This blanket is part of The Keepsake Granny Square Pattern Collection, which includes the full pattern for a blanket, a table runner, and a placemat.
Find it on Etsy: The Keepsake Granny Square Pattern Collection
Materials Needed
- Worsted (#4), Yarn Bee Pearlspun (100% Low Pill Acrylic), 150 yards (137 m) per 100 g (3.5 oz) skein
- Pearl – 3 skeins or 450 yds
- Rust – 1 skein or 150 yds
- Jade – 1 skein or 150 yds
- Moss – 1 skein or 150 yds
- Hazy Hazel – 1 skein or 150 yds
- Citrine Dream – 1 skein or 150 yds
- US H/8 (5 mm) hook – we love Clover Amour hooks
- scissors
- tapestry needle
Abbreviations
US terms
- ch = chain
- ch sp = chain space
- dc = double crochet
- MR = magic ring
- sc = single crochet
- sl st = slip stitch
- sp = space
- sts = stitches
Size
This blanket was made with 49 granny squares, plus 6 rounds of a granny stitch border.
The finished blanket measures approximately 34.5″ x 34.5″.
Gauge: Each 4-round granny square measures approximately 4″ x 4″. Keep in mind, gauge is not entirely important. Your blanket size may be slightly larger or smaller if you choose a different yarn.
Notes & Special Stitches
- 3 dc: make 3 double crochets into the next stitch/space
- (xyz): all stitches are worked into the same stitch/space
- {xyz}: repeat all those stitches a certain number of times
- cluster: 3 dc in the same space
- Starting Chain: The starting Ch 3 counts as a stitch.
- Stitch Counts: Stitch counts are listed at the end of each Round in [ ].
Pattern
Step 1: Pick Your Colors
This is where the fun begins. You can go bold and bright, soft and neutral, use up scrap yarn, or even stick to a monochromatic palette for a more minimalist look. I chose 5 bold colors and 1 neutral color (Pearl) to join the squares.

Step 2: Make Your Squares
The classic granny square is worked in rounds with clusters of double crochets separated by chain spaces. Each square is 3 rounds before joining. With a 5-color palette, I tried to make an even amount of centers for each color. Then, I did the same thing for Round 2, and again for Round 3. Repeat this process until you have 49 squares.
Round 1
With Color A, make a Magic Ring.
Ch 3, 2 dc, ch 1, {3 dc, ch 1} x 3, sl st to top of ch 3 to join. [4 clusters]
Cut yarn and fasten off.

Round 2
Attach Color B in any ch 1 sp (corner) with a sl st.
(Ch 3, 2 dc, ch 1, 3 dc) in same ch 1 sp, {3 dc, ch 1, 3 dc) in next ch 1 sp} x 3, sl st to top of ch 3 to join. [8 clusters]
Cut yarn and fasten off.


Round 3
Attach Color C in any ch 1 sp (corner) with a sl st.
(Ch 3, 2 dc, ch 1, 3 dc) in same ch 1 sp, 3 dc between clusters, {(3 dc, ch 1, 3 dc) in next ch 1 sp, 3 dc between clusters} x3, sl st to top of ch 3 to join. [12 clusters]
Cut yarn and fasten off.


Repeat until you make 49 squares, alternating colors each round.

I didn’t feel the need to block my squares because they were very consistent in size and shape, but now would be a great time to block them if they need it!
Step 3: Arranging Your Layout
Before joining, lay out all of your squares in a 7 x 7 grid. Play around with the color arrangement until you’re happy with the overall design. I tried to space out the colors so I didn’t have too many of one color in each row/column. Sometimes it helps to take a photo so you can refer back to it.

Step 4: Join the Squares
I used the continuous join-as-you-go (CJAYG) method with the Pearl yarn color. Instead of sewing or crocheting each square together one by one, this technique lets you join them as you add the final round. It creates a smooth, seamless look, and it saves a lot of time compared to sewing squares together afterward. With a project as large as this, anything I can do to avoid weaving in more ends is a win!

In the illustration above, I’ve mapped out 12 squares (your blanket will have 49). Throughout the pattern, I will refer to these 12 squares only for demonstration purposes. Start with the bottom right square, Square 1, and work in number order moving from the bottom row, up to the middle row, and then up to the top row. The arrows indicate the direction you will be going as well. For your blanket, repeat Row 2 until you reach the final row of your blanket (labeled as Row 3 in the illustration). Finish it off by going down the unfinished edge and then across the bottom of the very first row of squares.
This method is outlined below OR you can watch our CJAYG tutorial on YouTube:
CJAYG – Row 1
Begin with the bottom right square (Square 1 in the illustration). For this first square, you will work half of corner 1, side 1, corner 2, side 2, corner 3, side 3, and half of corner 4 as follows:
Attach yarn in any ch 1 sp, ch 3, 2 dc in same sp, {3 dc between next clusters} x2, (3 dc, ch 1, 3 dc) in next ch 1 sp, {3 dc between next clusters} x2, (3 dc, ch 1, 3 dc) in next ch 1 sp, {3 dc between next clusters} x 2, 3 dc in next ch 1 sp, ch 1.

To add squares 2-3, repeat the following:
Join to Square 2 with a dc in any ch 1 sp. Work 2 dc in same sp.

Rotate your work and join back to Square 1 with a sl st in the sp between clusters.

{3 dc between next clusters of Square 2, sl st between next clusters of Square 1} x 2.

3 dc in ch 1 sp of Square 2, sl st in ch 1 sp of Square 1, ch 1, 3 dc in same ch 1 sp of Square 2 to complete the corner.

{3 dc between next clusters} x 2, (3 dc, ch 1, 3 dc) in next ch 1 sp, {3 dc between next clusters} x2, 3 dc in ch 1 sp, ch 1.

When you reach the last square of the row, do the following:
Join to Square 4 with a dc in any ch 1 sp. Work 2 dc in same sp.
Rotate your work and join back to Square 3 with a sl st in the sp between clusters. {3 dc between next clusters of Square 4, sl st between next clusters of Square 3} x 2, 3 dc in ch 1 sp of Square 4, sl st in ch 1 sp of Square 3, ch 1, 3 dc in same ch 1 sp of Square 4 to complete the corner, {3 dc between next clusters} x 2, 3 dc in next ch 1 sp, ch 1.

CJAYG – Row 2
Now it’s time to move up to the next row of squares (starting with Square 5 in the illustration). For this square, you will work half of corner 1, side 1, corner 2, side 2, and half of corner 3.
Join to Square 5 with a dc in any ch 1 sp. Work 2 dc in same sp. Rotate your work and join back to Square 4 with a sl st in the sp between clusters.

{3 dc between next clusters of Square 5, sl st between next clusters of Square 4} x 2,

3 dc in next ch 1 sp of Square 5, sl st to corner of Square 4, ch 1, 3 dc back in the ch 1 sp of Square 5 (to finish the corner), {3 dc between next clusters} x 2, 3 dc in next ch 1 sp, ch 1.

To add squares 6-8, repeat the following:
Join to Square 6 with a dc in any ch 1 sp. Work 2 dc in same sp.
Rotate your work and join to Square 5 with a sl st in the sp between clusters. {3 dc between next clusters of Square 6, sl st between next clusters of Square 5} x 2,

3 dc in next ch 1 sp of Square 6, sl st to corner of Square 5, sl st to corner of the next Row 1 square (Square 3).

3 dc back in the ch 1 sp of Square 6 (to finish the corner), {sl st between next clusters of Square 3, 3 dc between clusters of Square 6} x 2, sl st between next clusters of Square 3, 3 dc in next ch 1 sp of Square 6, sl st to corner of Square 3, ch 1, 3 dc back in the ch 1 sp of Square 6 (to finish the corner), {3 dc between next clusters} x 2, 3 dc in next ch 1 sp, ch 1.

Repeat above instructions for Squares 7 & 8.

When you reach your last square (Square 8), continue with the following across the unfinished edge:
3 dc back in the same ch 1 sp to finish the corner, {3 dc between next clusters} x2,

3 dc in next ch 1 sp,

Ch 1, sl st in ch 1 sp between Squares 7 & 8, ch 1, 3 dc in Square 7 ch 1 sp.

Continue working down the top edge of Row 2 in the same manner until you reach the last corner of Square 5. Complete half of that last corner (3 dc, ch 1).

CJAYG – Row 3
Repeat Row 2.
In the last corner of the top row (Square 12), end with 3 dc, ch 1.

Rotate your work, and continue to crochet along the unfinished edges of the blanket, working (3 dc, ch 1, 3 dc) in each corner.

Finish the edge with 3 dc in the last ch 1 sp, ch 1, sl st to starting ch 3 to join.

Step 5: Add a Border
Once your squares are all joined, you’ll add a round of granny stitch with each of the colors in your palette, to give your blanket a polished, finished edge.
Round 1 – Continue with Main Color (Pearl)
Ch 3, 2 dc in corner ch 1 sp, {3 dc between clusters} x 3.
Now you’ve come to two corner spaces where your squares were joined.

Option A: Work between squares.
*Skip the 1st corner sp, work 3 dc in the space between the squares, skip the 2nd corner sp. Be careful not to crochet too tight in this space to allow for the extra distance.

{3 dc between clusters} x 3*
Repeat from * to * until you reach the corner.
Option B: Work in both square corners.
*Work a dc in the first corner, then a dc2tog (beginning in the 1st corner and ending in the 2nd corner) as follows:
yo, insert hook into 1st corner, yo, pull up a loop, yo, pull through 2 loops, yo, insert hook into 2nd corner, yo, pull up a loop, yo, pull through 2 loops, yo, pull through all 3 loops
Then, work a dc in the 2nd corner to complete the cluster.


{3 dc between clusters} x 3*
Repeat from * to * until you reach the corner.
In the corner, work (3 dc, ch 1, 3 dc).
Continue around the remaining 3 sides in the same way. Finish the round with 3 dc in the first corner, ch 1, sl st to ch 3 to join.
Cut yarn and fasten off.
Rounds 2-6
Change colors each round. I suggest alternating which corner I start a new color in.
Attach new yarn in the corner ch 1 sp with a sl st. Ch 3, 2 dc in corner.
Work 3 dc between each cluster (dc, dc2tog, dc from Round 1 counts as a cluster), and (3 dc, ch 1, 3 dc) in each corner. End the Round with 3 dc in first corner, ch 1, sl st to ch 3 to join.
Cut yarn and fasten off after each round.


Weave in all of your ends, and your granny square blanket is complete!
Love granny square projects? Check out our other patterns & tutorials that feature the traditional granny square motif:


Granny Square Duster
Granny Square Zipper Bag
4 Responses
Love it
Absolutely GORGEOUS! How many squares would it take to make an adult sized throw?
Thank you! I’d probably do a 12 x 14 square layout (168 squares) and that would be approximately 54″ x 62″. If you have another size in mind, each square is about 4″ plus the border is about 6″ if you match our gauge 🙂
beautiful work so lovely and on trend
Heather