If you’ve been crocheting for a while, you know just how quickly yarn scraps can accumulate. Maybe it’s not enough yarn to make a big project, but it’s definitely too much (or maybe it’s just too pretty) to toss or waste. Our Scrappy Moss Stitch Blanket is the perfect way to use up those leftover yarns while making something beautiful, relaxing, and completely unique to you.
This blanket is all about freedom – no color rules, no pressure to match skeins or dye lots, just your scraps coming together one row at a time. It can certainly follow a color scheme if your yarn stash allows it, but there’s something nice about not having to overthink any color decision. Also, it’s a project you can pick up at any time. Add a few rows when you have spare yarn, or when you just need a relaxing no-pressure project you can enjoy working on while watching some television.
This pattern works beautifully with any yarn weight, so you can use whatever you enjoy most! I haven’t tried mixing yarn weights, so I recommend sticking to the same general yarn type. That way your stitches stay consistent while your color changes do all the magic.
The best part? You don’t have to weave in ends if you don’t want to. We turn the ends into fringe tassels for some added frill!
You’ll Love the Moss Stitch

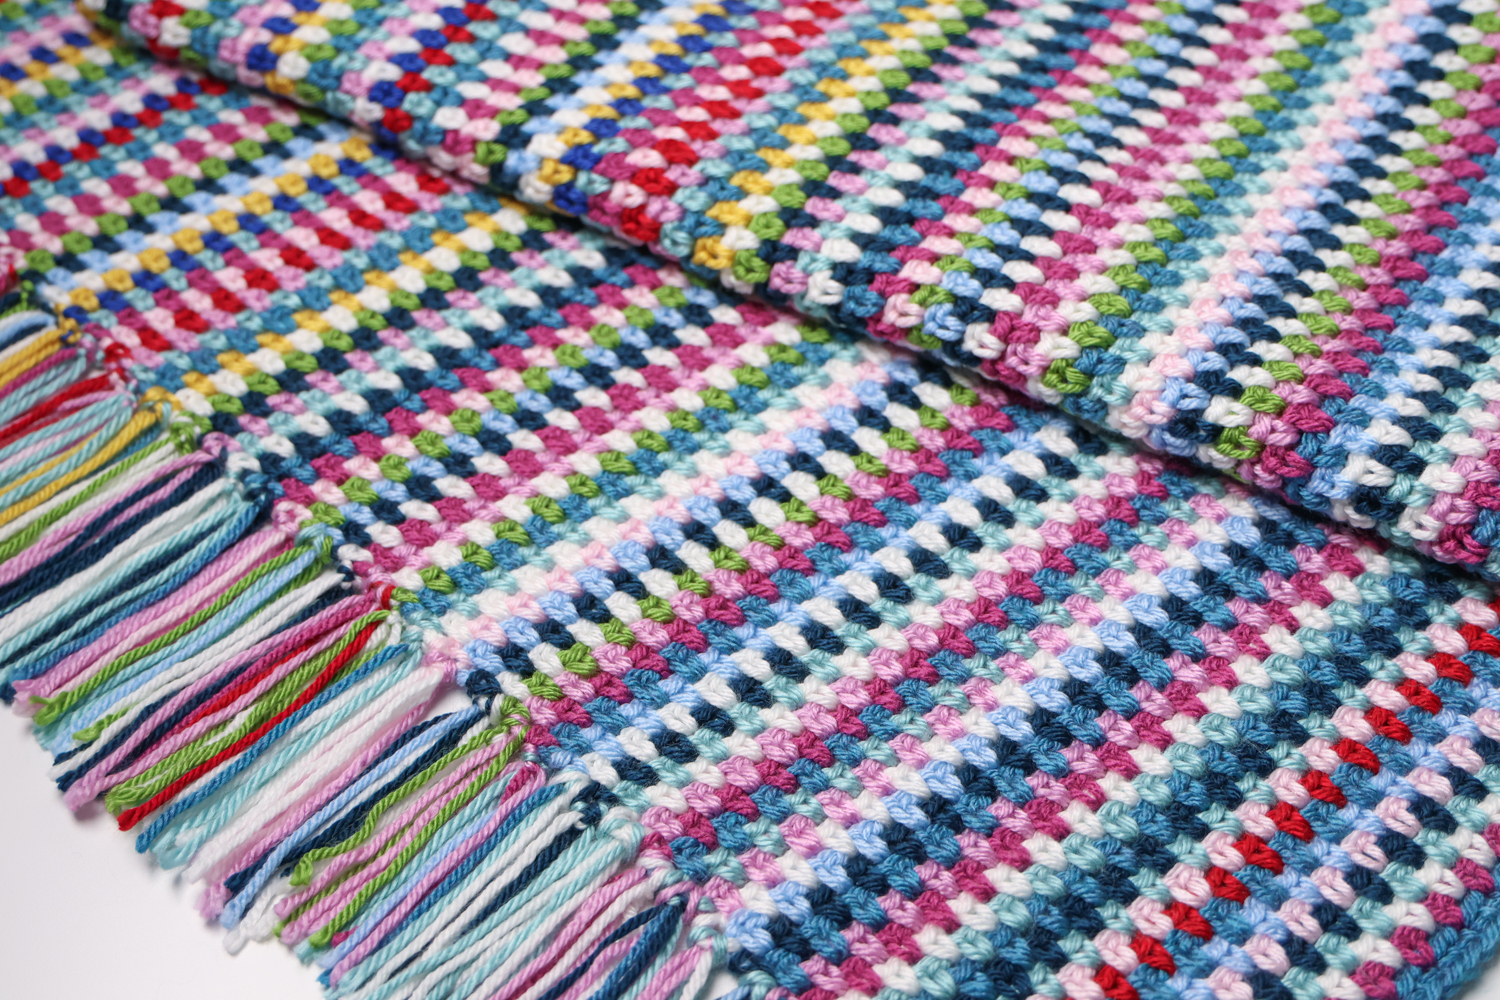
If you’re new to the moss stitch (also known as the linen stitch), you’re in for a treat. It’s one of the easiest stitches to learn and creates a sort of woven effect. The stitch alternates single crochets and chain spaces across each row and that’s pretty much it! There is no right or wrong side, which adds to its versatility. If the idea of a repetitive, soothing pattern sounds relaxing to you, then treat yourself!
Follow Along With Our Tutorial
We have a full step-by-step tutorial on YouTube that walks you through the moss stitch, color changes, and turning your ends into fringe. And in this post, we’ll also demonstrate each step with photos, so you can follow along at your own pace.
Adaptations

To make a scarf, follow the same instructions below, but instead, simply chain until you reach your height and crochet fewer rows! In the photo above, my scarf measures 60″ long (plus 4″ fringe on both ends) and 6″ wide. I used the same hook size and yarn as the blanket pattern. I chained 241 and worked 29 rows.
This post may contain affiliate links. We only recommend products we would use ourselves and all opinions expressed here are our own. Read our full privacy policy and disclosures here.
Materials Needed
Scrap Yarn:
Choose the yarn weight/type you love the most. We used the following yarns in our blanket:
- Worsted (#4), Lion Brand Heartland (100% Acrylic), 251 yards (230 m) per 142 g (5 oz) skein
- Worsted (#4), Lion Brand Basic Stitch (100% Acrylic), 185 yards (170 m) per 100 g (3.5 oz) skein
- Worsted (#4), Caron Simply Soft (100% Acrylic), 315 yds (288 m) per 170 g (6 oz) skein
- Worsted (#4), Loops & Threads Impeccable (100% Acrylic), 285 yds (260 m) per 127.5 g (4.5 oz) skein
Other Notions Needed:
- US H/8 (5 mm) hook, or size needed for your chosen yarn – we love Clover Amour hooks
- scissors
Abbreviations
US terms
- ch = chain
- ch sp = chain space
- rep = repeat
- sc = single crochet
- sk = skip
- sts = stitches
Size
Our finished blanket measures approximately 50″ wide and 60″ long, plus an additional 3″ of fringe on both sides of the blanket.
Notes & Special Stitches
- {xyz}: repeat those stitches a certain number of times
- Color Changes: change yarn as you finish the last sc of each row
Pattern
Ch any odd number until you reach your desired width – for my 50″ wide blanket, I chained 201.
Leave a starting yarn tail that is slightly longer than your desired fringe length.

Row 1 – Sc in 2nd ch from hook and in each ch across.
You can work your stitches into the chain as normal, or you can work into the back bumps of the chain, highlighted below. This creates a neat, finished look on the starting chain that will match the look of the top of your blanket when it’s done.
To do this, rotate your chain towards you, to reveal the “bumps” or the small ridges at the back of the chain. The front loops of the chain (the v) will now be facing down. Insert your hook into the bump and complete your stitch.


For each row, change yarn as you finish the last sc of the row. Before you yarn over and pull through to complete the sc, cut your working yarn, leaving a tail for the fringe. Grab your new yarn, leaving a long tail. Yarn over and pull through to finish the sc. Ch 2 and turn.
Scroll down to Color Changing Method #2 for another alternative.


Row 2 – Sk 1, sc, {ch 1, sk 1, sc} rep across the row.


With 2 sts left, ch 1, sk 1, change yarn as you finish the last sc of the row. Before you yarn over and pull through to complete the sc, cut your working yarn, leaving a tail for the fringe. Grab your new yarn, leaving a long tail to start with. Yarn over and pull through to finish the sc. Ch 2 and turn.
Scroll down to Color Changing Method #2 for another alternative.


In the next rows, you will always sc in the ch 1 spaces from the previous row and skip over the sc stitches from the previous row.
Row 3 – Sk 1, {sc in ch 1 sp, ch 1, sk 1} rep across the row.


Repeat Row 3 until you reach your desired length. I crocheted 240 rows to reach 60″ with my yarn and hook size.
For your Final Row, work a sc in each stitch and space across.
Tip: measure how much yarn is needed for one row, that way you don’t have to play yarn chicken later! I knew this project would take many rows, so redoing one row over again was worth it in my opinion. With my yarn and hook size, each row took just under 10 yards of yarn.
Color Changing Method #2
In this method, change yarn after you finish the last sc of the row. After you pull through to complete the sc, pull up your yarn approximately the height of your fringe and remove the hook. Insert your hook under the two bars highlighted in yellow. Grab your new yarn, leaving a long tail, pull through the two bars, and ch 2. Cut the old yarn as pictured and remove it. Turn your work.


Fringe Tassels
As you work up your moss stitch rows, tie the yarn tails in a double knot, two at a time.

Then, cut additional pieces of scrap yarn approximately twice the length of your blanket yarn tails. I used 2 pieces for each tassel, but you can use more if you want!
Next, fold the two pieces of yarn in half and place them around your finger. Insert your hook at the row end, going from the bottom to the top of your work. Grab the two pieces of yarn and pull through to make a loop.


Next, grab all 6 tails with your hook and pull through the loop. Pull tight to finish off your tassel.


Repeat across the length of your blanket.

For extra straight/smooth tassels, iron or steam them.
Looking for more ways to use up your scrap yarn? Check out some of our patterns and tutorials that make great stash busting, scrap yarn projects:


Granny Square Zipper Bag
3 Responses
Going to try I hope pattern doesn’t disappear
Greatb work
Love this and looking forward to trying this simple method. Thanks for posting.