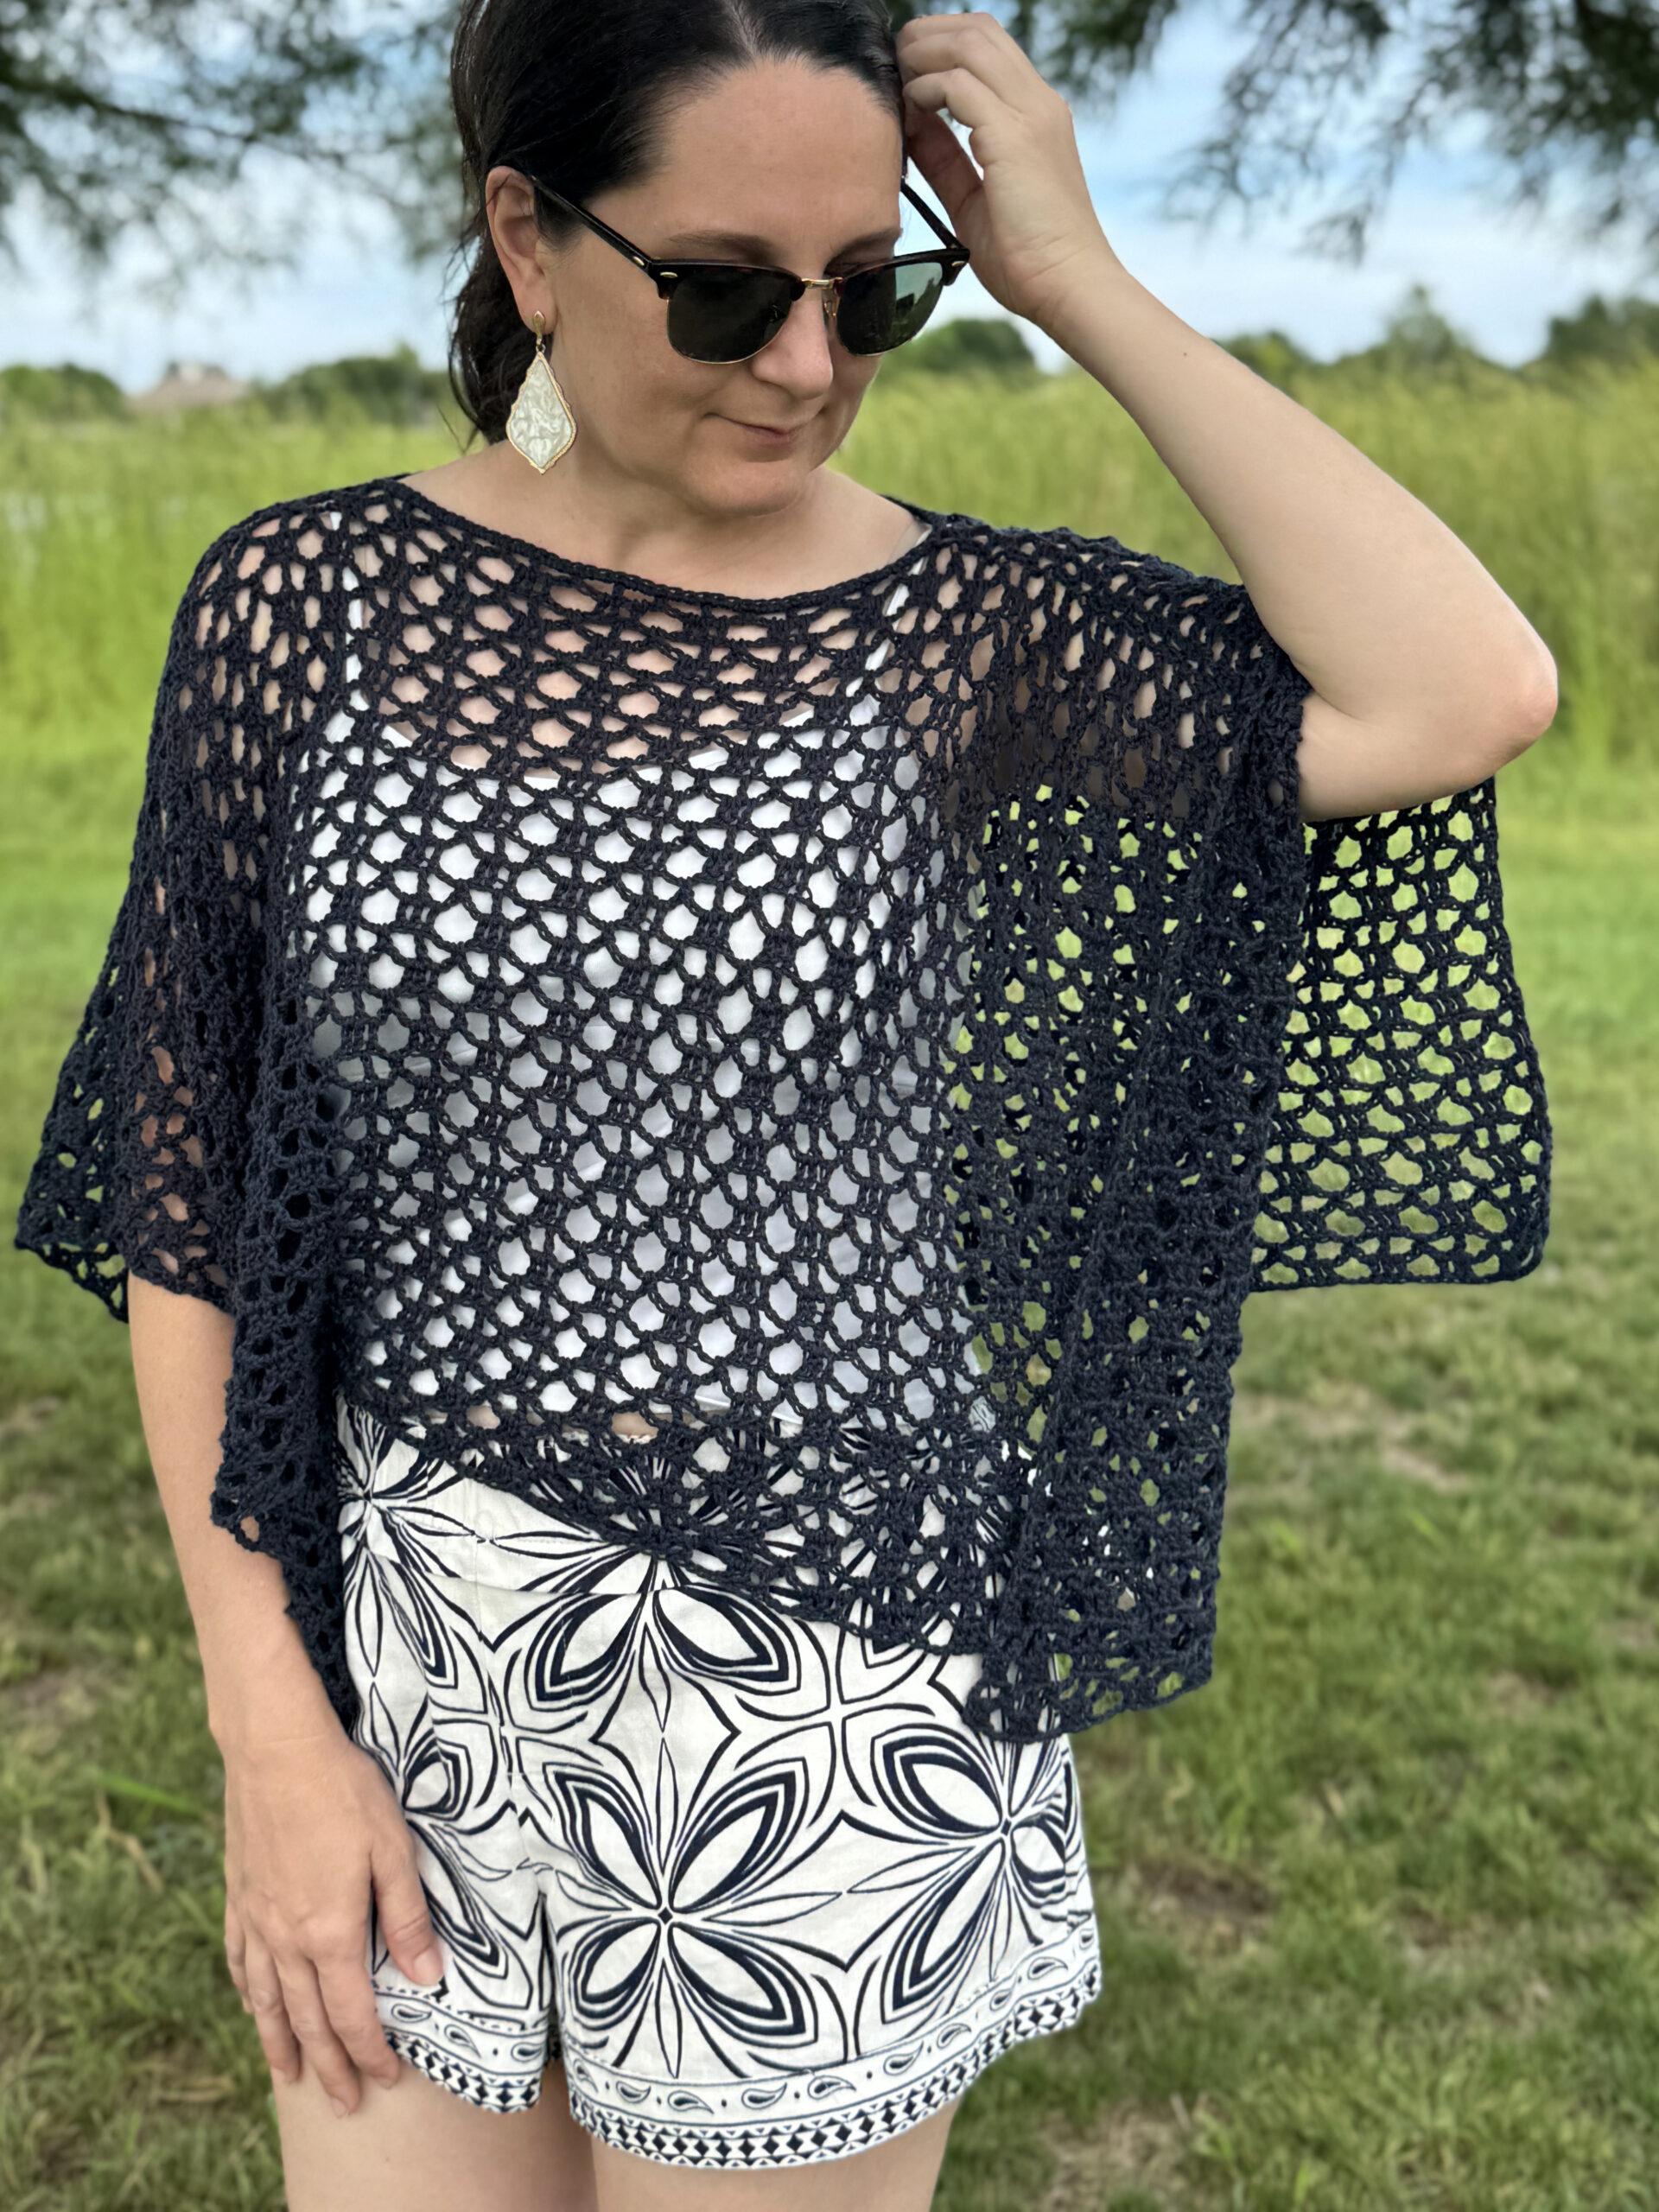
We decided to design the Twilight Poncho as the perfect transitional piece – something light, comfortable, and easy to layer. With ponchos making a strong return in both fashion and handmade wardrobes, we wanted to create a modern design that feels timeless, wearable, and elegant.
We chose the name Twilight for this poncho pattern because of the flowing silhouette and soft drape that bring to mind the calming colors and peaceful atmosphere of the twilight hours. It also reflects the practical warmth and wearability that make this poncho a go-to piece from day into evening.
The stitch pattern is built around an easy 2-row repeat that works up quickly and creates a wonderfully relaxing crochet experience. The only stitches you’ll use are single crochets, double crochets, slip stitches, and chains! The simple stitch rhythm allows you to settle into a meditative pace while still producing a polished and sophisticated finished garment.

It’s made of two identical rectangular panels that are joined together with a simple crochet join at the shoulders and it’s finished off with a final single crochet trim around the neck opening.
This poncho is versatile and timeless and can easily transition from casual daytime wear to elegant evening styling. Pair it with jeans and a tank for an everyday look, layer it over a sundress, or wear it as a refined accent piece for dinner outings and special occasions.
This post may contain affiliate links. We only recommend products we would use ourselves and all opinions expressed here are our own. Read our full privacy policy and disclosures here.
Yarn We Used
For this design, we chose Lion Brand 24/7 Cotton DK, a lightweight DK (#3) cotton yarn that gives the poncho a soft drape and an airy feel. We knew we didn’t want anything heavy or bulky for this particular poncho and this yarn has been a favorite of ours over the years. The stitch pattern is so distinct and eye-catching, and the structure of this yarn really makes the lace pattern stand out.

This yarn comes in several colors including prints and sparkles, and we usually purchase them in a pack of 3. If you’re making the S/M size, that will be the perfect amount to complete your poncho!
24/7 Cotton DK recommends using a US G/6 (4 mm) hook, but since we wanted a little extra drape, we’re going to use a US 7 (4.5 mm) hook instead.
Easy to Adapt
One of our favorite things about this design is how adaptable it is. Because the stitch pattern is repetitive and easy to customize, you can create multiple sizes in various yarns, simply by checking your gauge and choosing your preferred measurements. In the Gauge section of the pattern, we’ll share how to make adjustments using your own gauge, so you can feel confident in creating your custom poncho!
When it comes to gauge swatching, even if you use the same yarn and hook listed in a pattern, differences in tension can lead to a project turning out too large or too small. Taking the time to make a gauge swatch allows you to match the pattern’s measurements before you begin, leading to more consistent and predictable results. If your gauge doesn’t match, adjusting your hook size, tension, and sometimes even yarn choice can make all the difference. If the size of your gauge is larger, go down a hook size or tighten your tension. If the size of your gauge is smaller, go up a hook size or loosen your tension.
When measuring, make sure your swatch has been blocked evenly, and that you start the measurement at the beginning of one stitch and end at the end of the last stitch.

If you decide to choose a different yarn and hook size, use the gauge swatch not only to determine the final width and length of your poncho, but also to make sure you’re happy with the fabric your yarn creates.
If you’d rather skip the math altogether, you can also chain until you reach your desired width. Your starting chain must be a multiple of 6 for the stitch pattern to work, and your final measurements may end up larger than your starting chain, but it will get you pretty close!
The free pattern for the Twilight Poncho is available below in the Small/Medium size only, so you can try the design and enjoy the stitch pattern right away.
You can also follow along with our YouTube tutorial, where we make a gauge swatch so you can learn the stitch pattern.
If you’d like additional sizing, more photos, and expanded instructions, the complete paid pattern is available on Etsy & Ravelry. It comes in 10 sizes – Child Sizes 2, 4, 6, 8, 10 & Adult Sizes XS, S/M, L/XL, 2X/3X, 4X/5X. Yarn amounts and stitch counts are included.
Materials Needed
- DK (#3), Lion Brand 24/7 Cotton DK (100% Cotton), 273 yards (250 m) per 100 g (3.5 oz) skein
- Nightshade – 3 skeins or 708 yds
- Other yarns we recommend: Premier Cotton Sprout DK, Lion Brand Coboo, Premier Hipster Cotton, and Knit Picks Animation
- US 7 (4.5 mm) hook – we love Clover Amour hooks
- scissors
- stitch markers – we love these
- tapestry needle
Abbreviations
US terms
- ch(s): chain(s)
- ch sp(s): chain space(s)
- dc: double crochet
- RS: right side
- sc: single crochet
- sk: skip
- sl st: slip stitch
- st(s): stitch(es)
- STsc: stacked single crochet
- WS: wrong side
Special Stitches
Stacked Single Crochet (STsc): At the beginning of a new row, do not chain. Instead, insert hook into first st, yo and pull up a loop (2 loops on hook), yo, pull through both loops (1 loop on hook). You’ve now made one sc in the first st. Insert your hook into the left leg (right leg if you’re left-handed) of the sc you just made, yo and pull up a loop (2 loops on hook), yo, pull through both loops to finish the st.
Note: This stitch counts as a dc and is used at the beginning of each row. It can be substituted with a ch 3 if preferred. If you choose to ch 3, then in odd-numbered rows, “STsc in first st, ch 3” = Ch 6; and in even-numbered rows, the “last st” = the 4th ch of the turning chain.
Gauge
18 stitches (3 repeats across Row 4) and 8 rows of the pattern measures 4″ (10 cm) wide by 4″ (10 cm) tall.
Measure across a Row 4 repeat for accurate measurements. This stitch opens up and stretches, so it should be blocked and then measured. Keep in mind, the weight and width of the poncho will add more drape and stretch to your stitches, so if your gauge swatch measures close to those measurements, you should be fine.
For the swatch:
Ch 48.
Row 1: Sc in 9th ch from hook (counts as a dc and ch 3), {ch 3, sk 2, dc, ch 3, sk 2, sc} rep 6 times, ch 3, sk 2, dc in last ch, turn. [7 sc, 8 dc]
Row 2: STsc in first st, dc in ch 3 sp, {ch 3, dc in next ch 3 sp, dc in next st, dc in next ch 3 sp} rep until turning ch remains, ch 3, dc in turning ch sp, dc in 4th ch of turning ch, turn. [22 dc]
Row 3: STsc in first st, {ch 3, sc in next ch 3 sp, ch 3, dc in middle dc from prev row} rep until 1 ch 3 sp remains, sc in ch 3 sp, ch 3, dc in last st, turn. [7 sc, 8 dc]
Row 4: STsc in first st, dc in ch 3 sp, {ch 3, dc in next ch 3 sp, dc in next st, dc in next ch 3 sp} rep until 1 ch 3 sp remains, ch 3, dc in ch 3 sp, dc in last st, turn. [22 dc]
Rows 5-8: Repeat Rows 3-4.


Adjusting the Pattern for Your Gauge
For this pattern, the stitch multiple is 6, plus 6 (3 at the beginning and 3 at the end of each row). So, the starting chain must be a multiple of 6.
In the gauge above, 18 stitches (3 repeats) = 4 inches wide.
To figure out my starting chain, I need to first determine the desired width of my poncho. For example, I want it to be about 36″ wide. Here’s the math:
(18 sts ÷ 4″) × 36″ = 162 sts
Great! That’s already a multiple of 6! If yours doesn’t end up being a multiple of 6, just find the closest multiple of 6. Next, we need to add 6 chains, to account for the beginning and end of the first row. Therefore, the starting chain should be 168 for a 36″ wide poncho.
You can use the same math with your own gauge. For example, a gauge where 13 stitches = 4 inches wide. If you still want a 36″ wide poncho, just plug in the numbers:
(13 sts ÷ 4″) × 36″ = 117 sts
Add 6 chains and you’ll get 123. The closest multiple of 6 to 123 is 120 or 126 for a 36″ wide poncho.
To determine how many rows you will need for your poncho, you can use similar math. In our gauge, 8 rows = 4 inches tall. This pattern also calls for an even number of rows.
If I want a length of 16″, I’d plug in these numbers:
(8 rows ÷ 4″) × 16″ = 32 rows
You can use the same math with your own gauge. For example, a gauge where 7 rows = 4 inches tall. If you still want a length of 16″, just plug in the numbers:
(7 rows ÷ 4″) × 16″ = 28 rows
Alternatively, you can skip the gauge altogether and chain until you reach your desired width and crochet until you reach your desired length! Your starting chain must be a multiple of 6 for the stitch pattern to work, and you should keep the stretch of this stitch pattern in mind when choosing your width. As you continue to crochet, your panel will likely increase in width.
Size
The poncho in the following pattern measures approximately 41.25″ wide x 16″ tall.
The full written pattern includes detailed instructions for Child Sizes 2-10 and Adult Sizes XS-5X.
Find the pattern here: Etsy or Ravelry
Notes
- (xyz): all stitches are worked into the same stitch/space
- {xyz}: repeat those stitches a certain number of times
- Stitch counts: Stitch counts are listed in brackets [ ] at the end of the row/round. Chains between stitches do not count in stitch counts, unless otherwise noted.
Pattern
Panels
Make 2.
Ch 192.
Row 1 (WS): Sc in 9th ch from hook (counts as a dc and ch 3), {ch 3, sk 2, dc, ch 3, sk 2, sc} rep until 3 chs remain, ch 3, sk 2, dc in last ch, turn. [63 sts]

Row 2 (RS): STsc in first st, dc in ch 3 sp, {ch 3, sk next sc, dc in next ch 3 sp, dc in next st, dc in next ch 3 sp} rep until turning ch remains, ch 3, dc in turning ch sp, dc in 4th ch of turning ch, turn. [94 dc]


Row 3: STsc in first st, {ch 3, sc in next ch 3 sp, ch 3, dc in middle dc from prev. row} rep until 1 ch 3 sp remains, sc in ch 3 sp, ch 3, dc in last st, turn. [63 sts]


Row 4: STsc in first st, dc in ch 3 sp, {ch 3, sk next sc, dc in next ch 3 sp, dc in next st, dc in next ch 3 sp} rep until 1 ch 3 sp remains, ch 3, dc in ch 3 sp, dc in last st, turn. [94 dc]
Rows 5 – 32: Repeat Rows 3-4, ending on a Row 4 repeat.
Cut yarn and weave in ends.
Assembly
Since the stitch pattern opens and stretches, we recommend blocking your panels to your desired measurements before assembly. Be careful not to distort the stitches.
With RS facing up, line up the bottom edges of your panels. Mark the center of your panels and measure for your neck opening – approx. 10-12 inches is suggested for an adult size. Place stitch markers in corresponding sc or dc sts from Row 1. Double check to make sure your neck opening is centered.

Attach yarn in the corner chain (3rd chain) of the bottom panel with a sl st. Ch 1, sl st to corresponding ch of the top panel.

Ch 2, sk 2 chs, sl st in next ch (base of the sc) of top panel.

Ch 1, sl st to corresponding ch of bottom panel, ch 2, sk 2 chs, sl st in next ch (base of the dc) of bottom panel.

{Ch 1, sl st to corresponding ch of the top panel, ch 2, sk 2 chs, sl st in next ch (base of the sc) of top panel. Ch 1, sl st to corresponding ch of bottom panel, ch 2, sk 2 chs, sl st in next ch (base of the dc) of bottom panel.} rep until you reach the stitch marker.


Cut yarn and weave in ends.
Rotate your panels, attach new yarn and repeat on opposite side.
Neck Trim
Attach yarn in any st or ch sp around the neck opening with a sl st. Sc evenly around the neck opening, working 2 sc in each ch sp, and 1 sc in each ch that’s been worked into (the base of either a sc or dc stitch from Row 1). Sl st to first sc to join.

Cut yarn and weave in the ends.

Looking for more beginner-friendly patterns and tutorials? Check these out:


No responses yet