
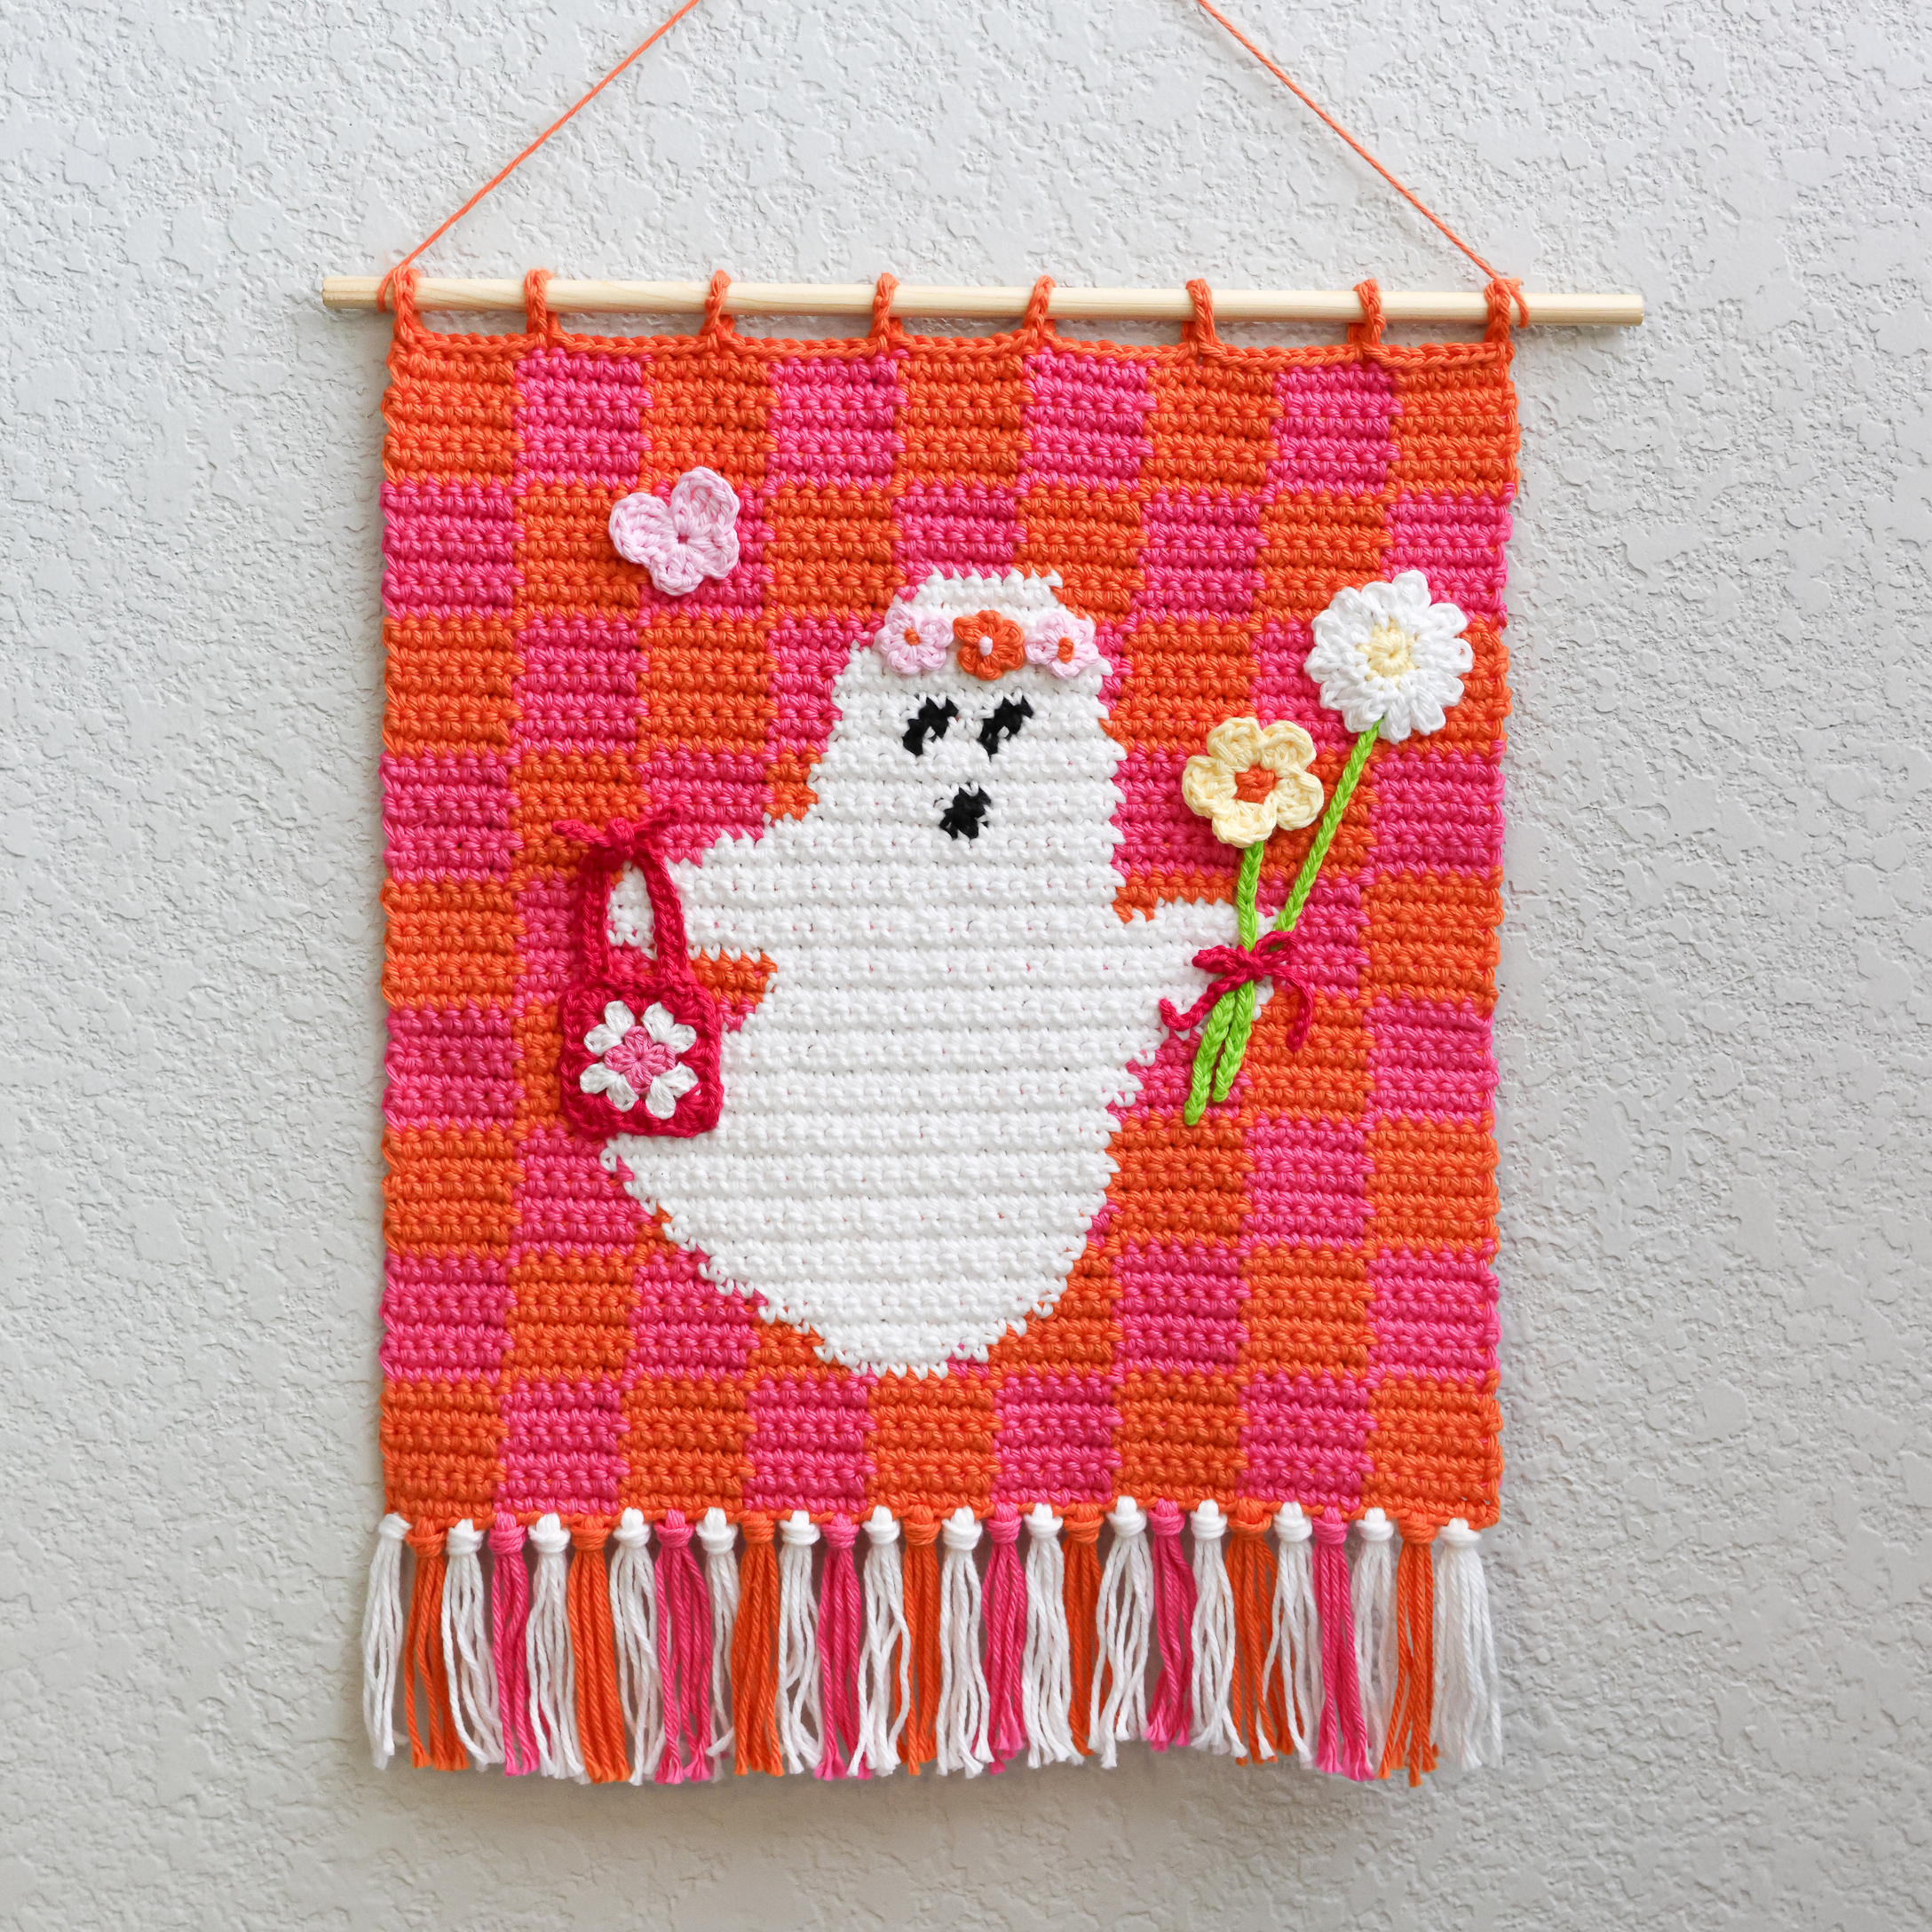
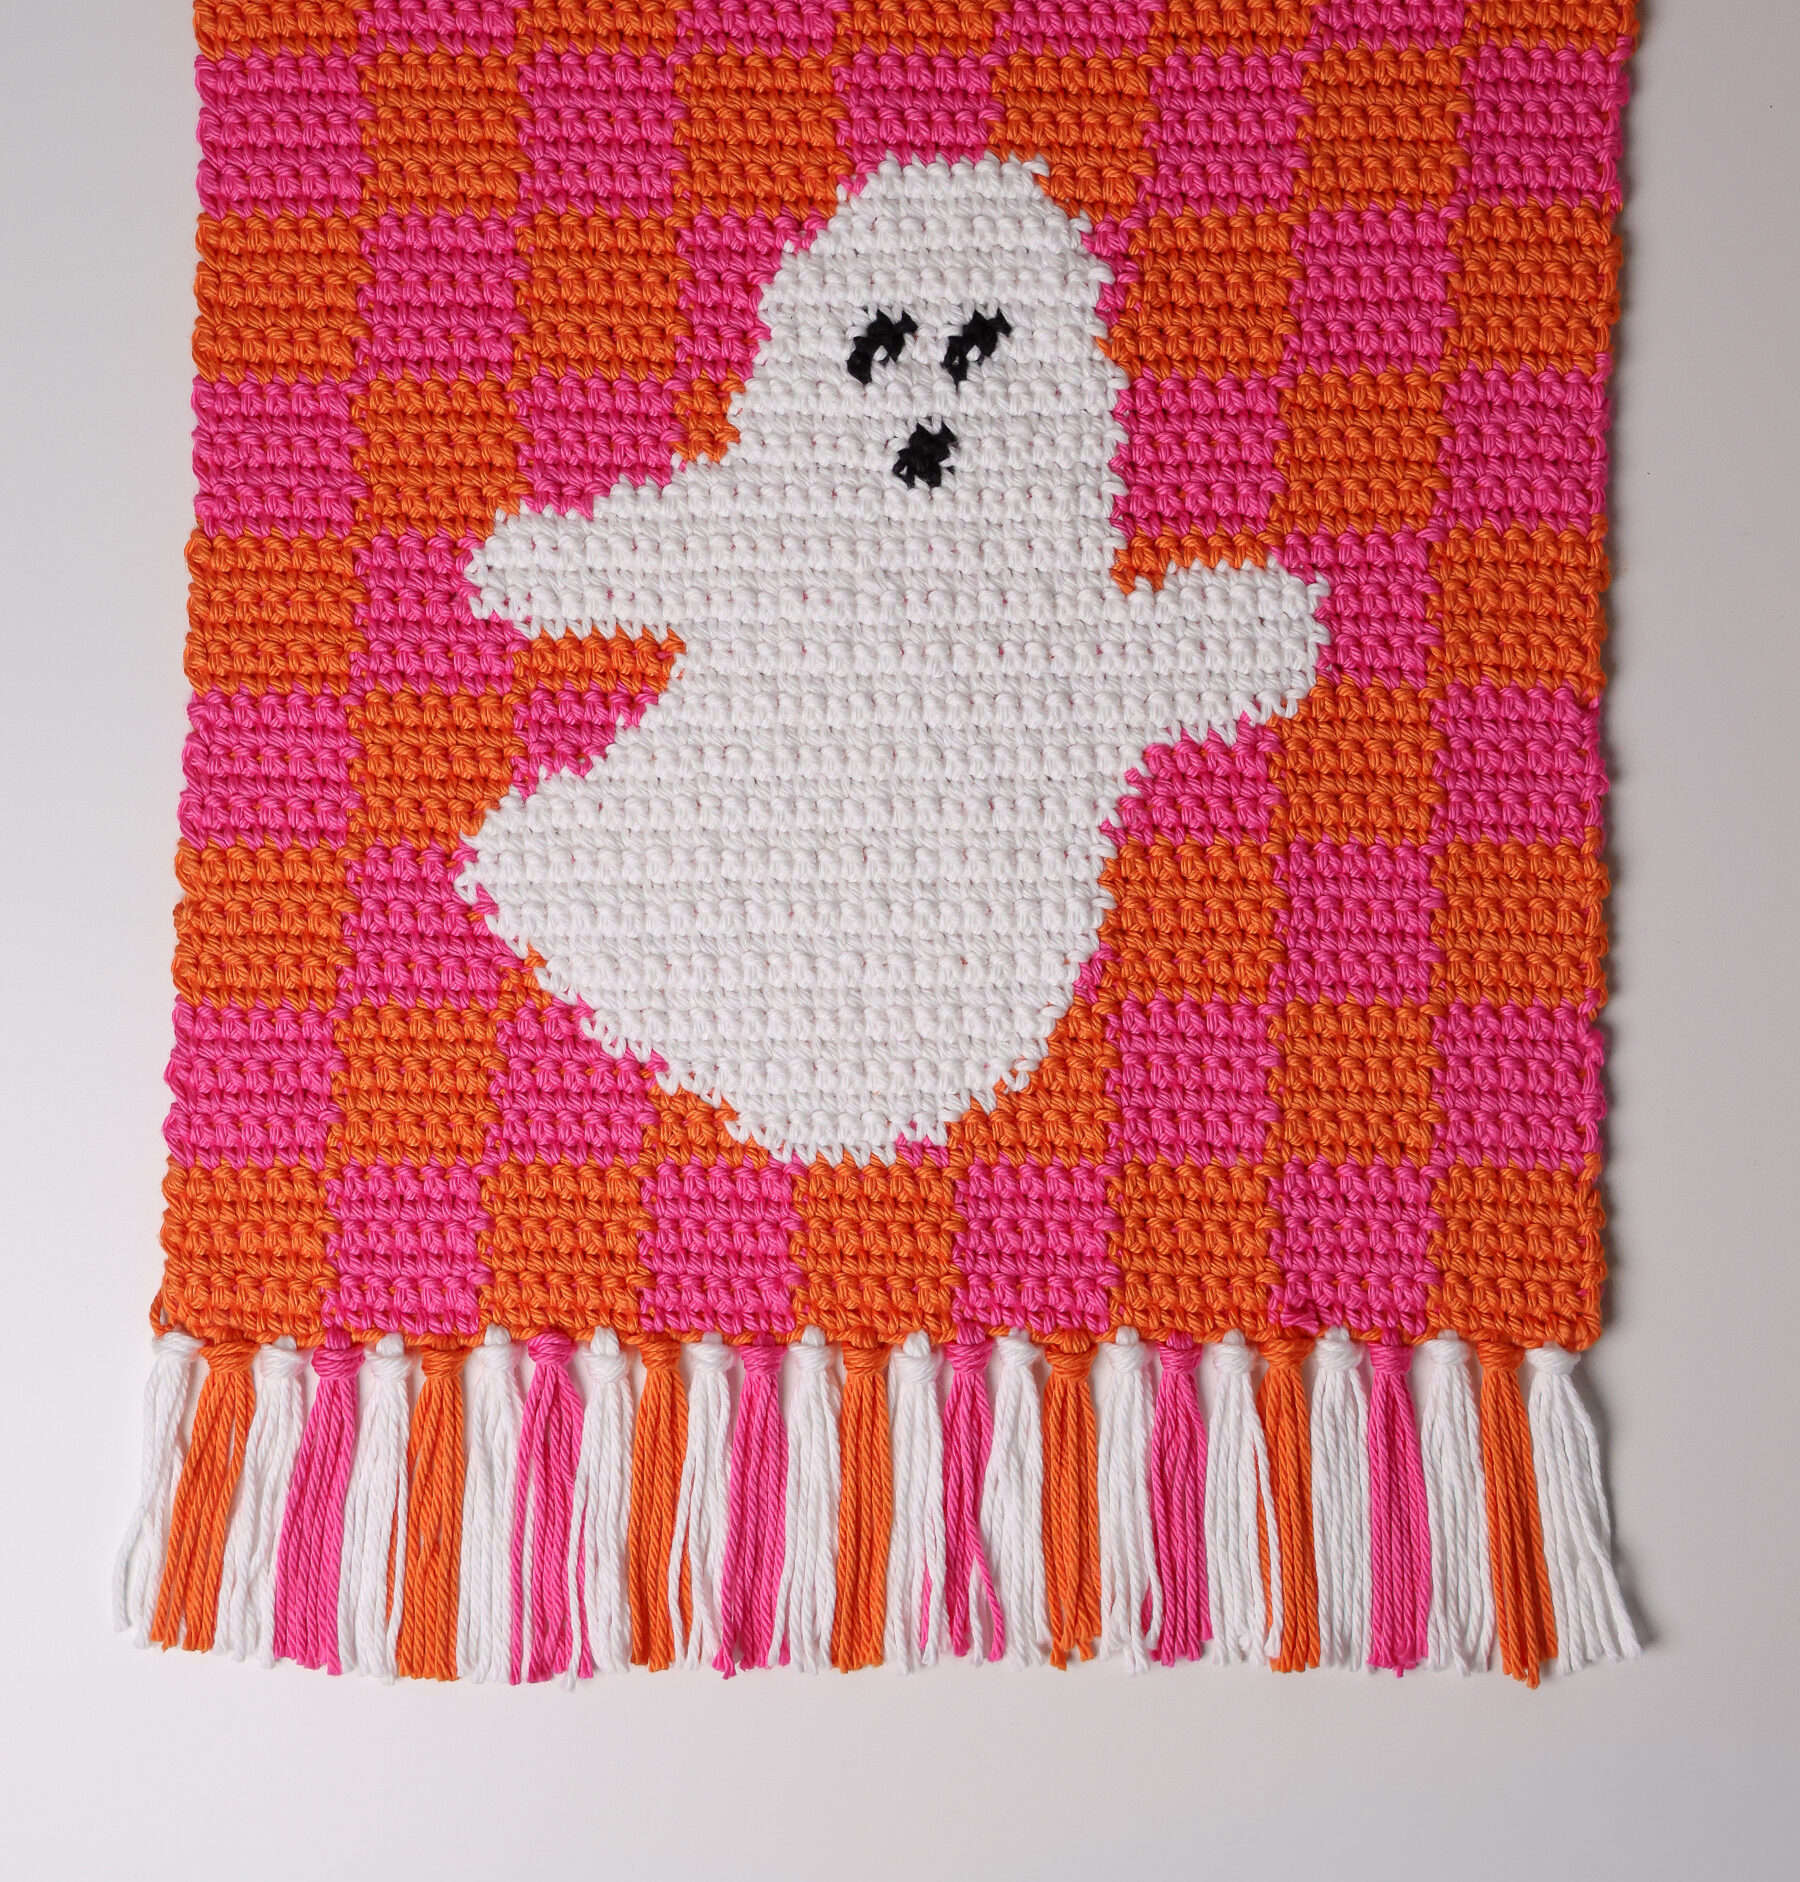
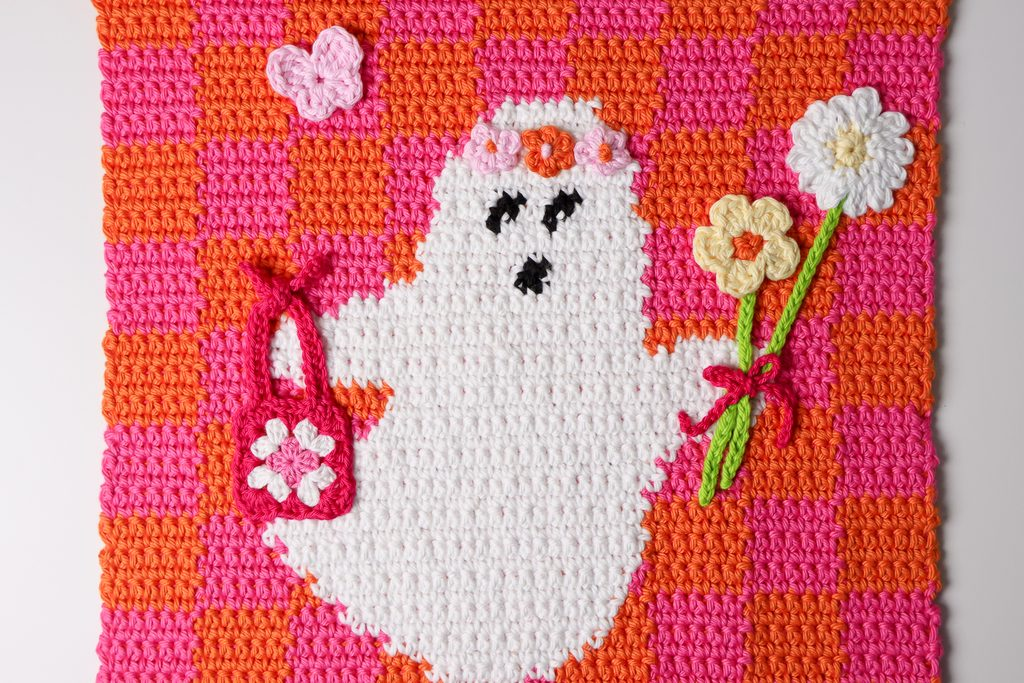
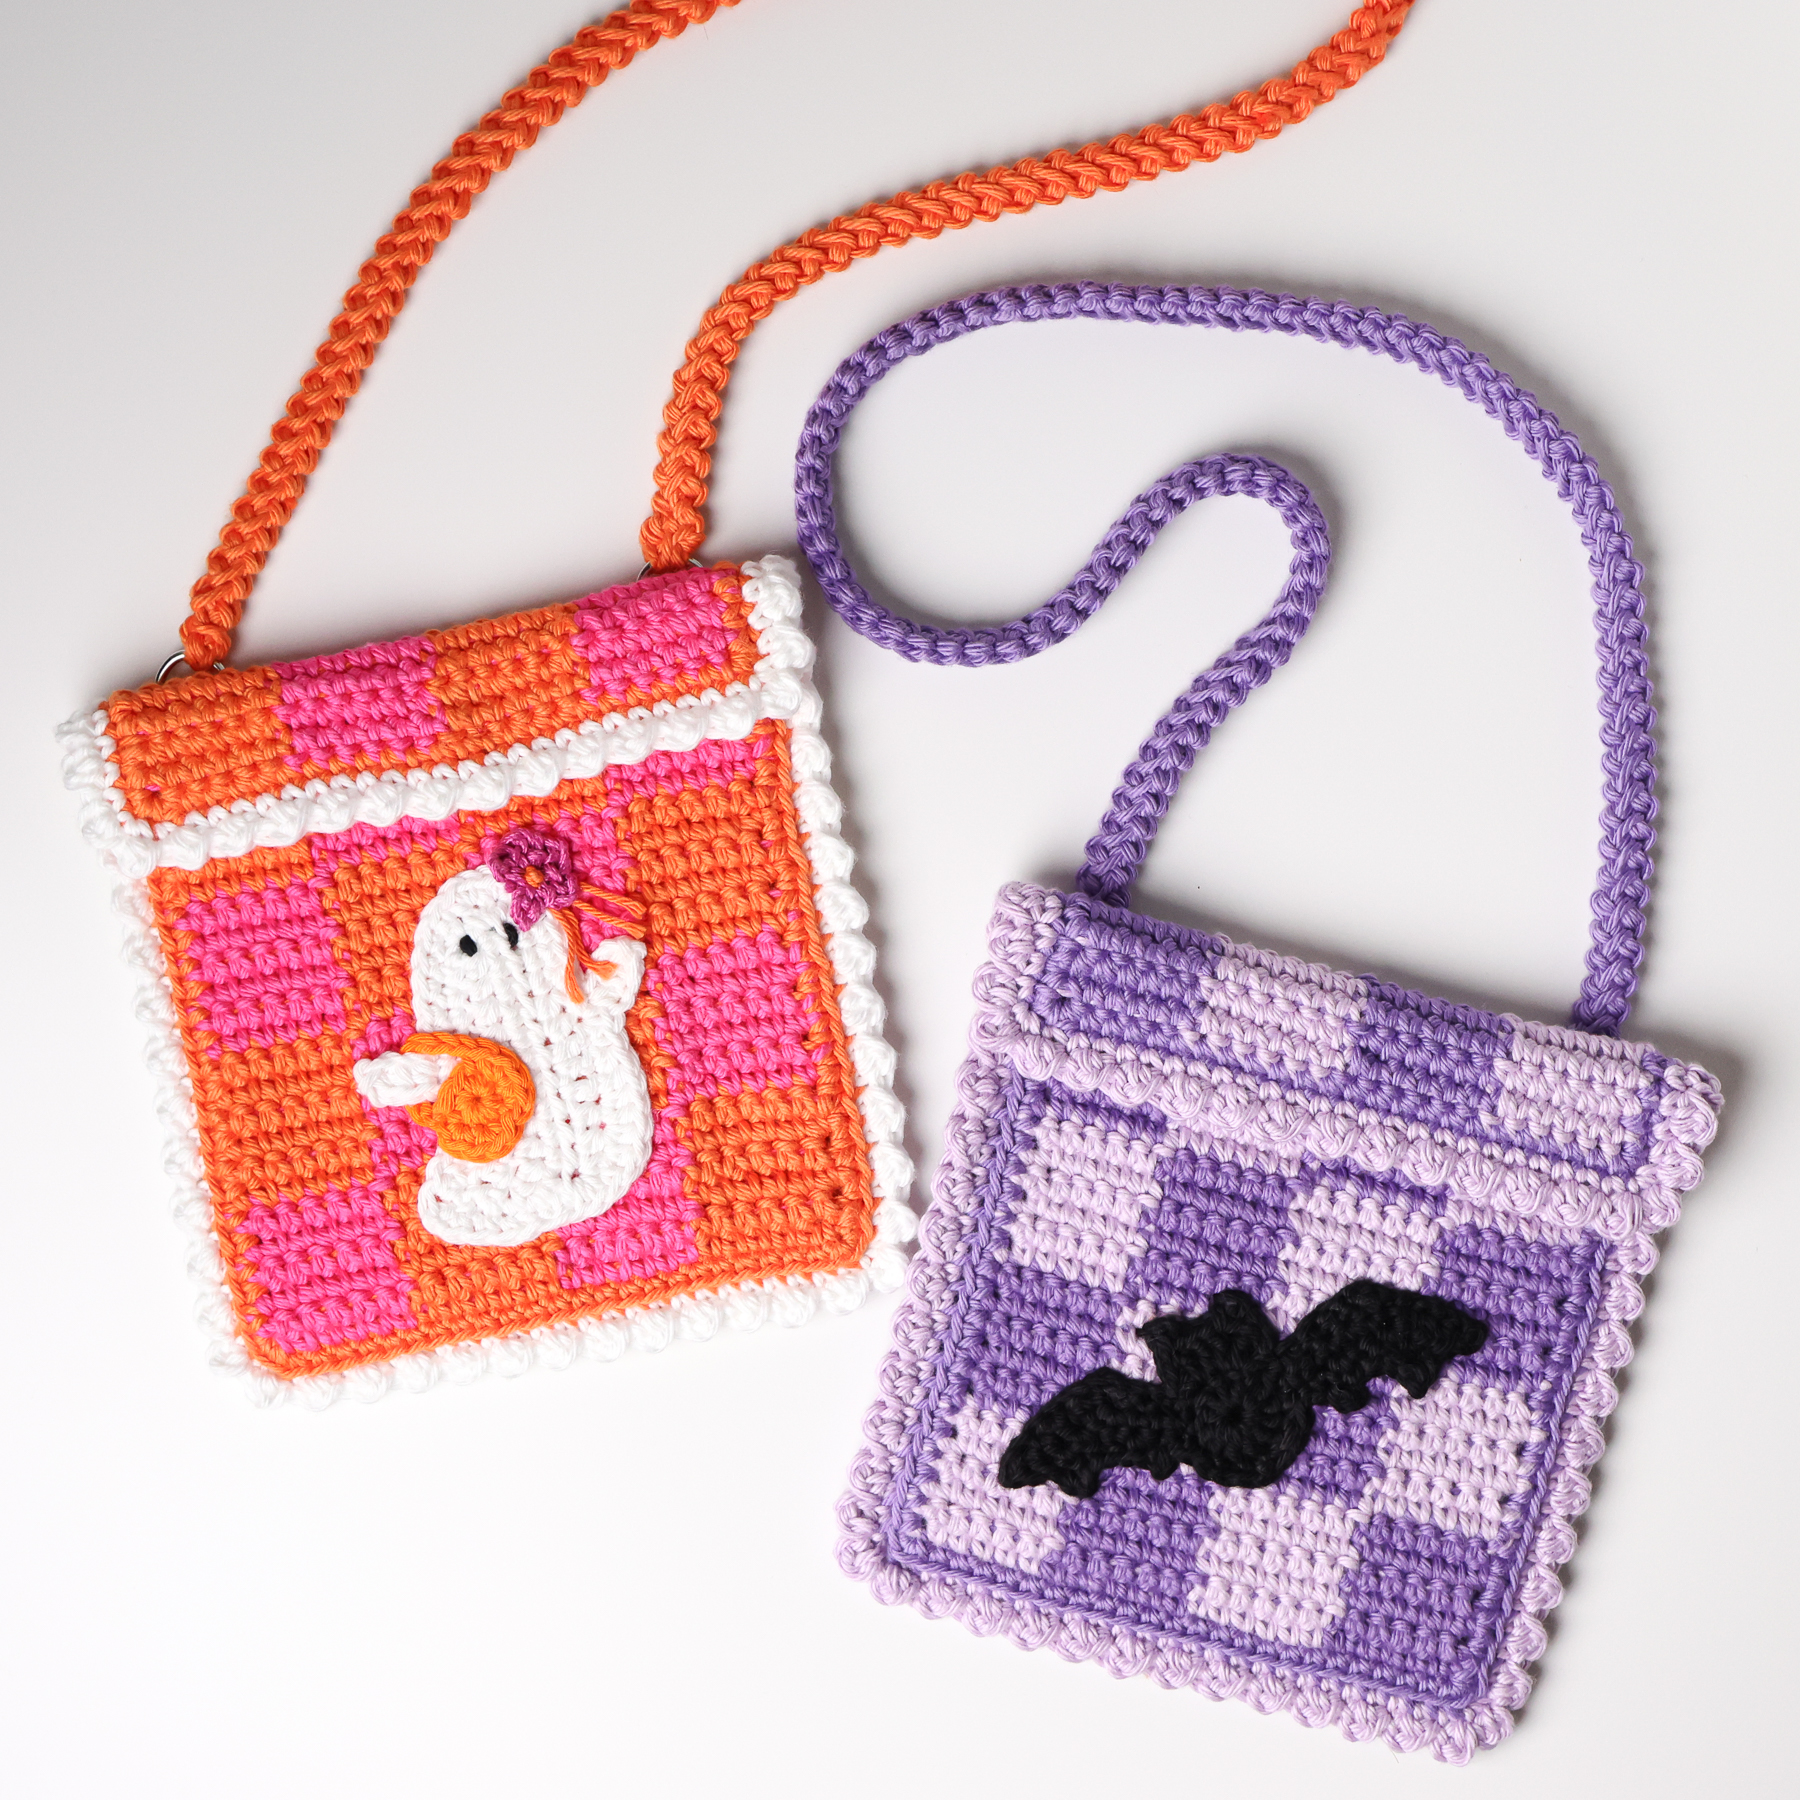
This time we’ve incorporated the checkered look into a Halloween-themed wall hanging! After making our checkered bag pattern and adding our ghost applique to it (check out that free pattern here), we knew we wanted to add a bit more to our color work with this one.
If you’re new to color work, don’t worry! This project uses 3 colors (okay, 4 really, but the mouth and eyes only take up 10 stitches total) and it’s still a good place to start once you’ve mastered using 2 colors. We have a tutorial that you can reference if you learn better that way. You can find it embedded below with the pattern as well.
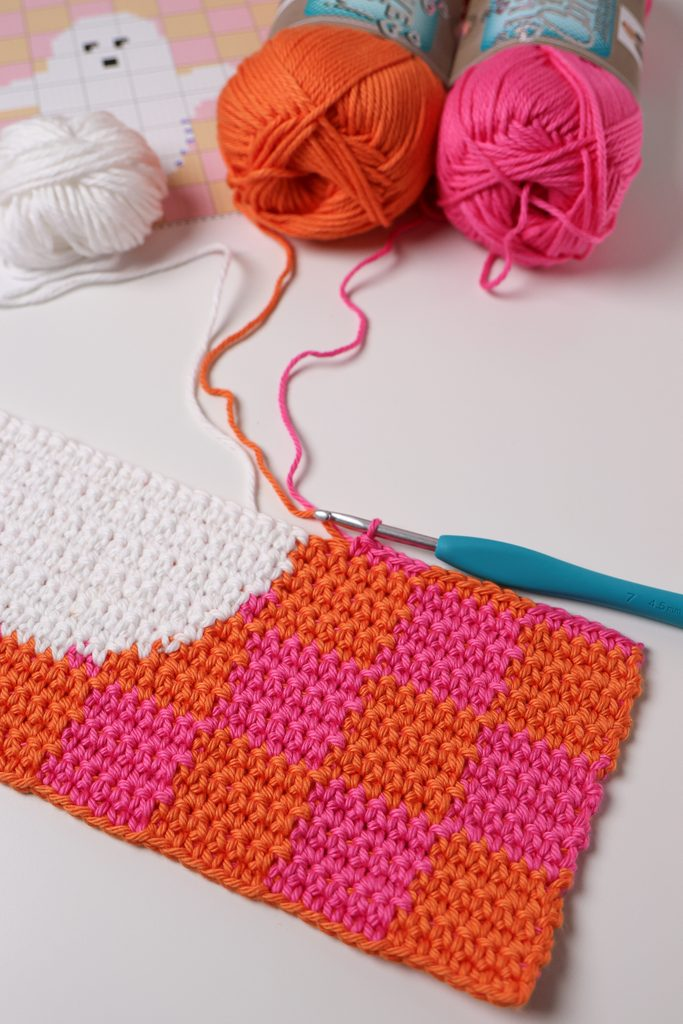
This wall hanging was made with 100% cotton yarn – all yarn details are included in the pattern below – but you can substitute it with a yarn of your choice. Just know, your yarn choice and your tension may cause your results to be different than ours, so keep that in mind! For reference, this wall hanging was 1.5″ (4 cm) wider & taller when made with 100% acrylic yarn, using the same hook size and everything!
This post may contain affiliate links. We only recommend products we would use ourselves and all opinions expressed here are our own. Read our full privacy policy and disclosures here.
Materials Needed
- Worsted (#4), I Love This Cotton (100% Cotton), 180 yards (165 m) per 100 g (3.5 oz) skein
- Color A, Orange – 90 yards (82 m) + 5 yards (4.5 m) for tassels
- Color B, Hot Rose – 60 yards (55 m) + 5 yards (4.5 m) for tassels
- Color C, White – 15 yards (14 m) + 10 yards (9 m) for tassels
- Color D, Black – less than 1 yard (1 m)
- Extra yarn for appliques – Fine (#1), Sport (#2), DK (#3), or Worsted (#4) – We used mostly Hobbii Rainbow Cotton 8/4 and Lion Brand 24/7 Cotton DK.
- US 7 (4.5 mm) hook for the wall hanging, US E/4 (3.5 mm) & US C/2 (2.75 mm) hooks for the appliques– we love Clover Amour hooks
- scissors
- stitch markers
- tapestry needle
- wooden dowel or branch
- we used a 36″ (91 cm) dowel, cut it down to 14″ (36 cm), and used sand paper to soften the ends.
Abbreviations
US terms
- ch = chain
- rep = repeat
- sc = single crochet
- sts = stitches
Size
Finished wall hanging measures 12.5″ (32 cm) wide by 12.5″ (32 cm) tall with 3″ (8 cm) long tassels
The same pattern made with Worsted (#4) 100% Acrylic yarn measures approximately 14″ (36 cm) wide by 14″ (36 cm) tall.
Gauge
18 rows of 18 sc measures 4″ (10 cm) wide by 4″ (10 cm) tall.
Notes & Special Stitches
- 2 sc: make 2 single crochets in the next stitch
- sc 2: make 1 single crochet in the next two stitches
- (xyz): all stitches are worked into the same stitch/space
- {xyz}: repeat those stitches a certain number of times
- Stitch counts: Stitch counts are listed in brackets [ ] at the end of the row/round. If no stitch count is given, it has not changed since the previous row.
- Turning Chain: Ch 1 at the beginning of the Row/Round does not count as a stitch.
Colorwork Graph
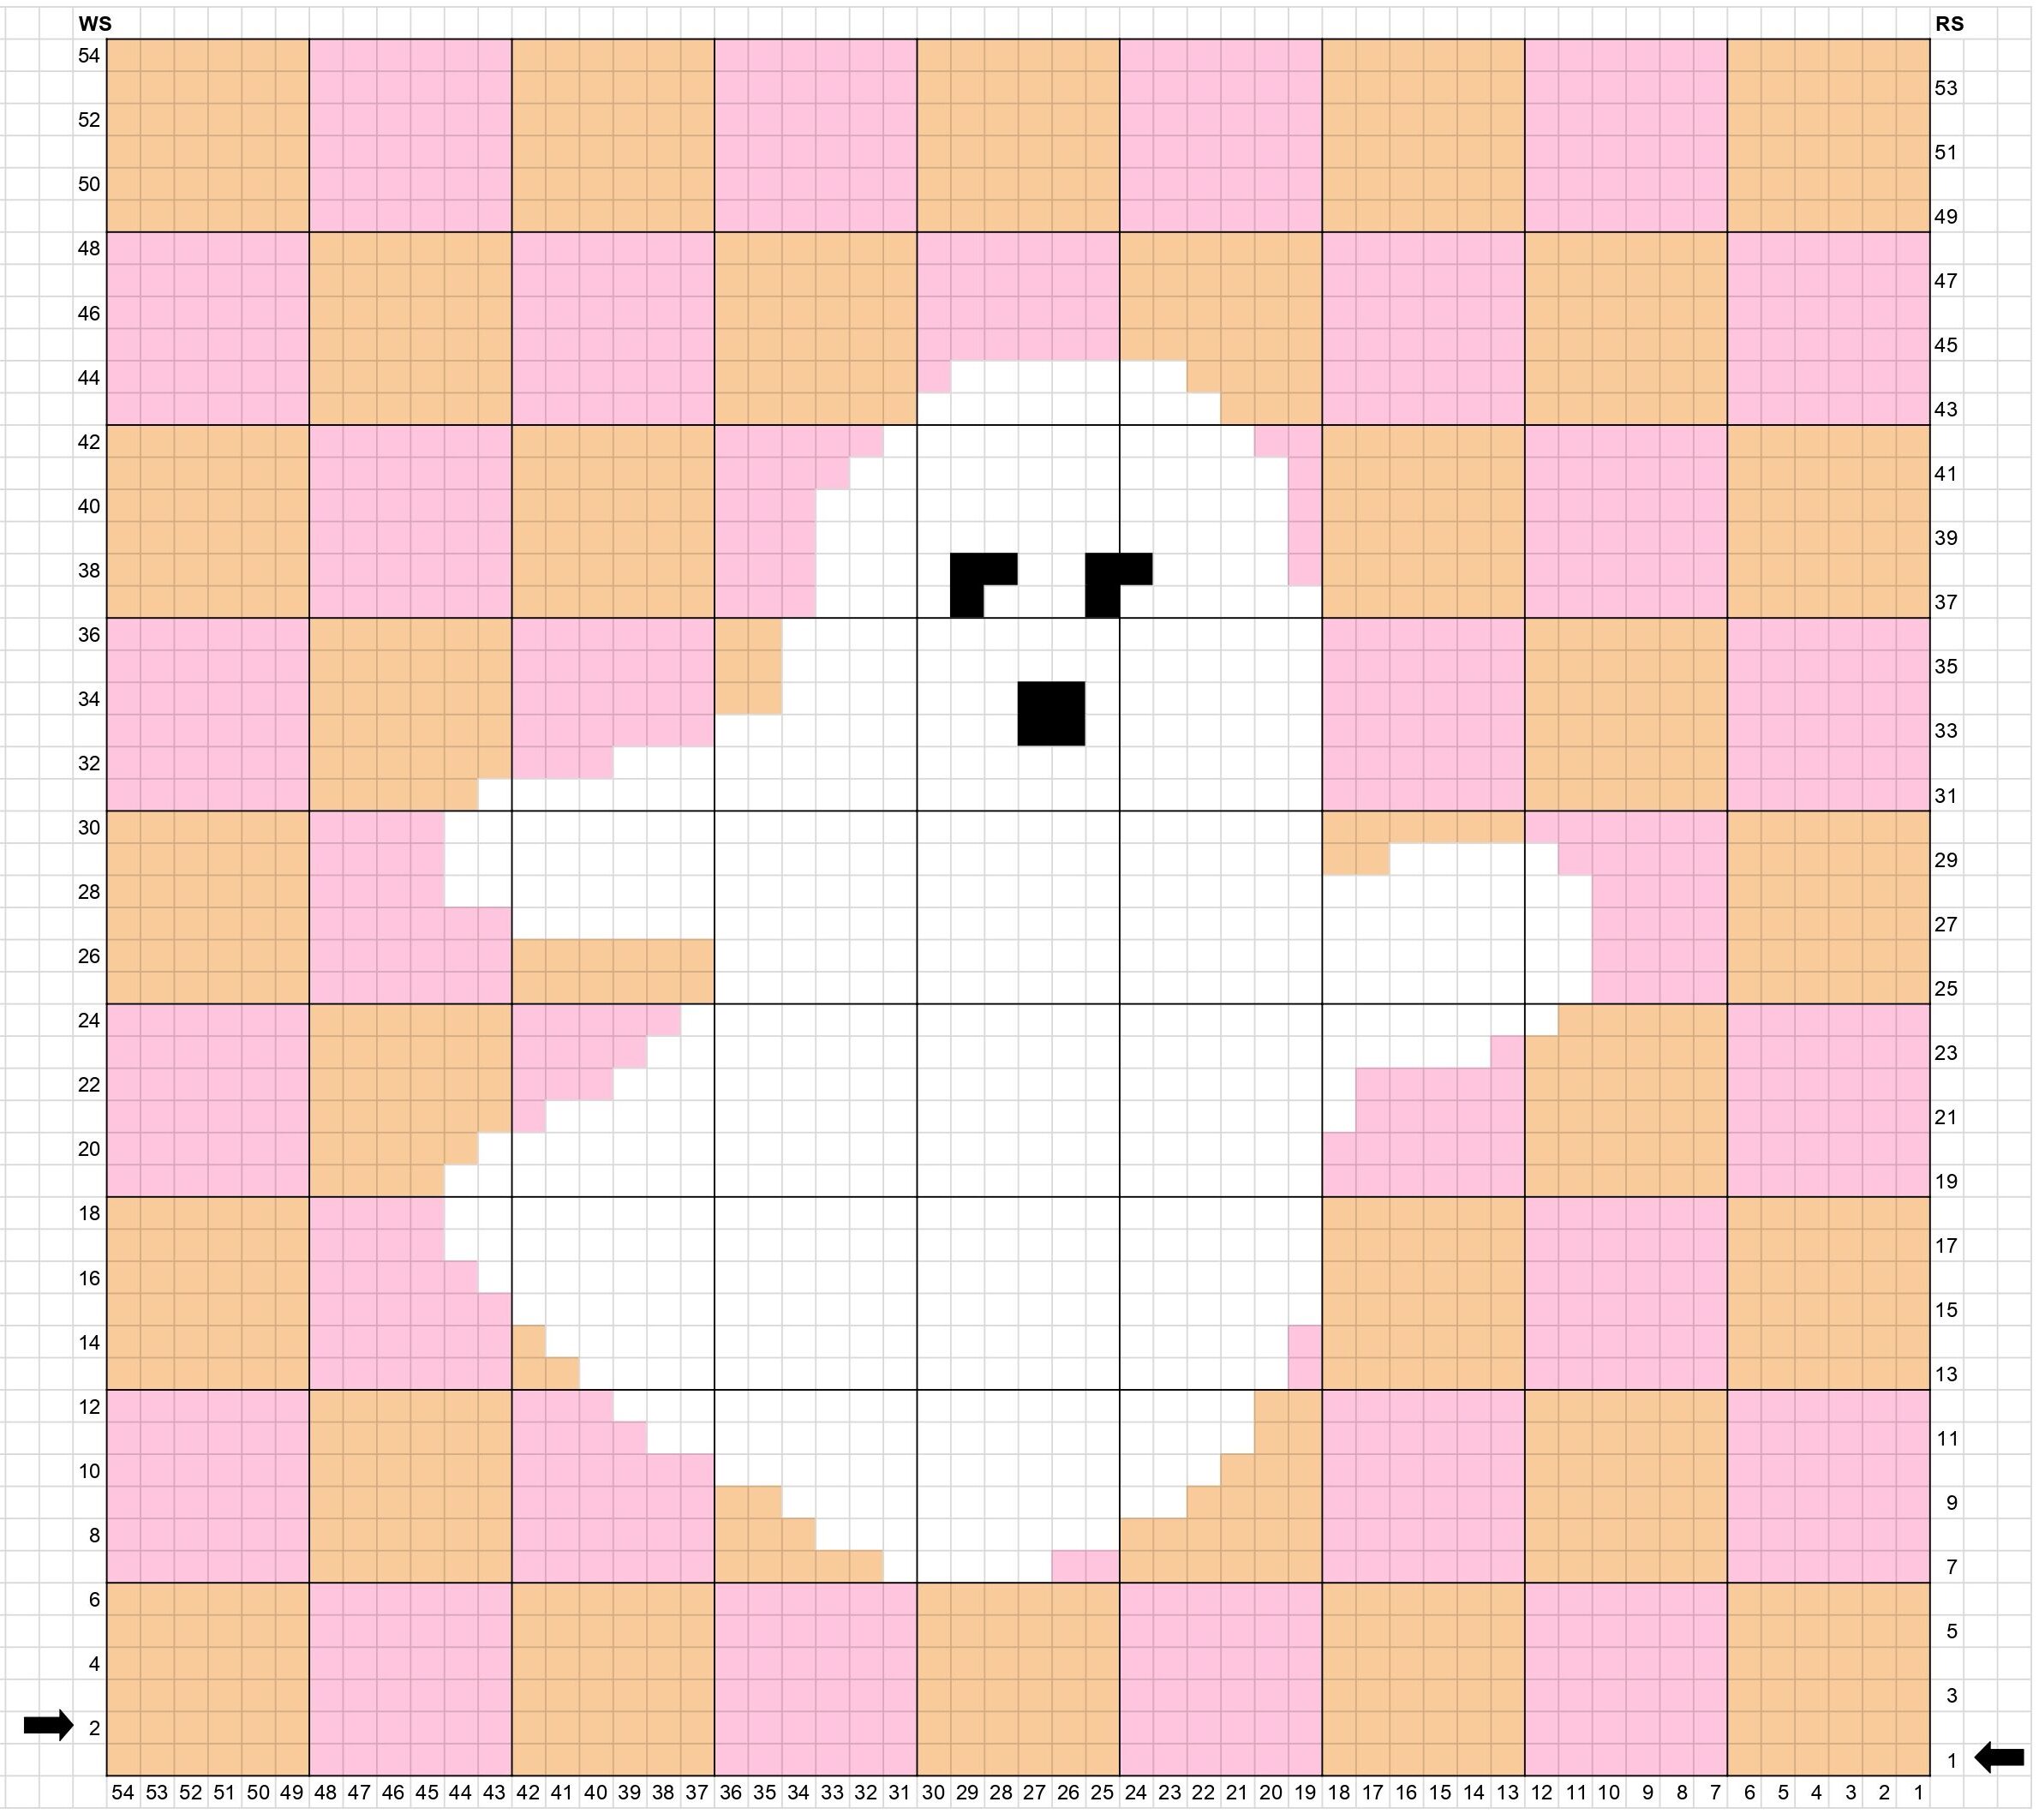
- Reading the Graph & Written Pattern:
- Each square represents one single crochet and each row equals one row in the project.
- The color of the square indicates the color of yarn to use for that stitch.
- Color A = Orange, Color B = Pink, Color C = White, Color D = Black
- The graph should be read from the bottom to the top.
- Read it from right to left for odd rows.
- Read it from left to right for even rows.
- The arrows in the written pattern indicate which direction you are reading the graph.
- The bottom right square is the first stitch.
- The odd rows are the RS and the even rows are the WS of your project.
- The pattern is written where the # of single crochet is followed by the color abbreviation.
- Ex: 5A, 8B = sc 5 in Color A, sc 8 in Color B
Color Changes
For clean color changes, change your yarn as you complete the last sc before the next color, when you have 2 loops left on your hook. Drop your current yarn and pull through the 2 loops with your new yarn to complete the sc.
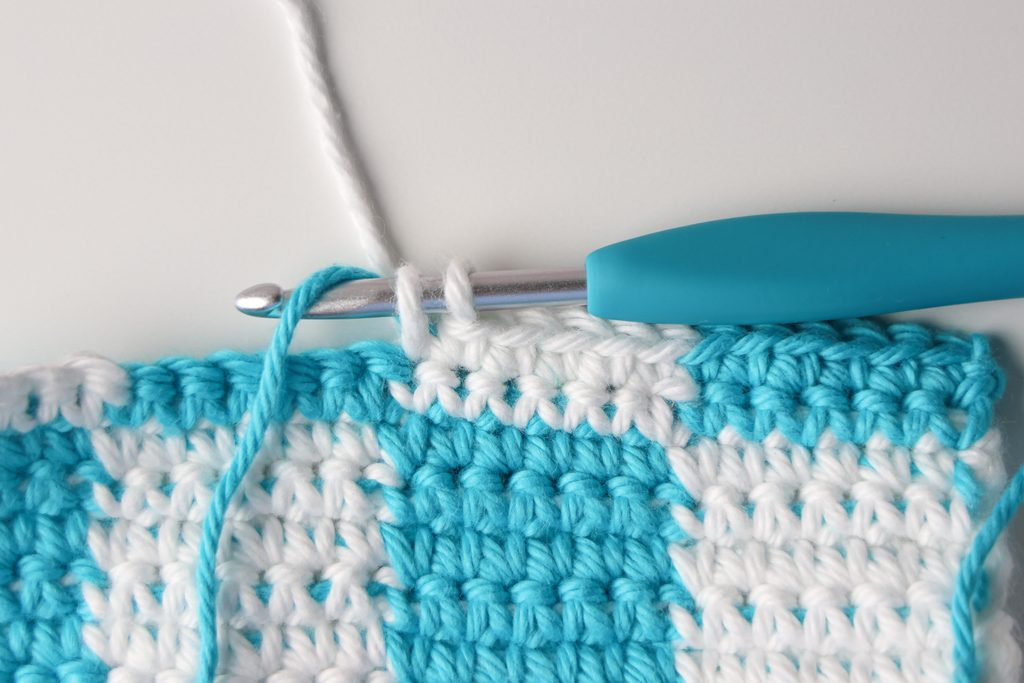
You can carry your inactive yarn by crocheting over it every stitch or by floating it across the wrong side, crocheting over it every few stitches.
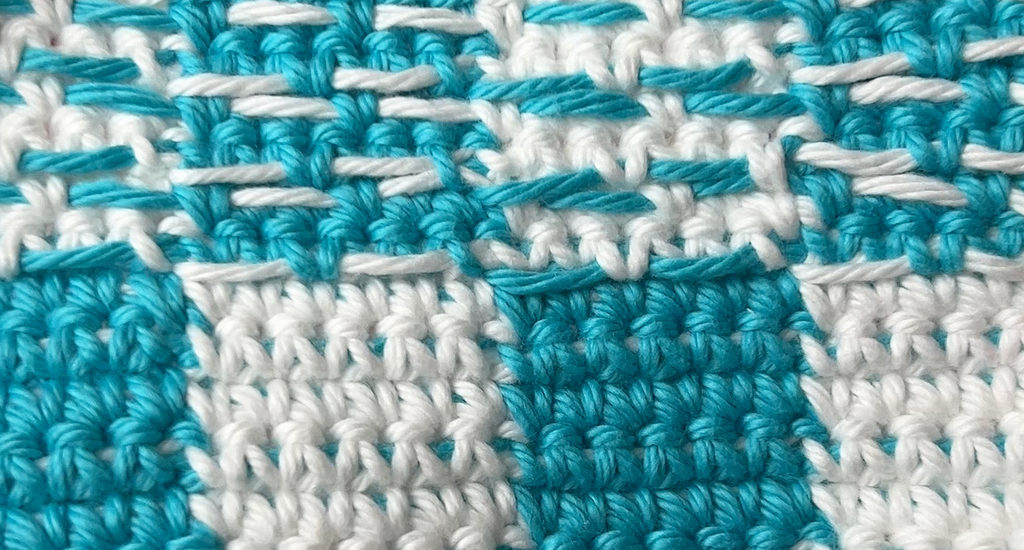
When working the ghost portion of the colorwork and carrying 2 colors across your work, we suggest alternating which inactive yarn you “pick up” and float along the wrong side. To avoid a tangled mess of yarn, determine which yarn is the “top” yarn and which is the “bottom” yarn and keep them organized that way.
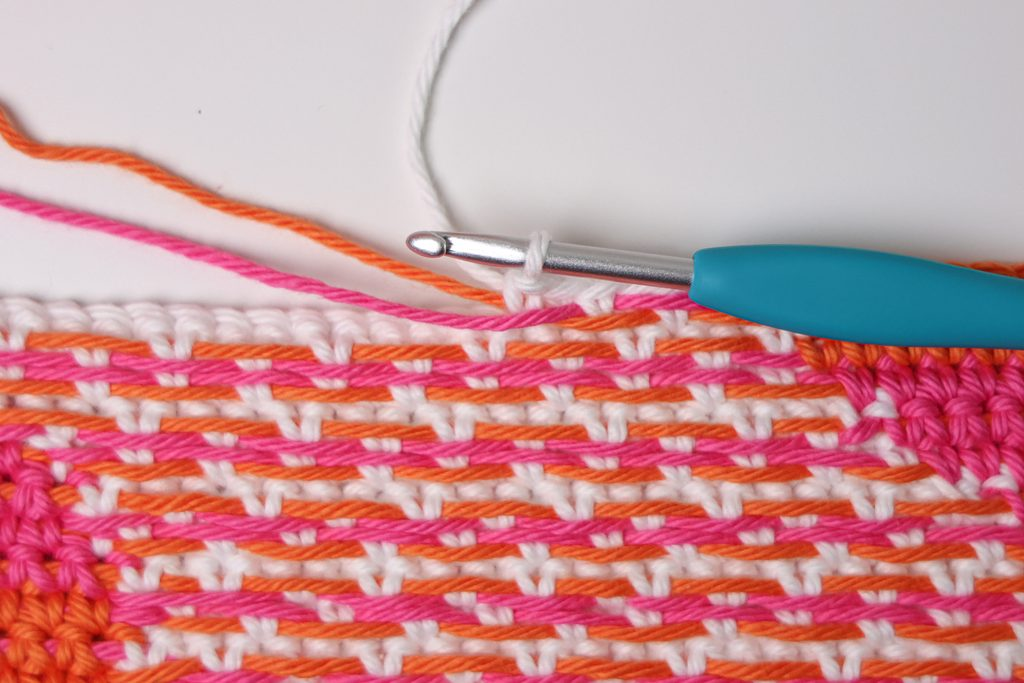
For a better look at these different techniques and how to achieve the checkered portion of the pattern, you can follow along with our tutorial here:
Pattern
With a US 7 (4.5 mm) hook and Color A, Ch 55
Row 1 (RS): 6A, {6B, 6A} rep 4 times, ch 1 and turn. [54 sc]
Rows 2-6: 6A, {6B, 6A} rep 4 times, ch 1 and turn.
Row 7: 6B, 6A, 6B, 6A, 2B, 5C, 5A, 6B, 6A, 6B, ch 1 and turn.
Row 8: 6B, 6A, 6B, 3A, 9C, 6A, 6B, 6A, 6B, ch 1 and turn.
Row 9: 6B, 6A, 6B, 4A, 12C, 2A, 6B, 6A, 6B, ch 1 and turn.
Row 10: 6B, 6A, 6B, 15C, 3A, 6B, 6A, 6B, ch 1 and turn.
Row 11: 6B, 6A, 6B, 2A, 18C, 4B, 6A, 6B, ch 1 and turn.
Row 12: 6B, 6A, 3B, 19C, 2A, 6B, 6A, 6B, ch 1 and turn.
Row 13: 6A, 6B, 6A, 1B, 21C, 2A, 6B, 6A, ch 1 and turn.
Row 14: 6A, 6B, 1A, 22C, 1B, 6A, 6B, 6A, ch 1 and turn.
Row 15: 6A, 6B, 6A, 24C, 6B, 6A, ch 1 and turn.
Row 16: 6A, 5B, 25C, 6A, 6B, 6A, ch 1 and turn.
Row 17: 6A, 6B, 6A, 26C, 4B, 6A, ch 1 and turn.
Row 18: 6A, 4B, 26C, 6A, 6B, 6A, ch 1 and turn.
Row 19: 6B, 6A, 6B, 26C, 4A, 6B, ch 1 and turn.
Row 20: 6B, 5A, 25C, 6B, 6A, 6B, ch 1 and turn.
Row 21: 6B, 6A, 5B, 24C, 1B, 6A, 6B, ch 1 and turn.
Row 22: 6B, 6A, 3B, 22C, 5B, 6A, 6B, ch 1 and turn.
Row 23: 6B, 6A, 1B, 25C, 4B, 6A, 6B, ch 1 and turn.
Row 24: 6B, 6A, 5B, 26C, 5A, 6B, ch 1 and turn.
Row 25: 6A, 4B, 26C, 6A, 6B, 6A, ch 1 and turn.
Row 26: 6A, 6B, 6A, 26C, 4B, 6A, ch 1 and turn.
Row 27: 6A, 4B, 32C, 6B, 6A, ch 1 and turn.
Row 28: 6A, 4B, 34C, 4B, 6A, ch 1 and turn.
Row 29: 6A, 5B, 5C, 2A, 26C, 4B, 6A, ch 1 and turn.
Row 30: 6A, 4B, 26C, 6A, 6B, 6A, ch 1 and turn.
Row 31: 6B, 6A, 6B, 25C, 5A, 6B, ch 1 and turn.
Row 32: 6B, 6A, 3B, 21C, 6B, 6A, 6B, ch 1 and turn.
Row 33: 6B, 6A, 6B, 7C, 2D, 9C, 6B, 6A, 6B, ch 1 and turn.
Row 34: 6B, 6A, 6B, 2A, 7C, 2D, 7C, 6B, 6A, 6B, ch 1 and turn.
Row 35: 6B, 6A, 6B, 16C, 2A, 6B, 6A, 6B, ch 1 and turn.
Row 36: 6B, 6A, 6B, 2A, 16C, 6B, 6A, 6B, ch 1 and turn.
Row 37: 6A, 6B, 6A, 6C, 1D, 3C, 1D, 4C, 3B, 6A, 6B, 6A, ch 1 and turn.
Row 38: 6A, 6B, 6A, 3B, 4C, 2D, 2C, 2D, 4C, 1B, 6A, 6B, 6A, ch 1 and turn.
Row 39: 6A, 6B, 6A, 1B, 14C, 3B, 6A, 6B, 6A, ch 1 and turn.
Row 40: 6A, 6B, 6A, 3B, 14C, 1B, 6A, 6B, 6A, ch 1 and turn.
Row 41: 6A, 6B, 6A, 1B, 13C, 4B, 6A, 6B, 6A, ch 1 and turn.
Row 42: 6A, 6B, 6A, 5B, 11C, 2B, 6A, 6B, 6A, ch 1 and turn.
Row 43: 6B, 6A, 6B, 3A, 9C, 6A, 6B, 6A, 6B, ch 1 and turn.
Row 44: 6B, 6A, 6B, 6A, 1B, 7C, 4A, 6B, 6A, 6B, ch 1 and turn.
Rows 45-48: 6B, {6A, 6B} rep 4 times, ch 1 and turn.
Rows 49-54: 6A, {6B, 6A} rep 4 times, ch 1 and turn.
Option 1: If you are attaching your wall hanging to a wooden dowel, one option is to crochet loops to slide your dowel through. Here’s what we did:
Row 55 (RS): Ch 6 (for a total of 7 chs) (or more to fit your dowel), sl st into first st, sl st 6, (sl st, ch 7, sl st), sl st 7, (sl st, ch 7, sl st), sl st 7, (sl st, ch 7, sl st), sl st 6, (sl st, ch 7, sl st), sl st 7, (sl st, ch 7, sl st), sl st 7, (sl st, ch 7, sl st), sl st 6, (sl st, ch 7, sl st). [8 loops]
Fasten off and weave in ends.
Option 2: Or, if you’d like to attach by whipstitching, do a solid Color A row in sc:
Row 55 (RS): With Color A, sc 54.
Fasten off and weave in ends.
Block your project if necessary!
Fringe
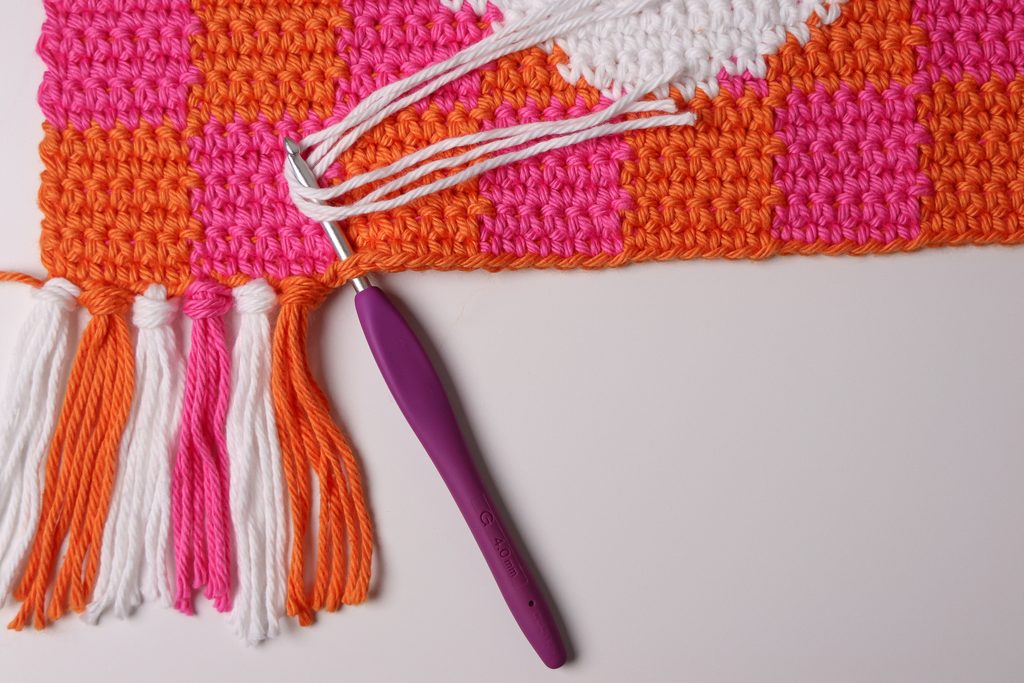
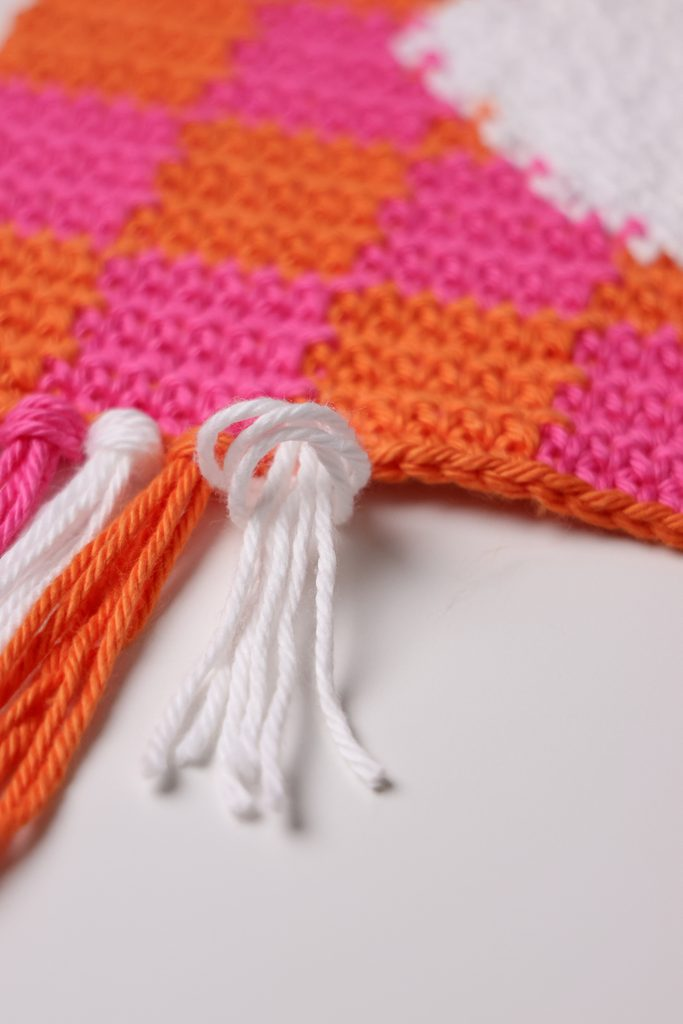
Cut 81 8″ (20 cm) pieces of yarn total – 21 of Color A, 21 of Color B, and 39 of Color C. Each fringe will be made with 3 pieces. Add fringe along the foundation chain, going in every other chain. The order of fringe is C, A, C, B, C, A, C, B, etc. Since it’s an even number of foundation chains, you won’t put one in the last chain.
To attach, grab 3 pieces of yarn and your crochet hook. Insert your hook into the far left chain from the WS to the RS. Fold the 3 pieces of yarn in half over the hook and pull the center loop through. Pull the ends through the loop and pull tight to finish your fringe.
Continue to Appliques or Hanging Your Project
Appliques
Leave your ghost as-is or mix and match various accessories for a completely personalized wall hanging!
We made all appliques with various DK (#3), Sport (#2) and Superfine (#1) yarns and a US C/2 (2.75 mm) hook or Worsted (#4) yarn & a E/4 (3.5 mm) hook.
Colors indicated do not correspond to the colorwork yarn colors.
Glue or leave yarn tails and sew appliques to the wall hanging.
Here are our favorite appliques:
Flower #1
any yarn weight
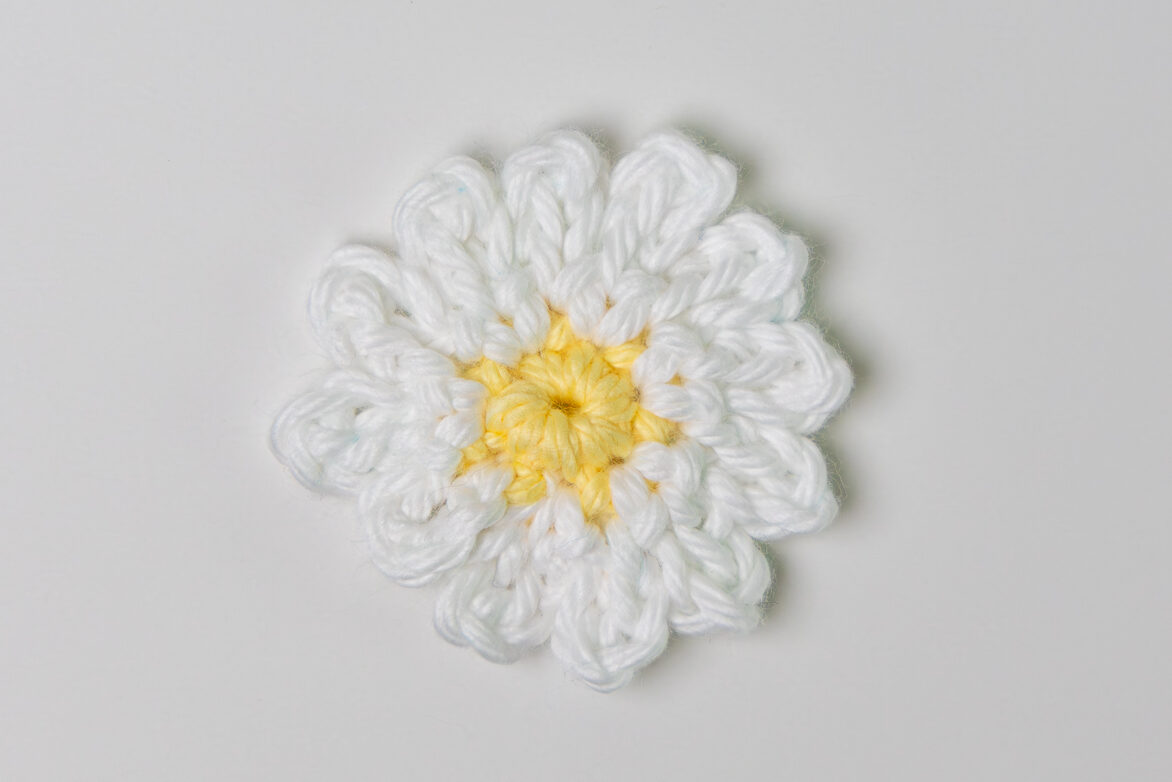
With Color A, begin with a Magic Ring.
Round 1: Sc 6 into the ring, sl st to first sc to join. [6 sc]
Attach Color B in any st with a sl st.
Round 2: {Ch 6, sl st in same st, ch 6, sl st in next st} rep 6 times. [12 petals]
Flower #2
any yarn weight
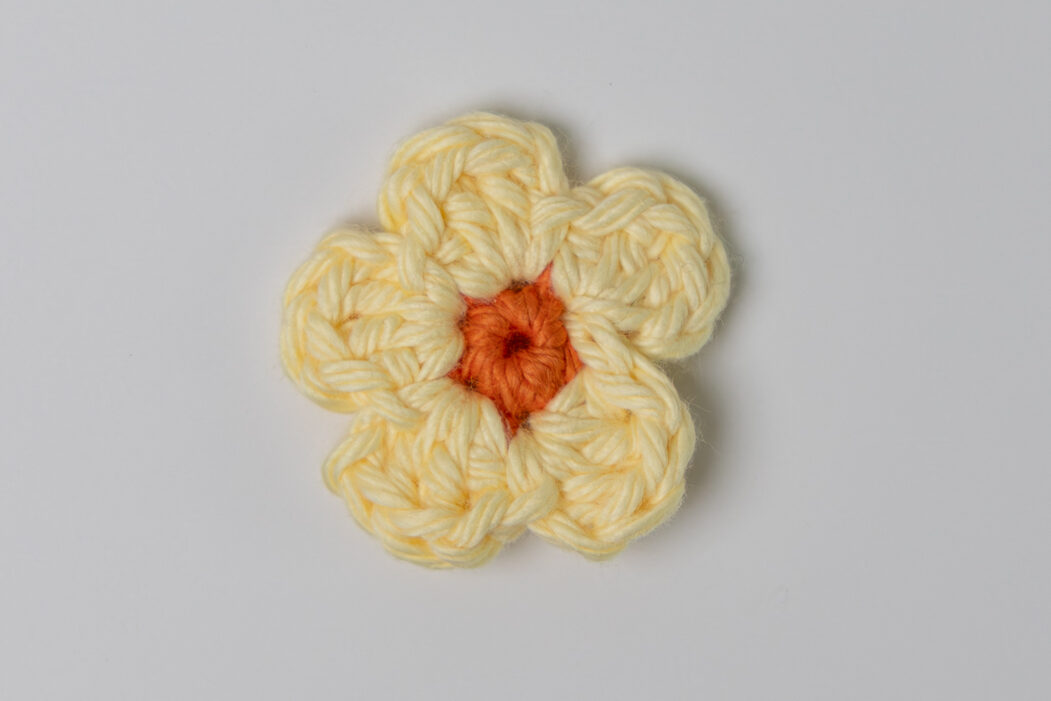
With Color A, begin with a Magic Ring.
Round 1: Sc 5 into the ring, sl st to first sc to join. [5 sc]
Attach Color B in any st with a sl st.
Round 2: (Ch 2, 2 dc, hdc), {(sl st, ch 2, 2 dc, hdc)} rep 4 times, sl st in first st to join. [5 petals]
Flower #3
any yarn weight
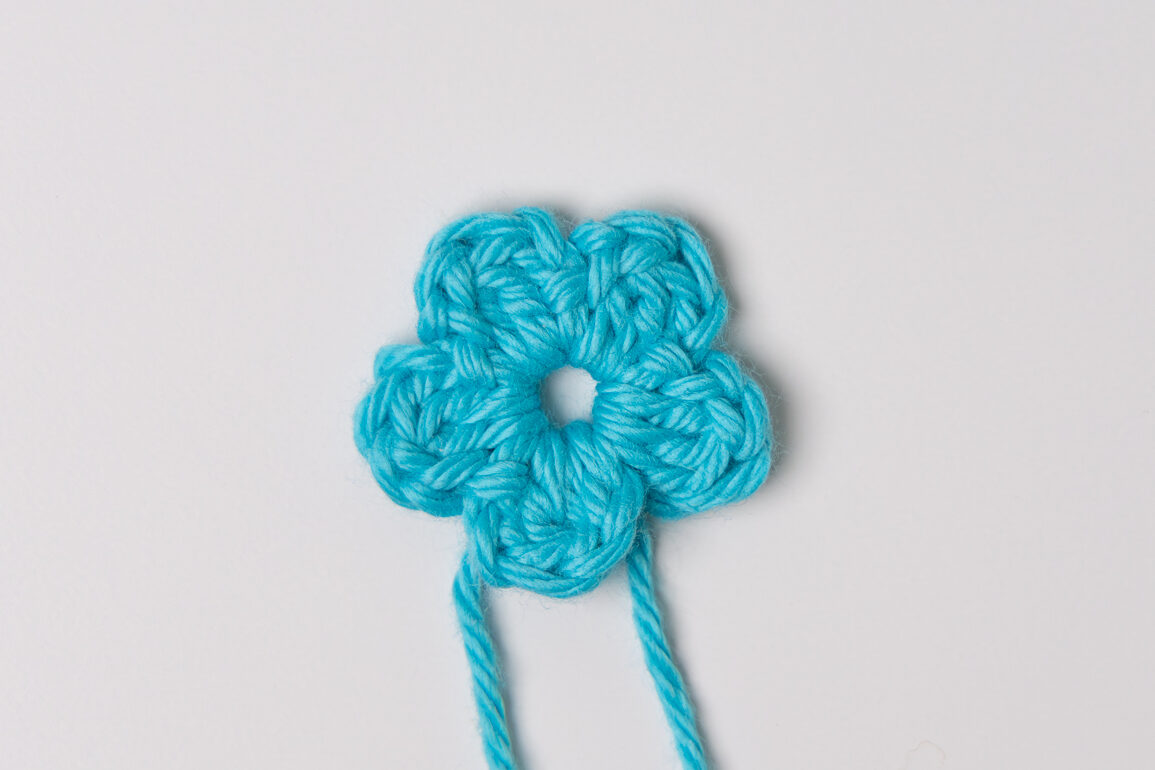
2dc-cl: yo, insert hook into the ring, yo, pull up a loop (3 loops on hook), yo, pull through 2 loops (2 loops on hook). Yo, insert hook into the ring, yo, pull up a loop, yo, pull through 2 loops (3 loops on hook), yo, pull through all 3 loops on hook.
With Color A, begin with a Magic Ring.
{Ch 2, 2dc-cl, ch 2, sl st} rep 5 times. [5 petals]
Flower Stems
any yarn weight
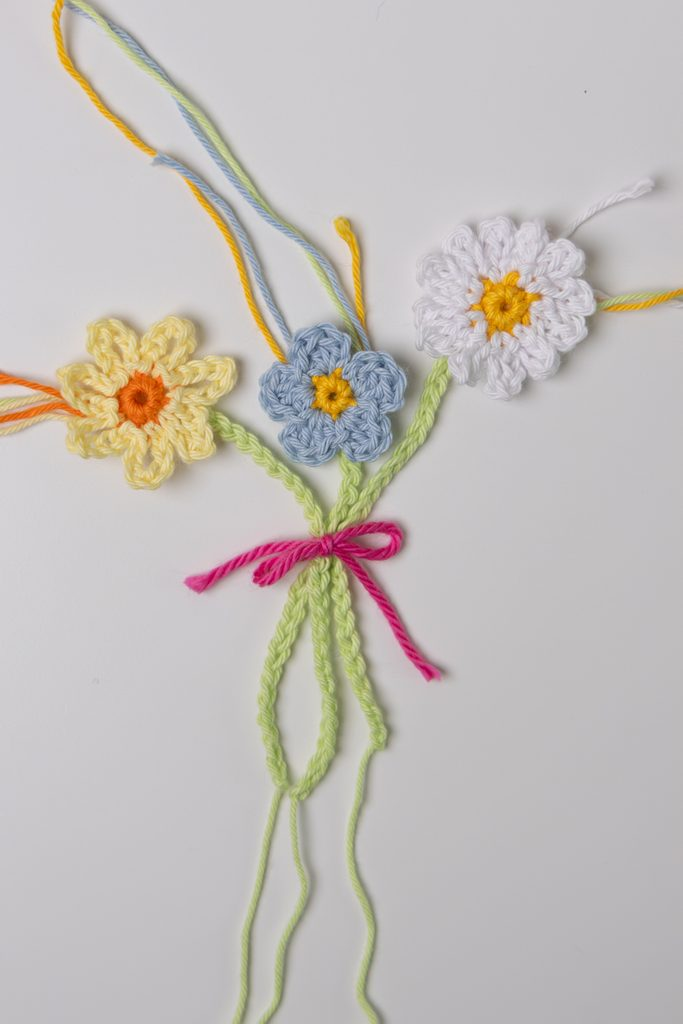
With Color C (stem color), Ch 20+.
Attach to each flower, tie a little bow (make a chain if you want) around them and you’ve got a bouquet!
Mini Flowers for Flower Crown (or necklace, or other accessory!) – make 3-4
any yarn weight
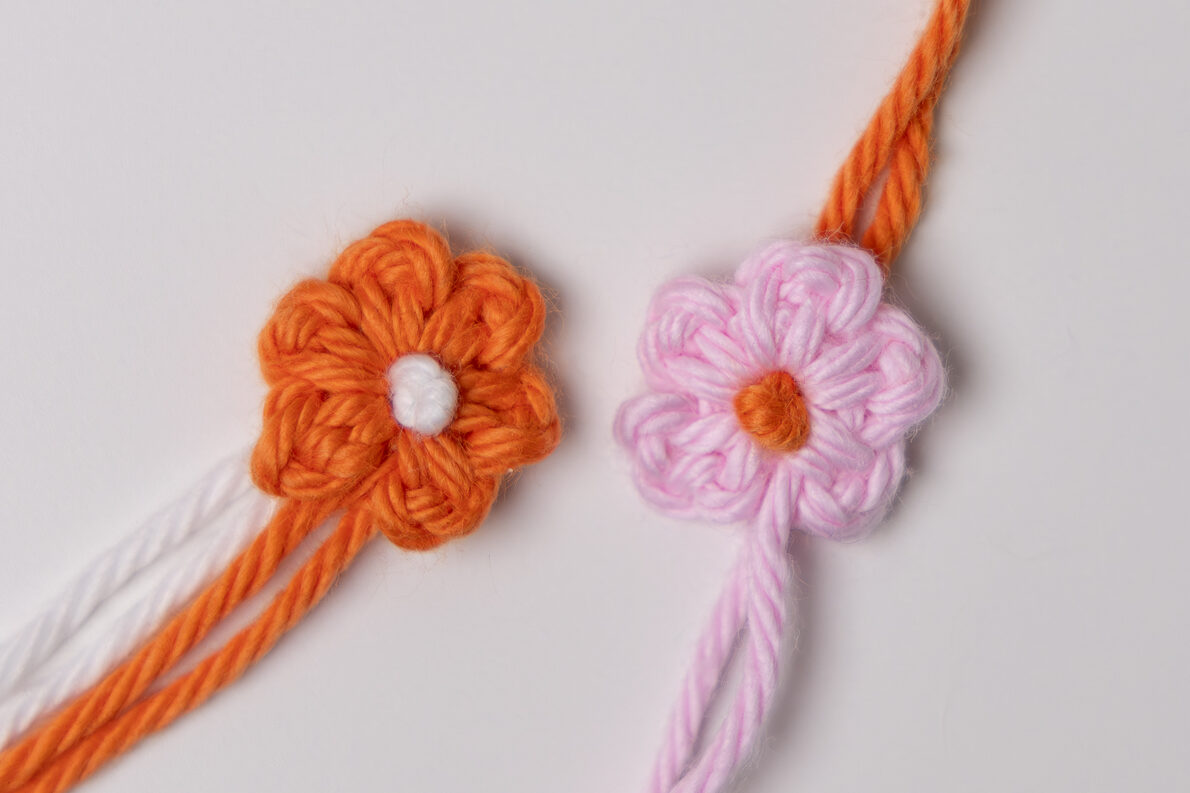
Begin with a Magic Ring.
{Ch 2, sl st} rep 5 times into the ring.
For a colored center, cut a 5″ piece of yarn and tie a knot (single or double knot) in the middle. Feed both ends onto your needle and feed it through the center of your flower.
Sew/glue your flowers to the ghost separately to make a flower crown.
Flower Glasses
#1, #2, or #3 yarn weight recommended
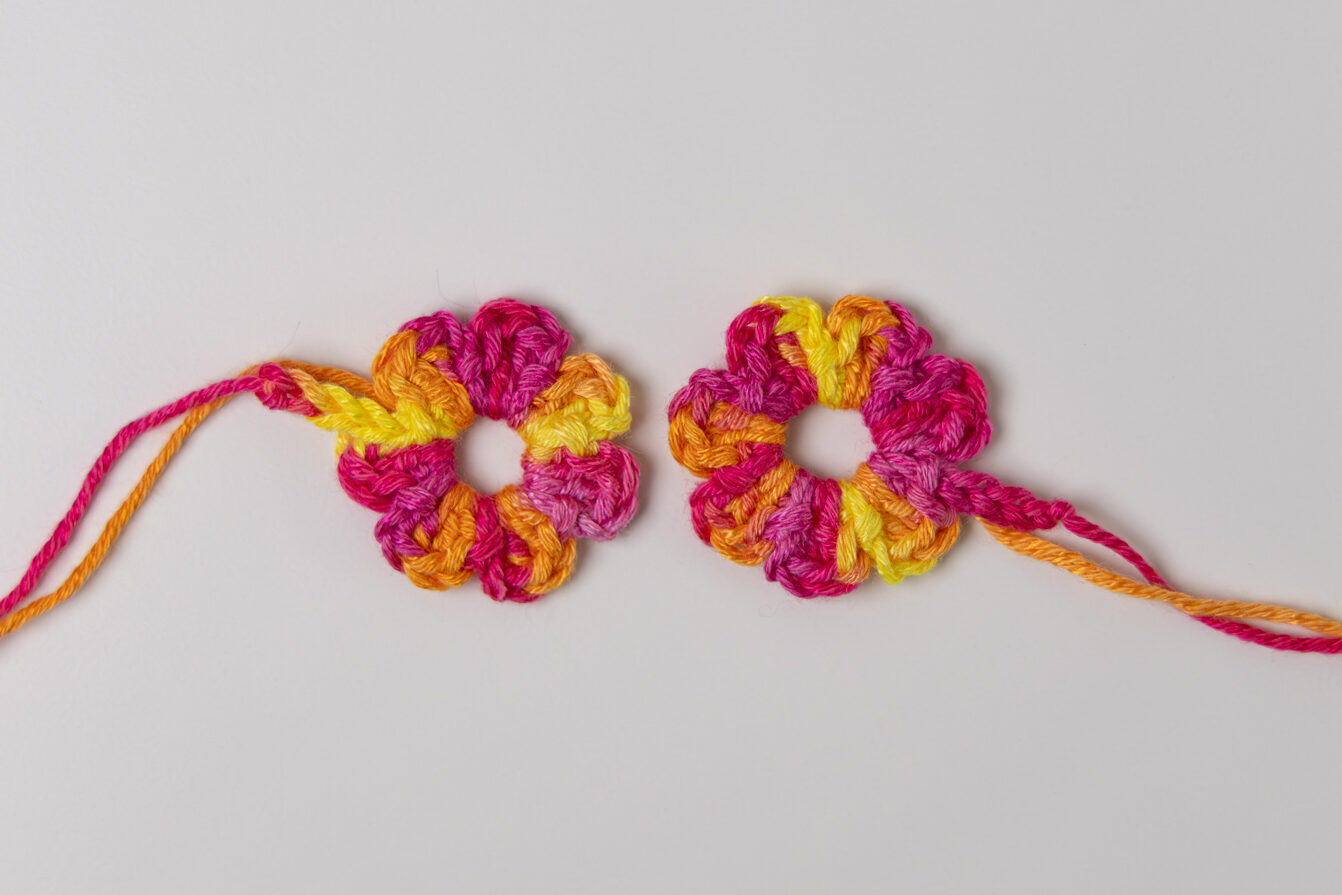
Make 2.
Begin with a Magic Ring.
Round 1: Ch 2, 2 dc, hdc, sl st, {ch 2, 2 dc, hdc, sl st} rep 6 times in the ring. Ch 6. [7 petals]
Micro Bat
any yarn weight
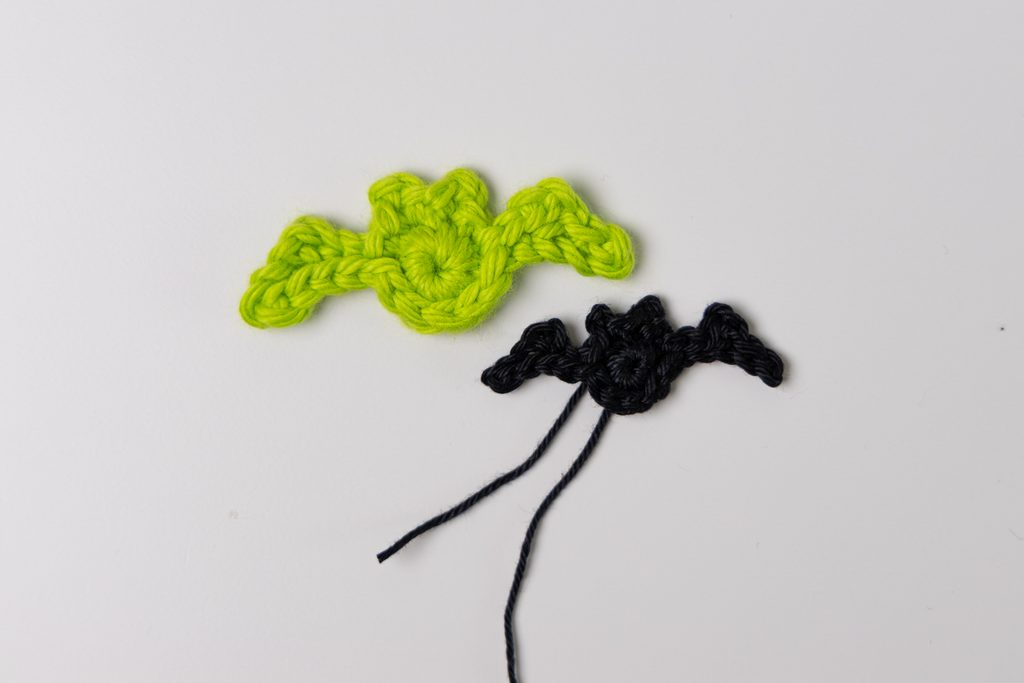
Green Bat was made with Worsted (#4) Cotton, Black Bat was made with Super Fine (#1) Cotton
Begin with a Magic Ring.
Round 1: Sc 8 into the ring, sl st to first sc to join. [8 sc]
Round 2: {(sl st, ch 2, sl st)} rep 2 times, sl st, ch 7. Sl st in 2nd ch from hook, sl st in next ch, sk 2, sl st 2, sl st to body (where ch 7 started), sl st 5, ch 5. Sl st in 2nd ch from hook, sl st in next ch, ch 2, sl st 2, sl st to body (where ch 5 started).
Butterfly
any yarn weight
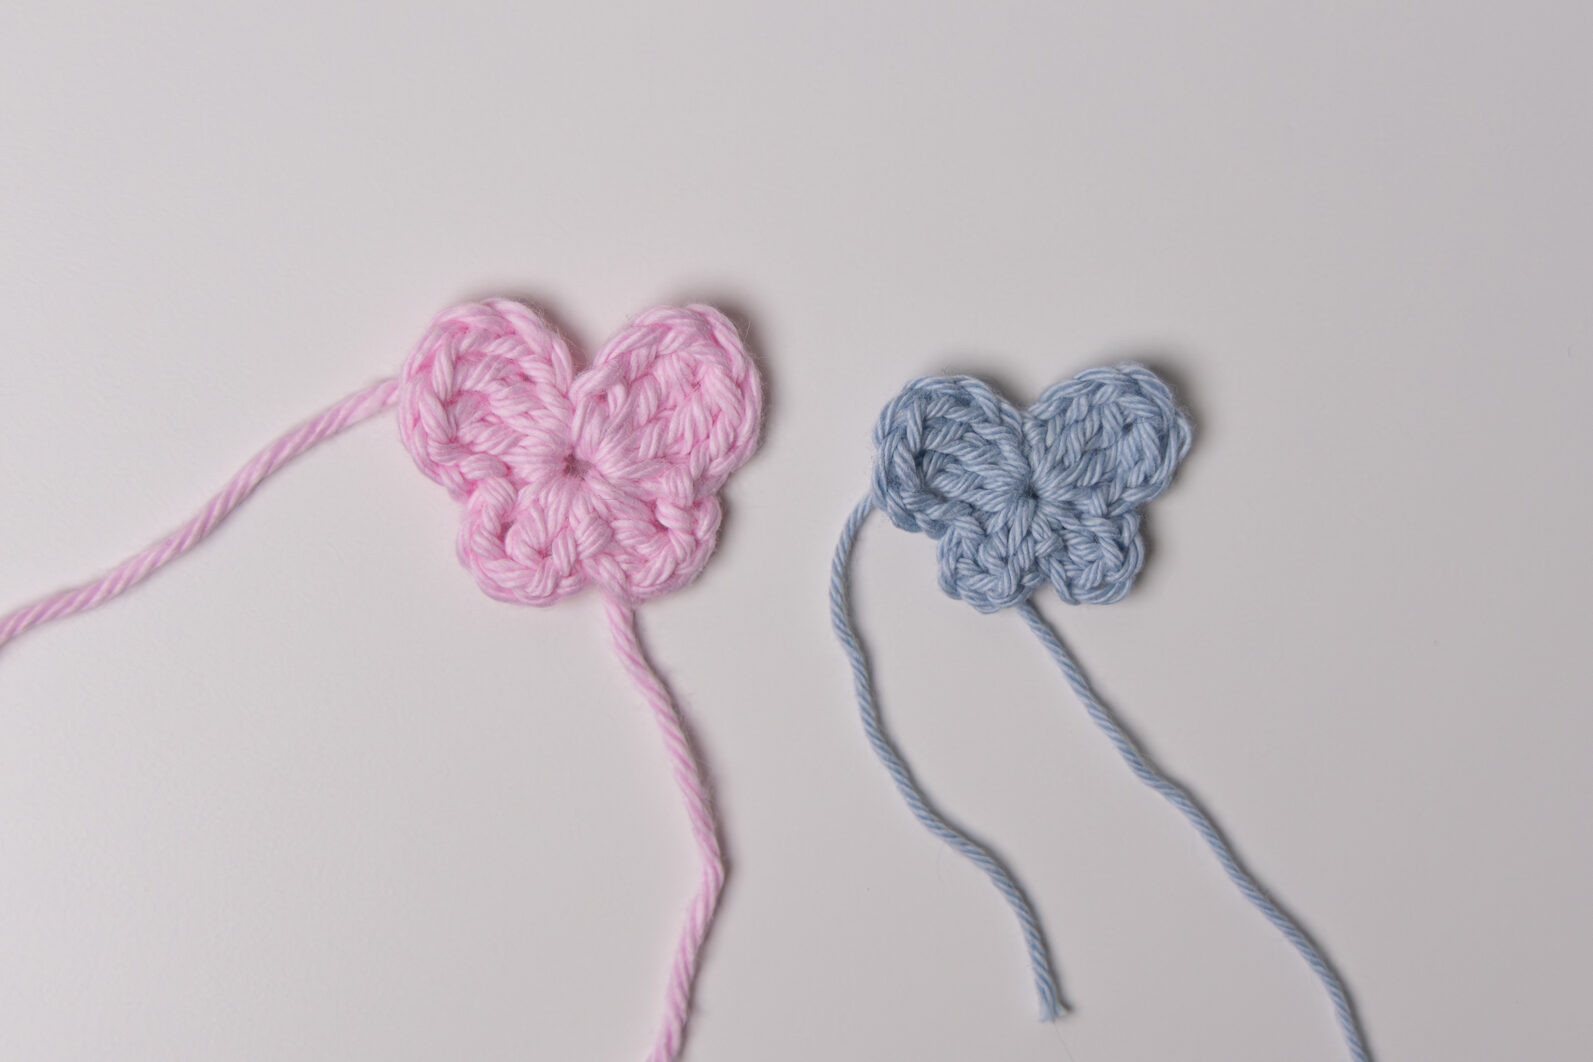
Pink Butterfly was made with Worsted (#4) Cotton, Blue Butterfly was made with Super Fine (#1) Cotton
Begin with a Magic Ring.
Round 1: Ch 3, tr 2, ch 2, sc, ch 2, dc, ch 2, sl st, ch 2, dc, ch 2, sc, ch 2, tr 2, ch 3, sl st into the ring.
Glasses
#1, #2, or #3 yarn weight recommended
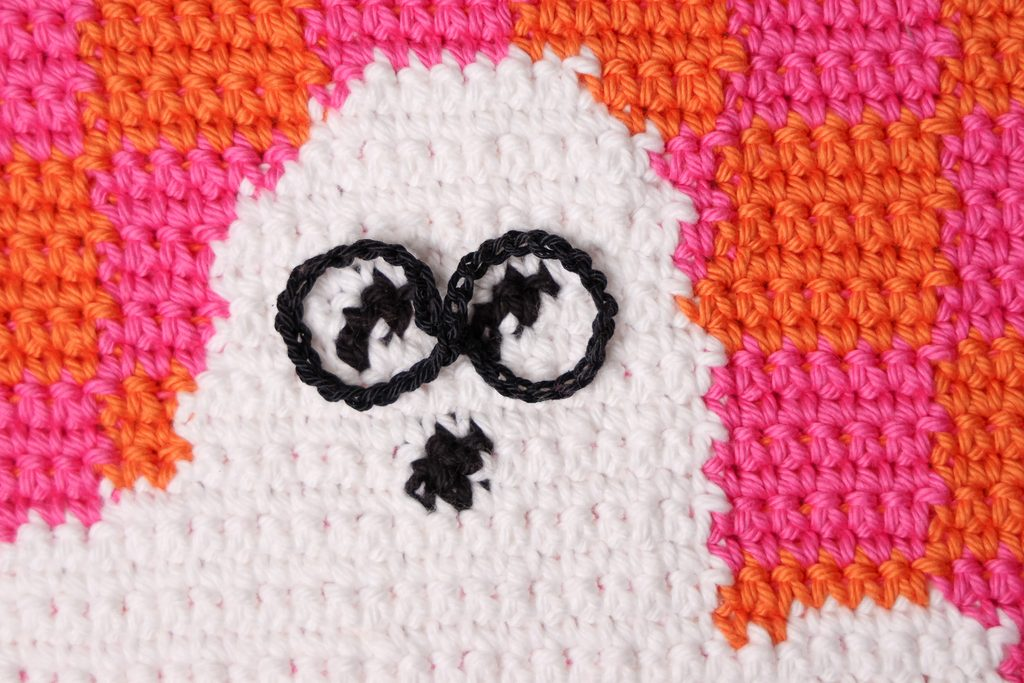
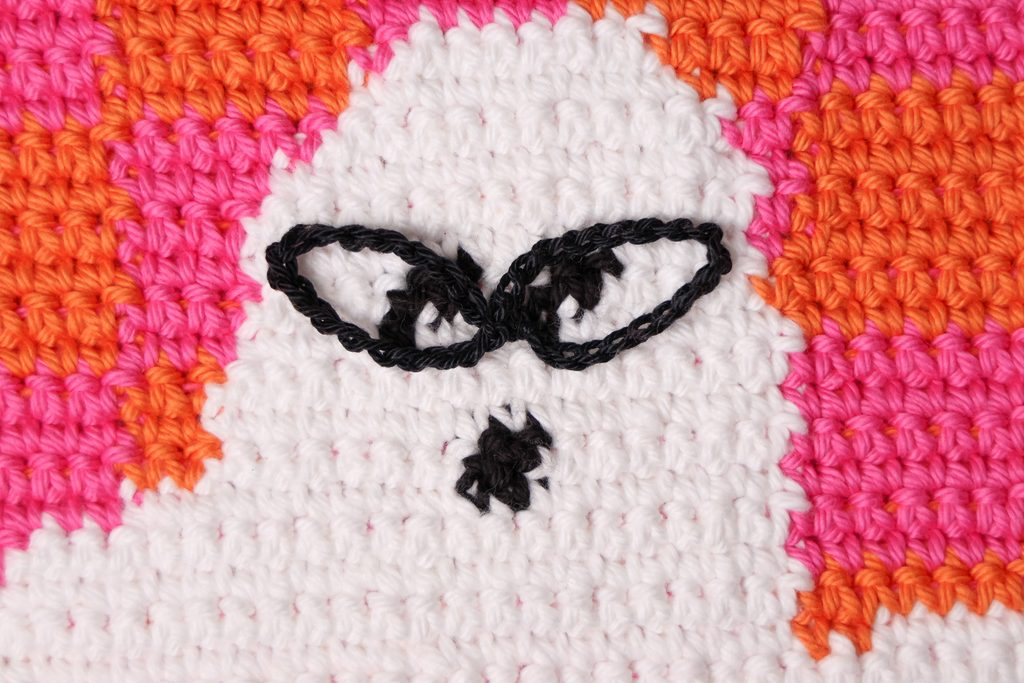
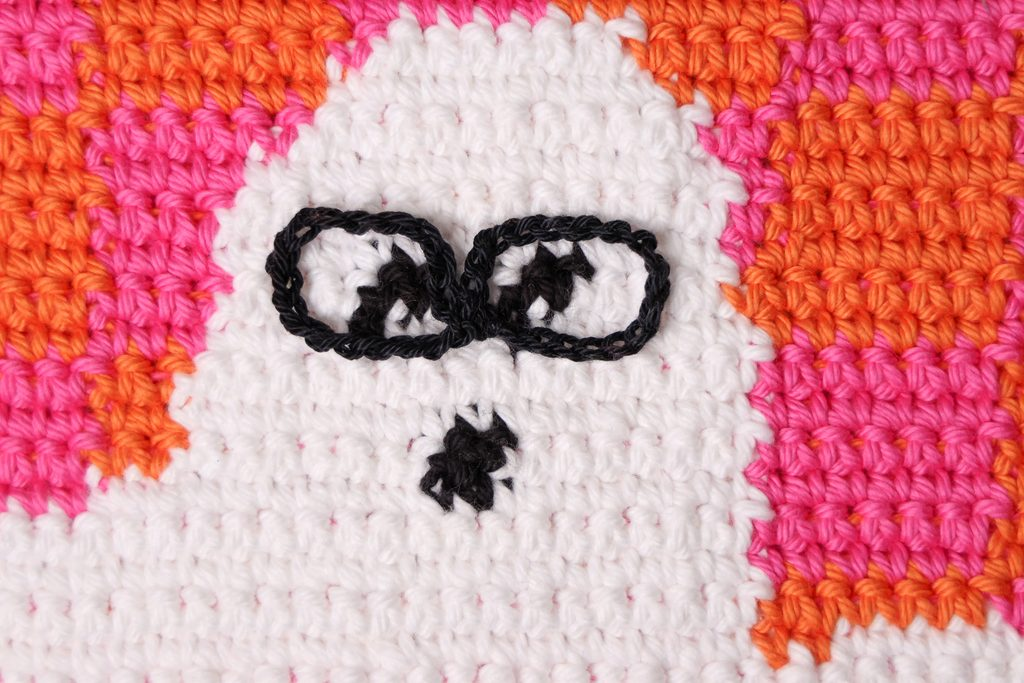
Ch 30-36, create a figure 8, and shape.
Purse
#1-#3 yarn weight recommended
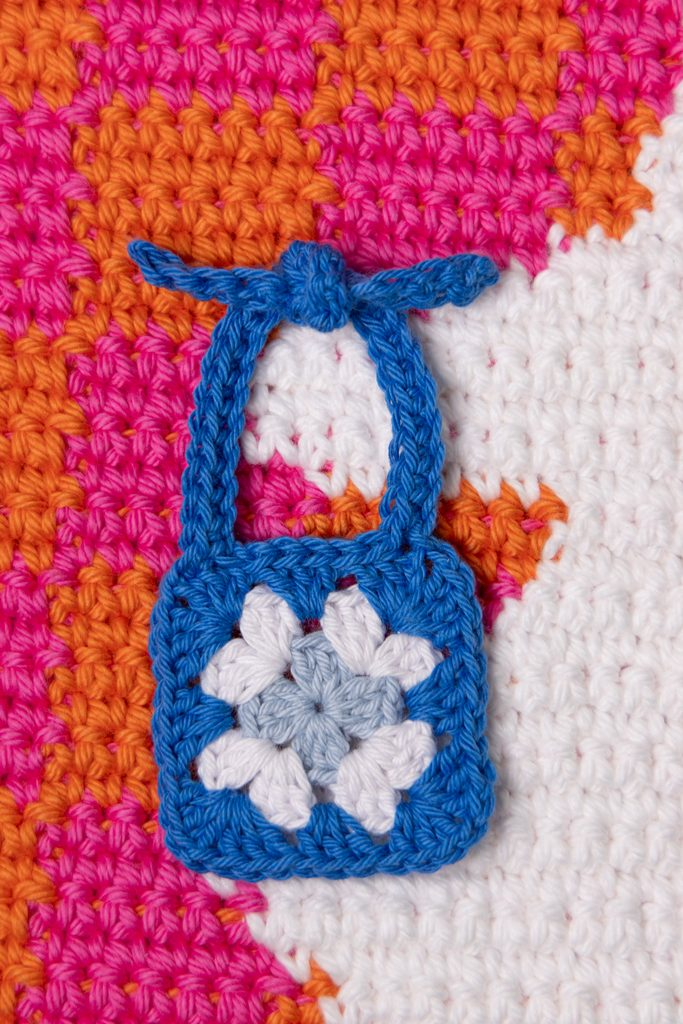
cluster = 3 dc
With Color A, make a Magic Ring.
Round 1: Ch 3 (counts as a dc), 2 dc, ch 1, {3 dc, ch 1} rep 3 times in the ring, sl st to top of ch 3 to join. Cut yarn and fasten off. [12 dc]
Round 2: Attach Color B with a sl st in any ch 1 sp. Ch 3 (counts as a dc), 2 dc in same ch 1 sp, {(3 dc, ch 1, 3 dc) in next ch 1 sp} rep 3 times, 3 dc in first ch 1 sp, ch 1, sl st to top of ch 3 to join. Cut yarn and fasten off. [24 dc]
Round 3: Attach Color C with a sl st in any ch 1 sp. Ch 3 (counts as a dc), 2 dc in same ch 1 sp, {3 dc in sp between clusters, (3 dc, ch 1, 3 dc) in next ch 1 sp} rep 3 times, 3 dc in sp between clusters, 3 dc in first ch 1 sp, ch 1, sl st to top of ch 3 to join. [36 dc]
Round 4: Ch 18. Beginning in 2nd ch from hook, sc 17, sl st to next dc, sl st 6, ch 18. Beginning in 2nd ch from hook, sc 17, sl st to next dc.
Tie Round 4 chains in a knot at the top.
For a smaller bag, substitute the dc sts with hdc sts.
Bow tie (blue)
any yarn weight
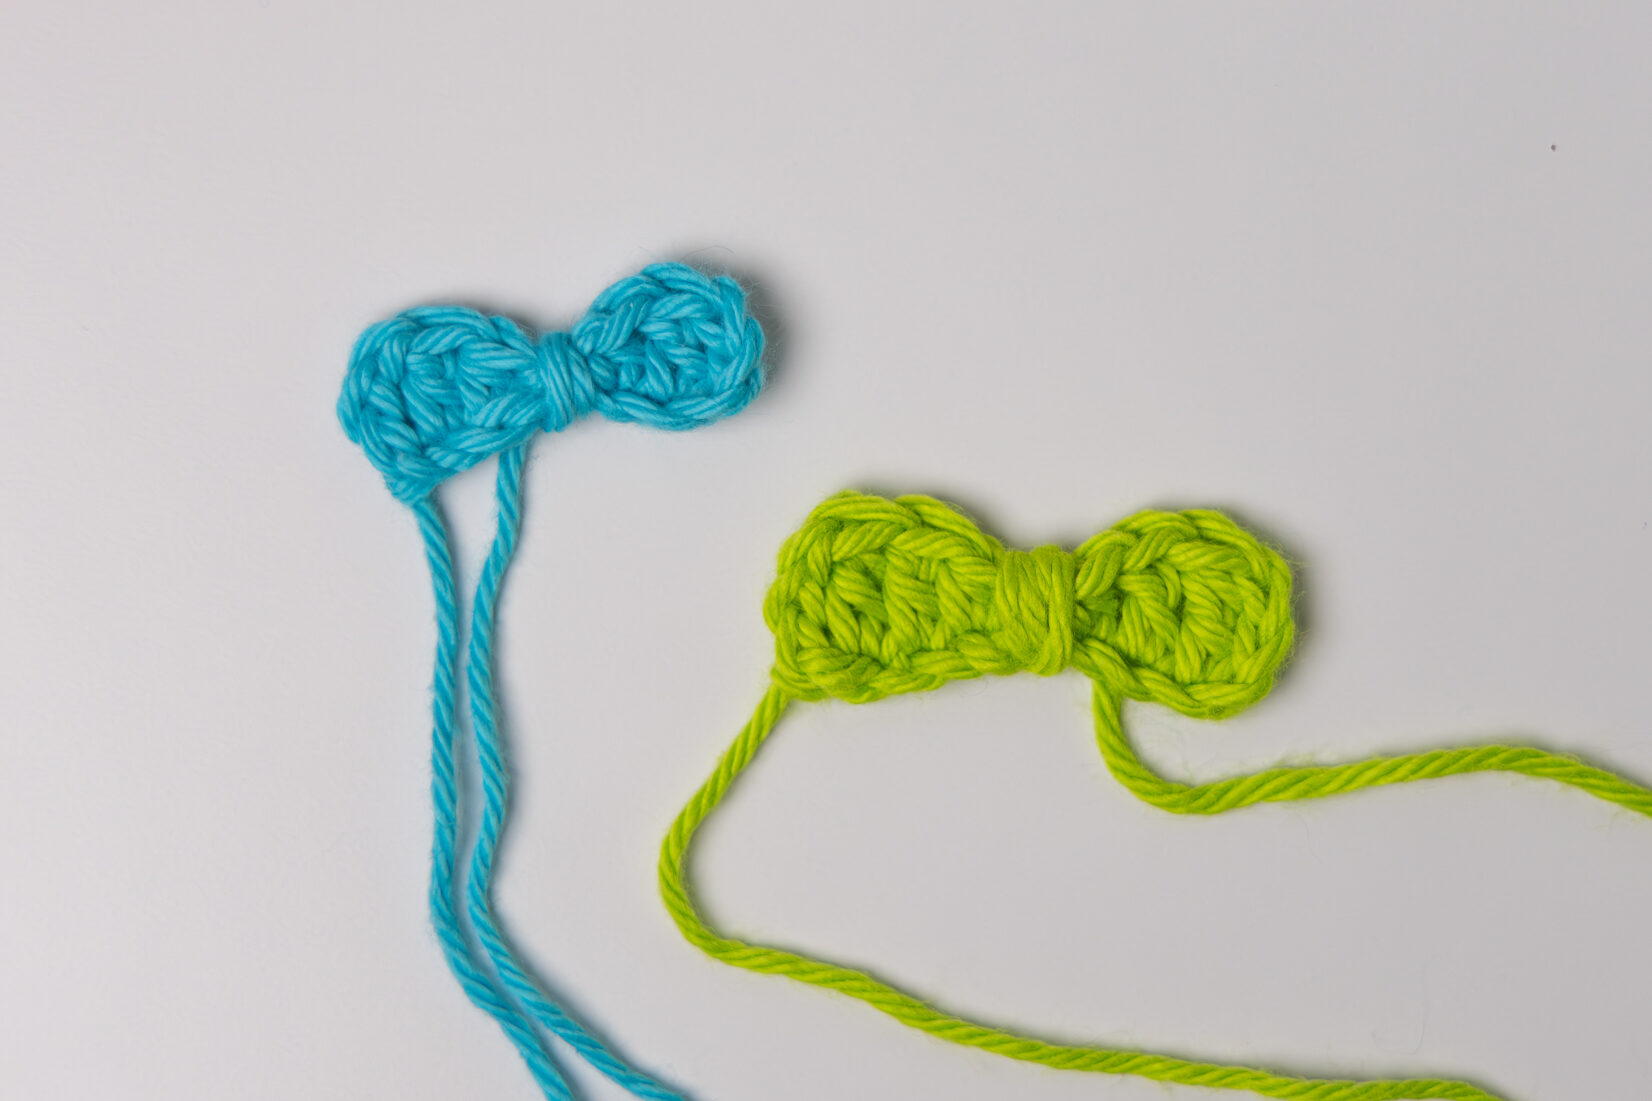
Ch 9*, dc in 4th ch from hook, hdc, sl st, hdc, dc, ch 2, sl st in last ch. Fasten off.
Cut an 8″ piece of yarn, tie a knot around the center of the bowtie and use the tails to attach the bow to the ghost.
*To avoid having a bump, we recommend starting without a slipknot (just twist, pinch, and begin chaining), or removing the slip knot once you’re done.
Bow (green)
any yarn weight
Ch 11, tr in 4th ch from hook, dc, hdc, sl st, hdc, dc, tr, ch 2, sl st in last ch. Fasten off.
Cut an 8″ piece of yarn, tie a knot around the center of the bow and use the tails to attach the bow to the ghost.
Balloons
any yarn weight
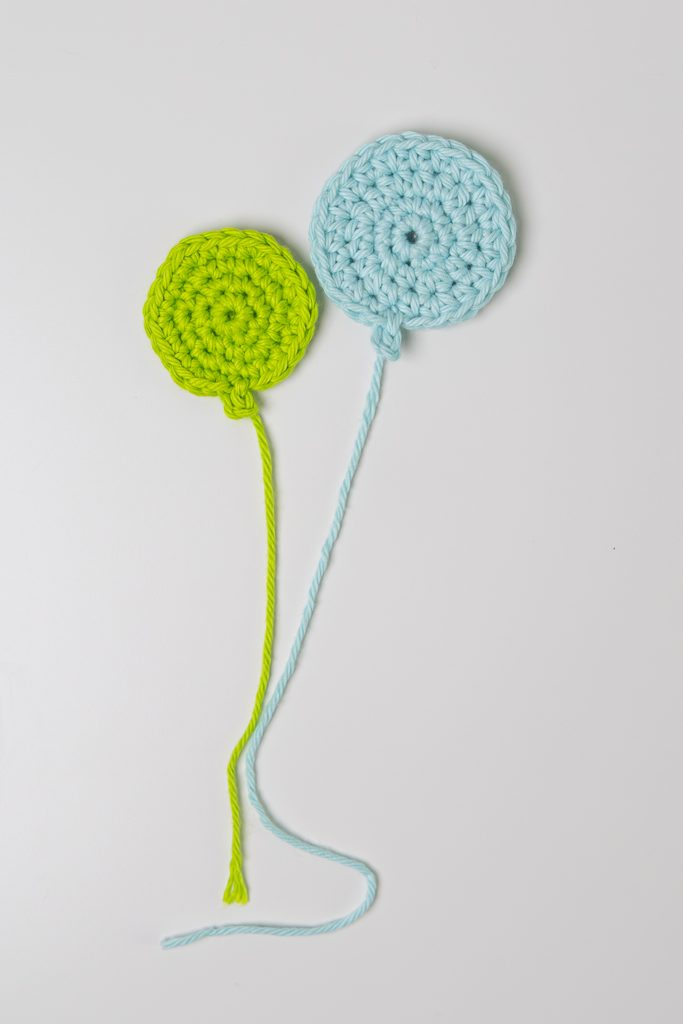
Work in a continuous round – do not join or chain.
Small Balloon
Make a Magic Ring.
Round 1: Sc 6 in the ring. [6 sc]
Round 2: {2 sc} rep 6 times. [12 sc]
Round 3: {sc, 2 sc} rep 6 times. [18 sc]
Round 4: {sc 2, 2 sc} rep 6 times.
Round 5: Sl st, ch 3, sl st in 3rd ch from hook, sl st to next st. Pull up a 6″ tail for the balloon string. [2 sl sts]
Medium Balloon
Make a Magic Ring.
Round 1: Sc 6 in the ring. [6 sc]
Round 2: {2 sc} rep 6 times. [12 sc]
Round 3: {hdc, 2 hdc} rep 6 times. [18 hdc]
Round 4: {hdc 2, 2 hdc} rep 6 times. [24 hdc]
Round 5: Sc, sl st, ch 3, sl st in 3rd ch from hook, sl st to next st. Pull up a 6″ tail for the balloon string. [3 sts]
Hanging Your Project
If you went with Option A and made loops across the top, simply slide your wooden dowel through the loops.
If you went with Option B, cut a piece of Color A yarn approximately 3 times the width of your project. Use a tapestry needle to whipstitch the yarn over the dowel/branch and back under into the 1st stitch on the top of the wall hanging. Repeat for each remaining stitch along the top, fasten off and weave in your ends.
With Color A, ch 80 or so. Tie & knot the starting and ending tails to each end of the dowel.
Or, attach a 20″+ (51 cm+) strand of Color A to each end of the dowel. Secure the strand with a knot at each end.
Want more fall projects? Check out our Favorite Spooky Halloween Projects post OR our other patterns & tutorials:
Alpine Pumpkin
No responses yet