
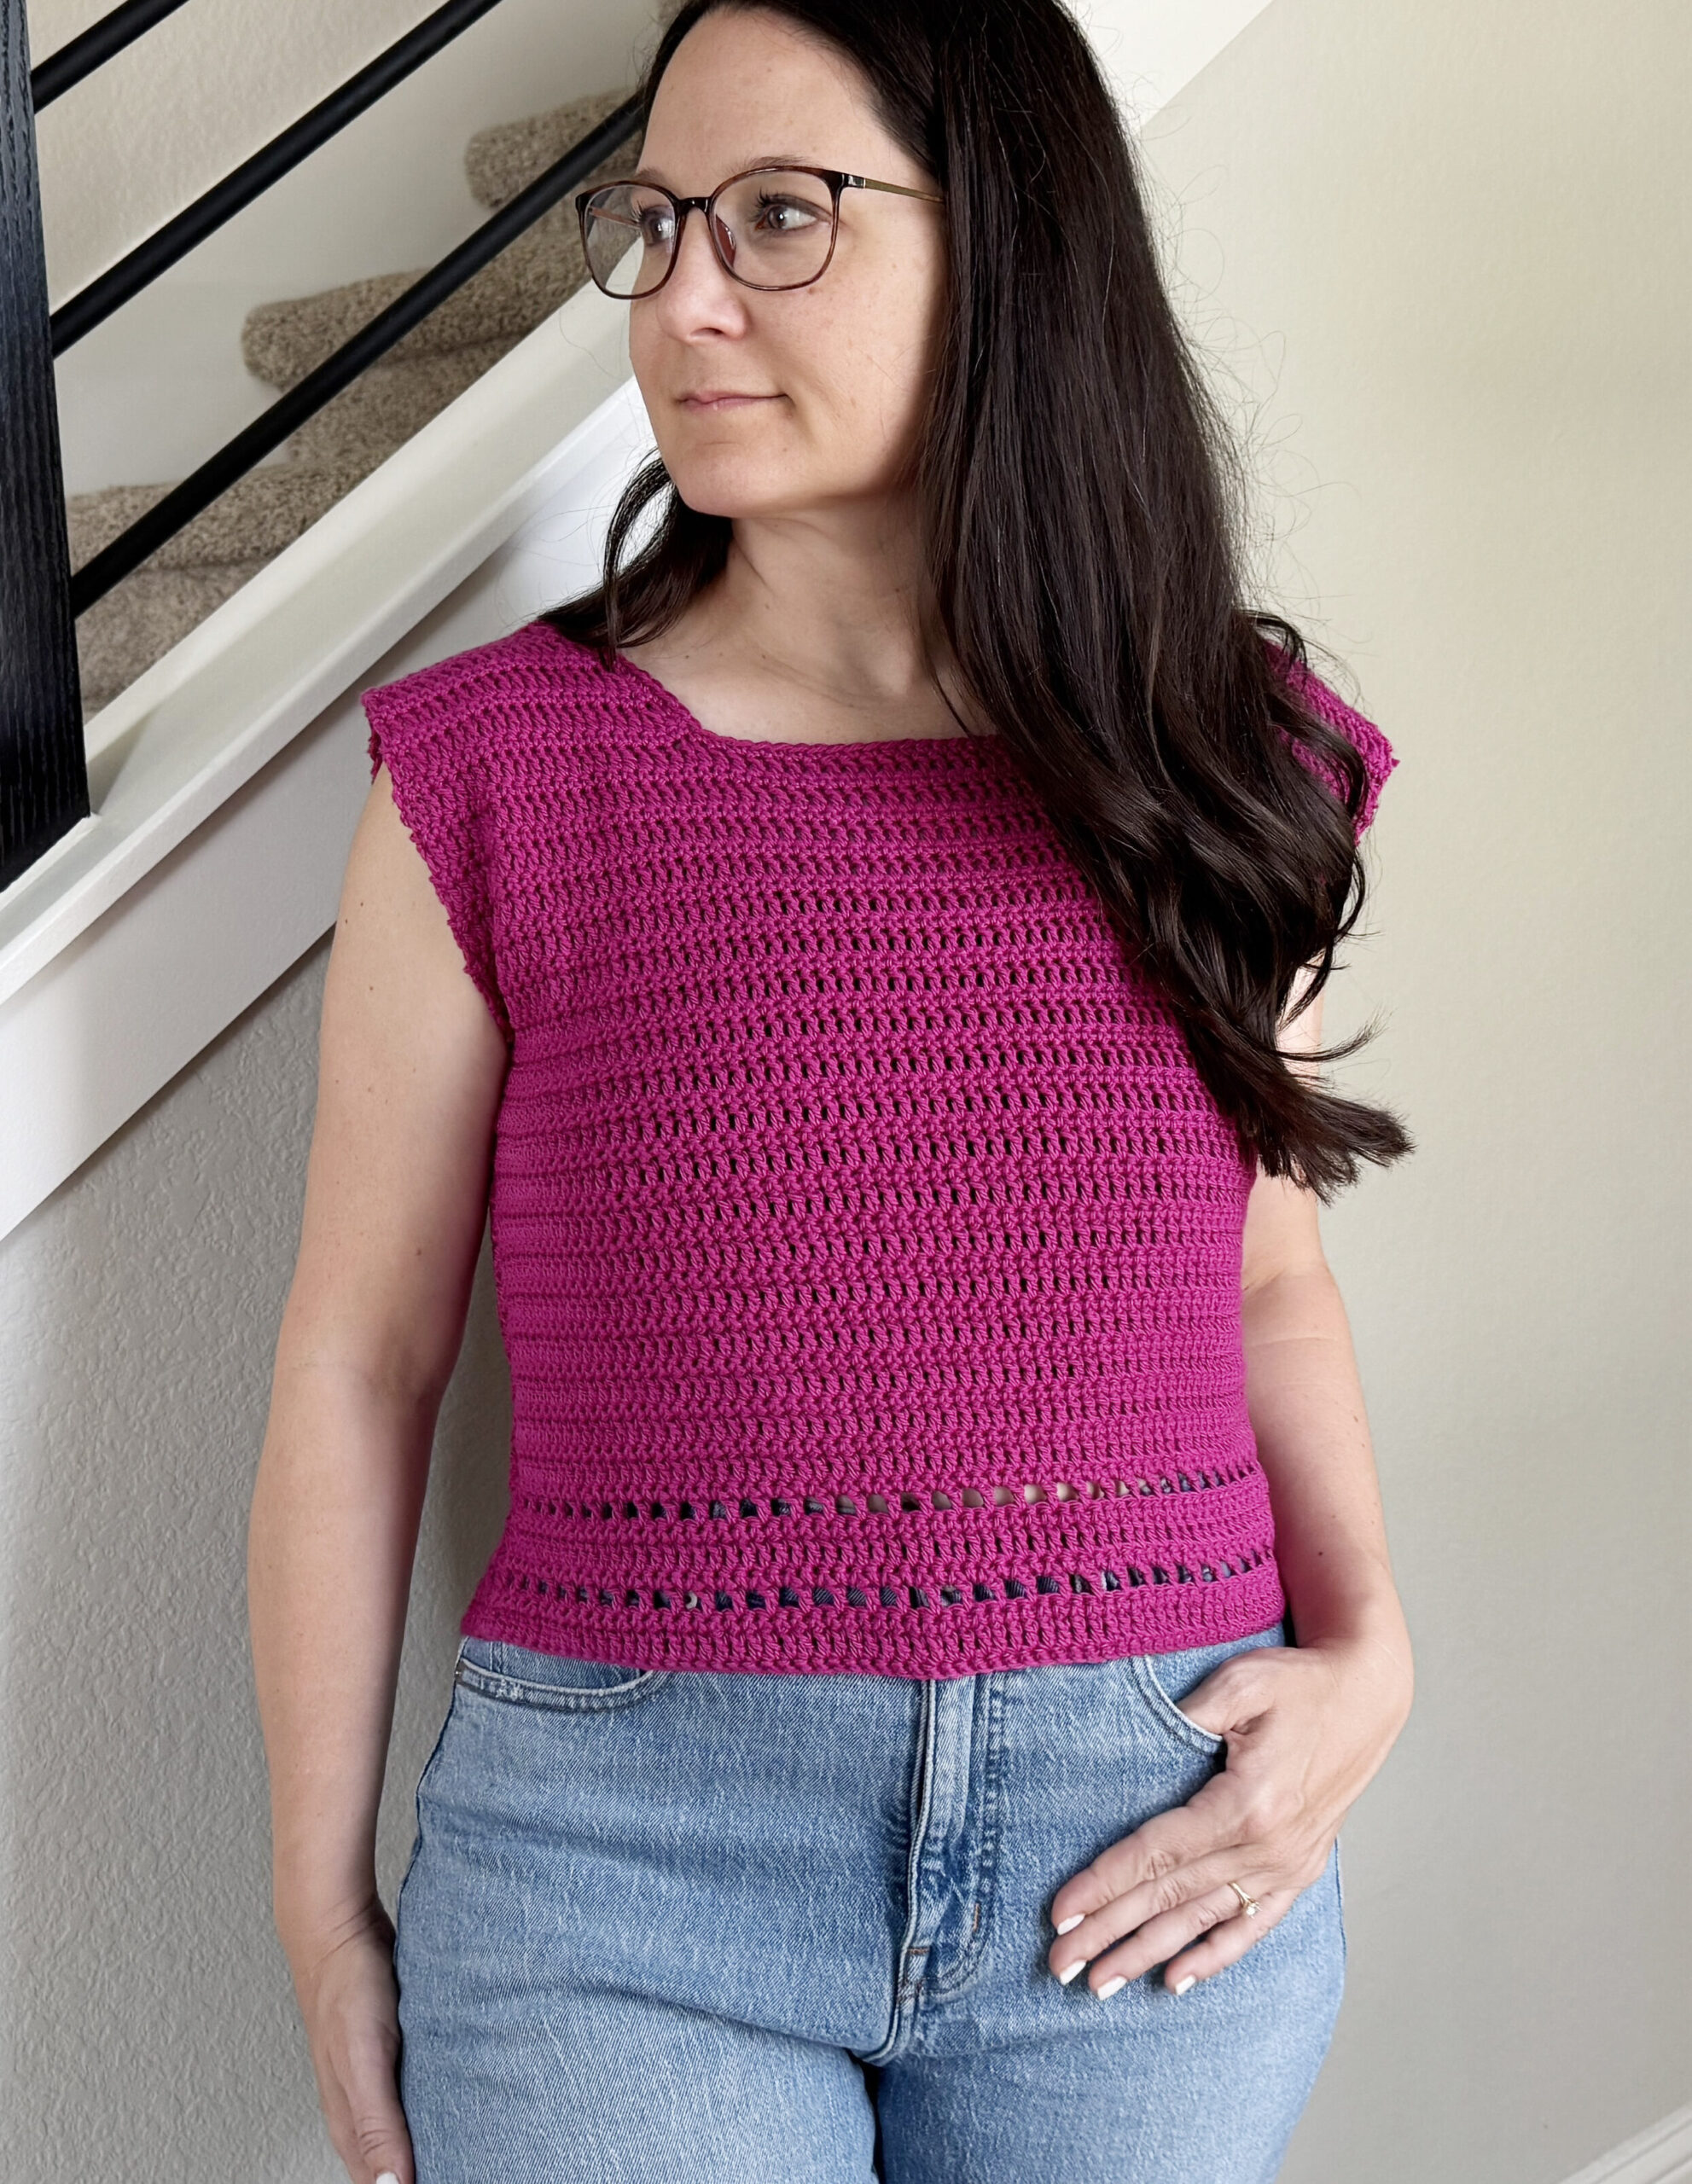
If you’ve been wanting to try crocheting your first garment, The Classic Tee is a great place to start. Designed with a timeless, easy-to-wear silhouette, this tee keeps the construction simple while still giving you a beautiful finished piece to include in your everyday collection.
The top is made of two panels, alternating single crochet and double crochet rows, making it a great project for beginners who are ready to move beyond smaller crochet projects. The pattern uses only minor shaping around the neckline, so you can focus on getting comfortable with garment construction without being overwhelmed by complicated shaping or techniques.
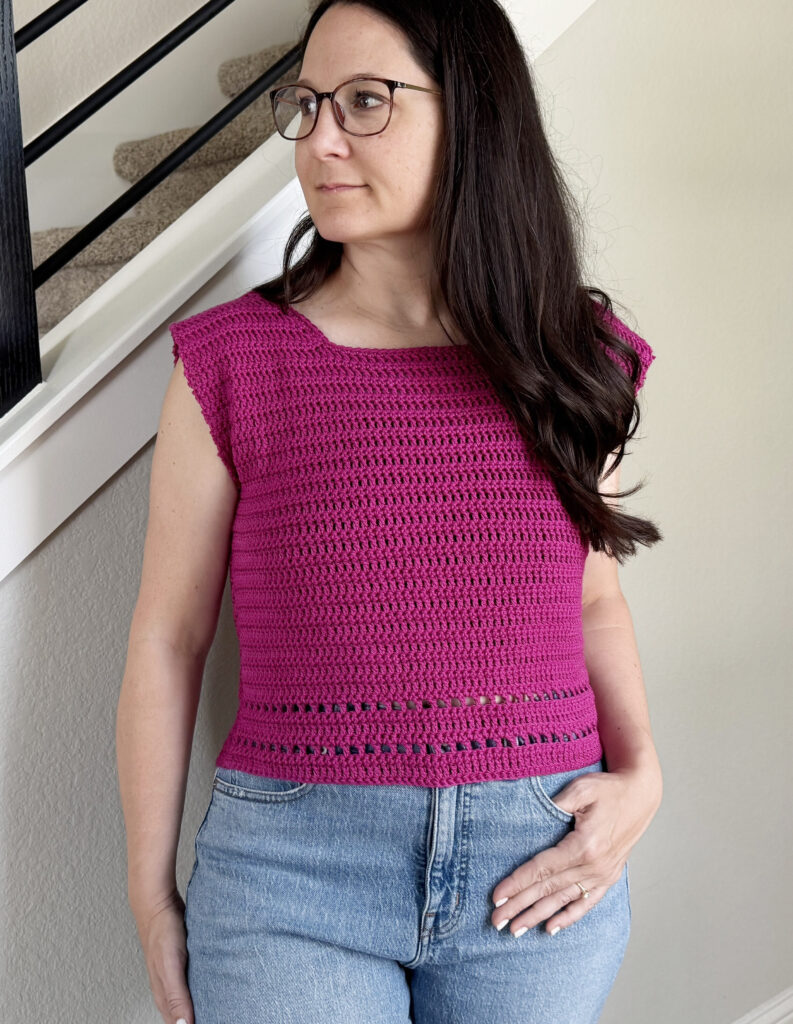
It’s made of two identical panels that are joined together with a whipstitch at the shoulders and at the sides. The sleeves are more of a cap sleeve and meant to hang over the shoulders slightly.
It’s a made-to-measure pattern, so you’ll use your own body measurements to determine your stitch count and row count.
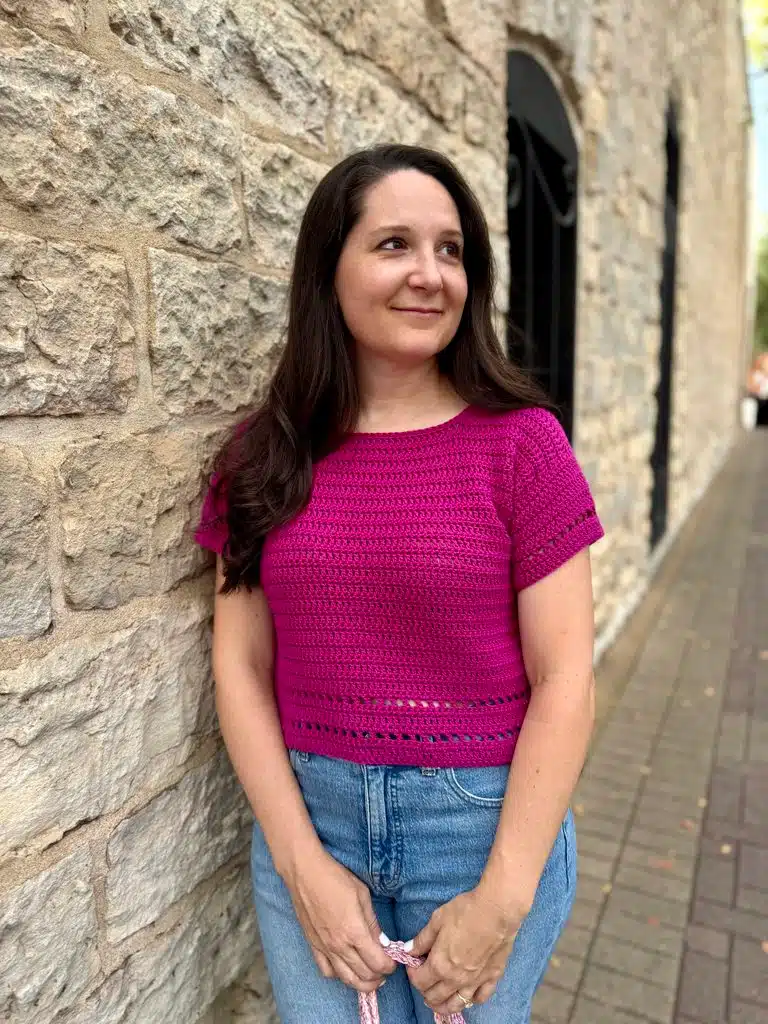
If you’d rather have a size-specific written pattern, The Classic Tee pattern is available on Etsy and Ravelry. It includes sizes XS-5X and all of the stitch counts, row counts, yarn amounts, and the gauge. This written pattern also includes instructions for added sleeves.
This post may contain affiliate links. We only recommend products we would use ourselves and all opinions expressed here are our own. Read our full privacy policy and disclosures here.
Yarn We Used
This is a made-to-measure pattern, which means you can use virtually any yarn and hook size to create a tee that fits you just the way you want. For a similar look and drape to our sample, we recommend using a size 3 weight yarn with a 5.5 mm crochet hook.
For this design, we chose Premier Cotton Sprout DK, a lightweight DK (#3) cotton yarn that gives the top a soft drape and an airy feel. We knew we didn’t want anything heavy or bulky for this particular project and this yarn has been a favorite of ours over the years.
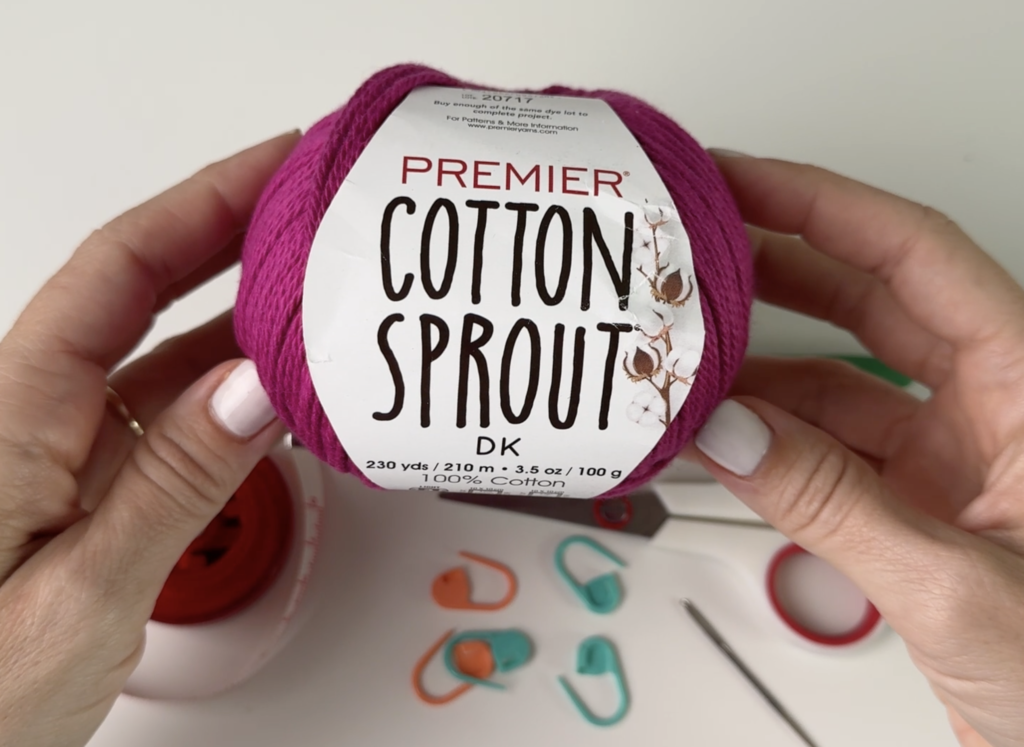
Cotton Sprout DK recommends using a US H/7 (5 mm) hook, but since we wanted a little extra drape, we’re going to use a US I/8 (5.5 mm) hook instead.
If you’d like to test out a different yarn and hook size, consider making a swatch first to make sure you like the fabric! Just follow the beginning of the pattern and chain 20 for your starting chain.
The free made-to-measure written pattern for the Classic Tee is available below.
You can also follow along with our YouTube tutorial that goes through how to take body measurements, crochet the swatch, work the neckline decreases, and seam it together, so you can learn any new-to-you techniques and see how it all comes together.
If you’d like the size-specific written pattern, more photos, and expanded instructions, the complete paid pattern for The Classic Tee is available on Etsy. It comes in 9 sizes – Adult Sizes XS, S, M, L, XL, 2X, 3X, 4X, 5X. Yarn amounts and stitch counts are included.
Materials Needed
- DK (#3), Premier Cotton Sprout DK (100% Cotton), 230 yards (210 m) per 100 g (3.5 oz) skein
- Magenta
- Other yarns we recommend: Lion Brand 24/7 Cotton DK, Lion Brand Coboo, Premier Hipster Cotton, and Knit Picks Animation
- US I/8 (5.5 mm) hook – we love Clover Amour hooks
- scissors
- stitch markers – we love these
- tapestry needle
- measuring tape
Abbreviations
US terms
- ch(s): chain(s)
- ch sp(s): chain space(s)
- dc: double crochet
- dc2tog: double crochet two together
- rep: repeat
- RS: right side
- sc: single crochet
- sc2tog: single crochet two together
- sk: skip
- sl st: slip stitch
- st(s): stitch(es)
- STsc: stacked single crochet
- WS: wrong side
- yo: yarn over
Special Stitches
Double Crochet Two Together (dc2tog): {Yo, insert hook in next st, yo, pull up loop, yo, pull through 2 loops} rep 2 times, yo, pull through all 3 loops on hook.
Single Crochet Two Together (sc2tog): Insert hook into first st, yo, pull up a loop (2 loops on hook), insert hook into next st, yo, pull up a loop (3 loops on hook), yo, pull through all 3 loops on hook.
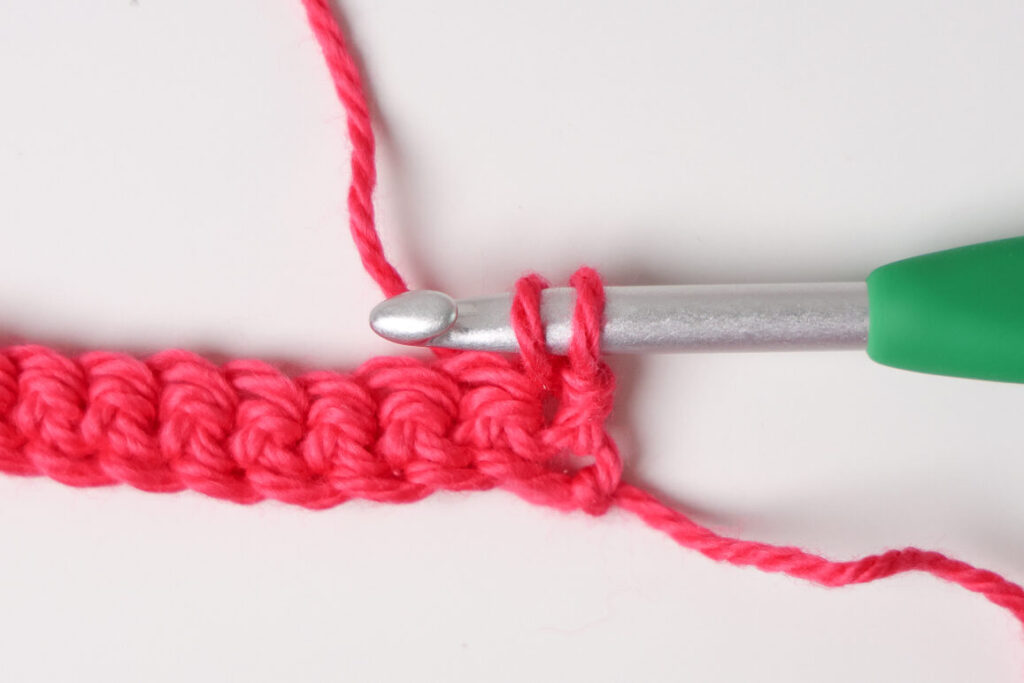
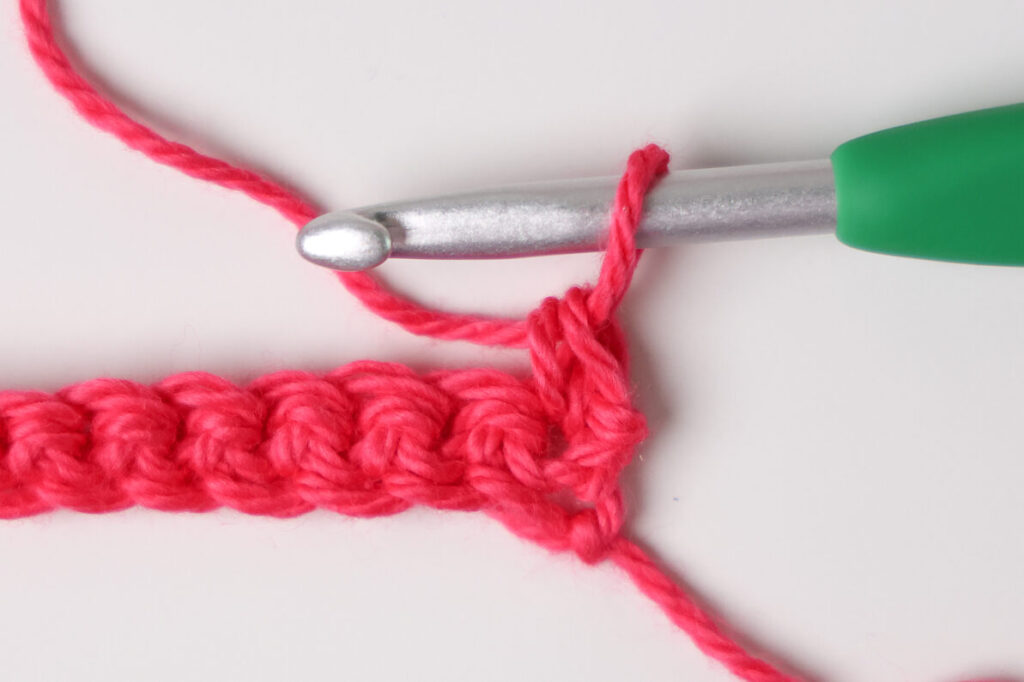
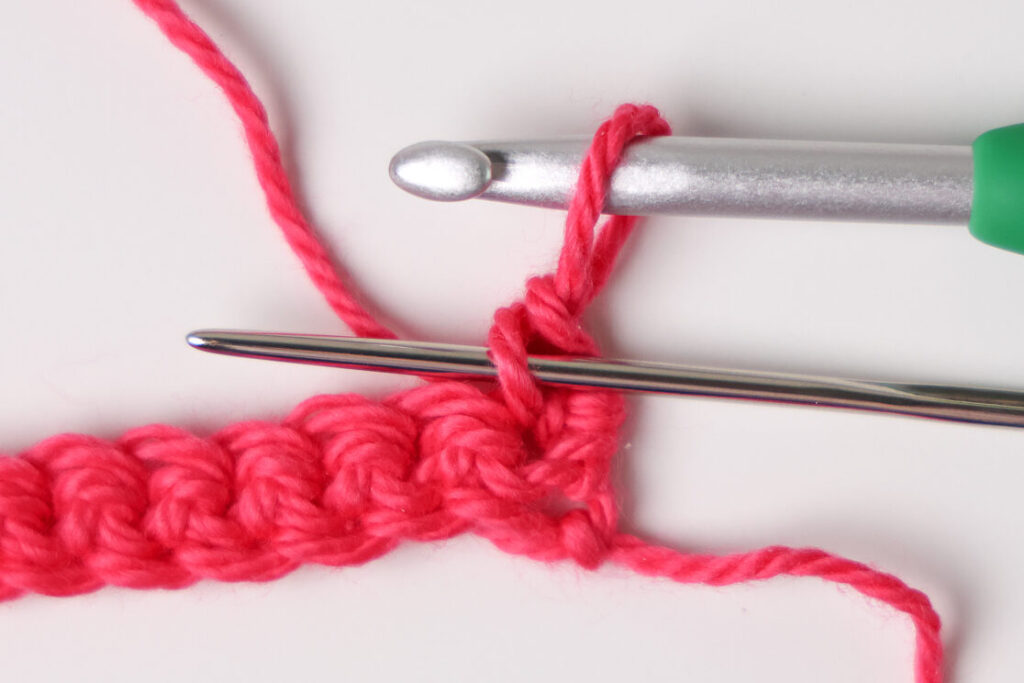
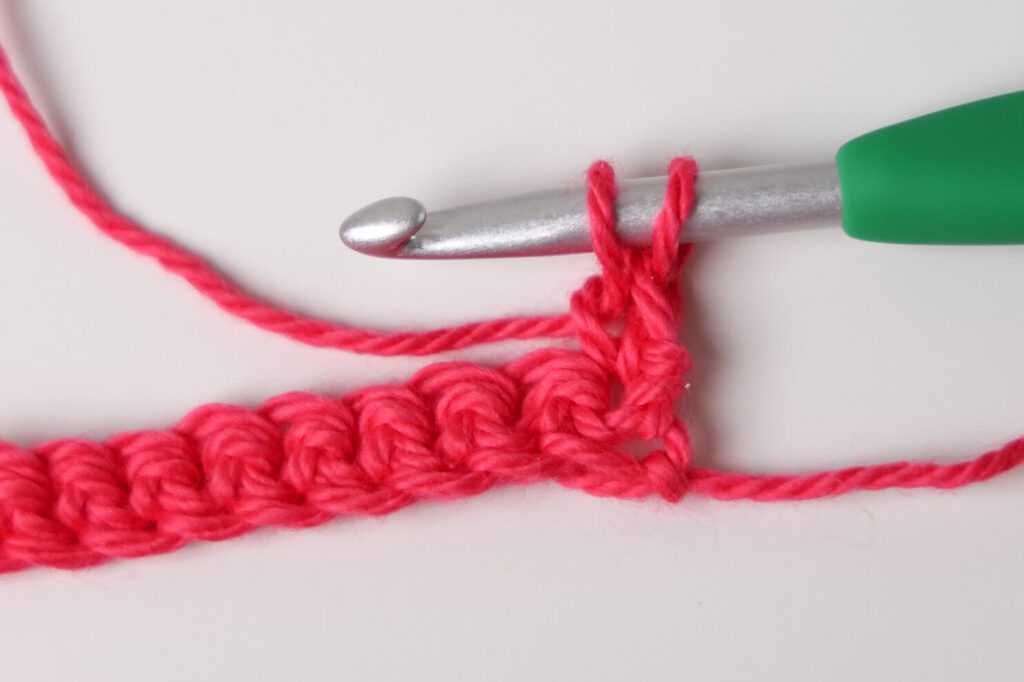
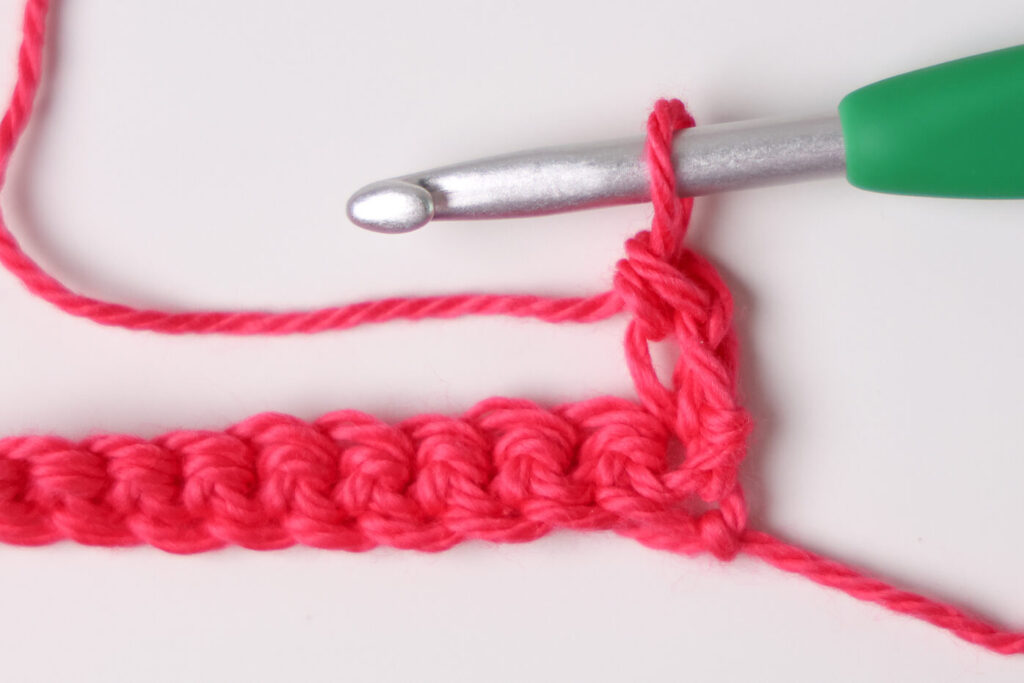
Stacked Single Crochet (STsc): At the beginning of a new row, do not chain. Instead, insert hook into first st, yo and pull up a loop (2 loops on hook), yo, pull through both loops (1 loop on hook). You’ve now made one sc in the first st. Insert your hook into the left leg (right leg if you’re left-handed) of the sc you just made, yo and pull up a loop (2 loops on hook), yo, pull through both loops to finish the st.
Note: This stitch counts as a dc and is used at the beginning of each row. It can be substituted with a ch 3 if preferred. We highly recommend marking this ch 3 so you don’t skip it!
Notes
- {xyz} = repeat these stitches a certain number of times.
- Turning Chain: STsc (or ch 3) counts as a dc at the beginning of the row. Ch 1 does not count as a stitch.
- Construction: This top is made in two identical panels which are seamed at the shoulders and at the sides.
Take Some Measurements First
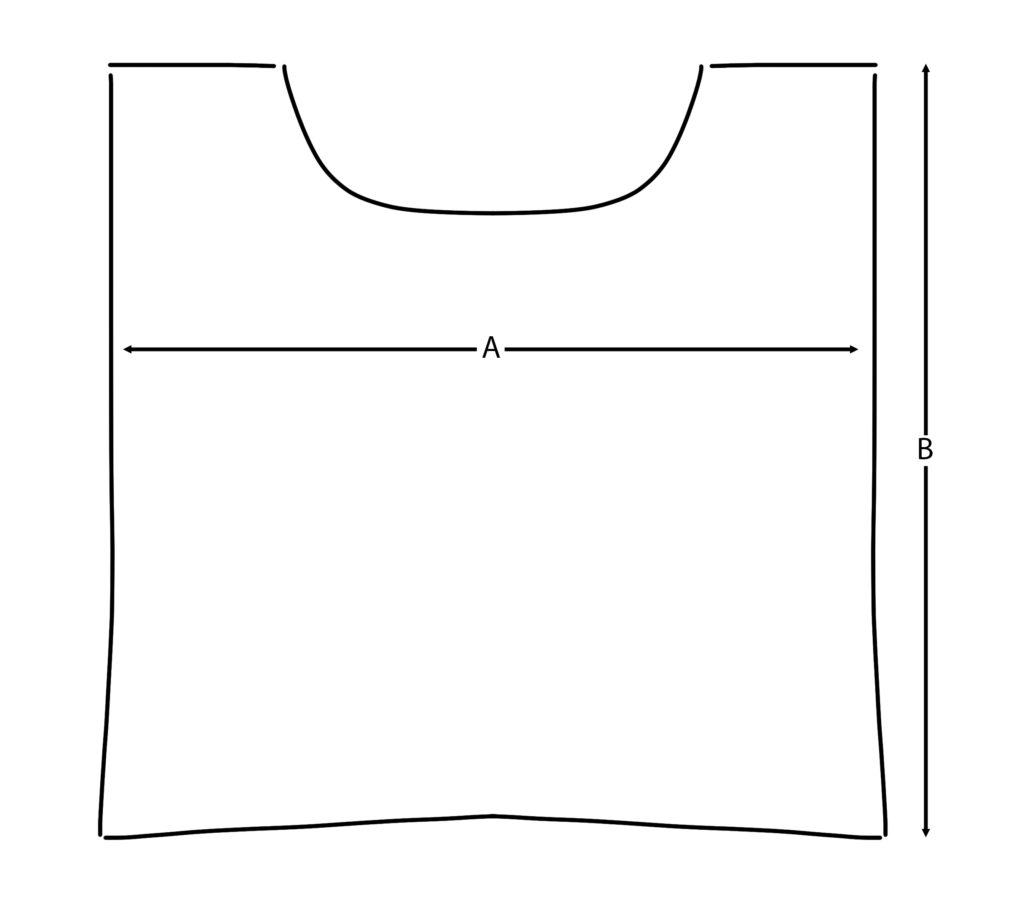
A – Desired width. For a top with 0-2″ positive ease, this measurement should be approximately 1/2 your bust measurement.
B – Desired length. Measure from the top of your shoulder down to where you want your top to hit. You can make this cropped, hit just above the hips, or extend past the hips. If your hips measurement is wider than your bust, you might want to increase your width measurement slightly and/or split at side when seaming.
Pattern
Body Panels
Make 2.
Chain until you reach your desired width. (Must be an even number of chains)
Row 1 (WS): Working into the back bumps, sc in 2nd ch from hook and each ch across, turn.
Row 2 (RS): STsc, dc in each st across, turn.
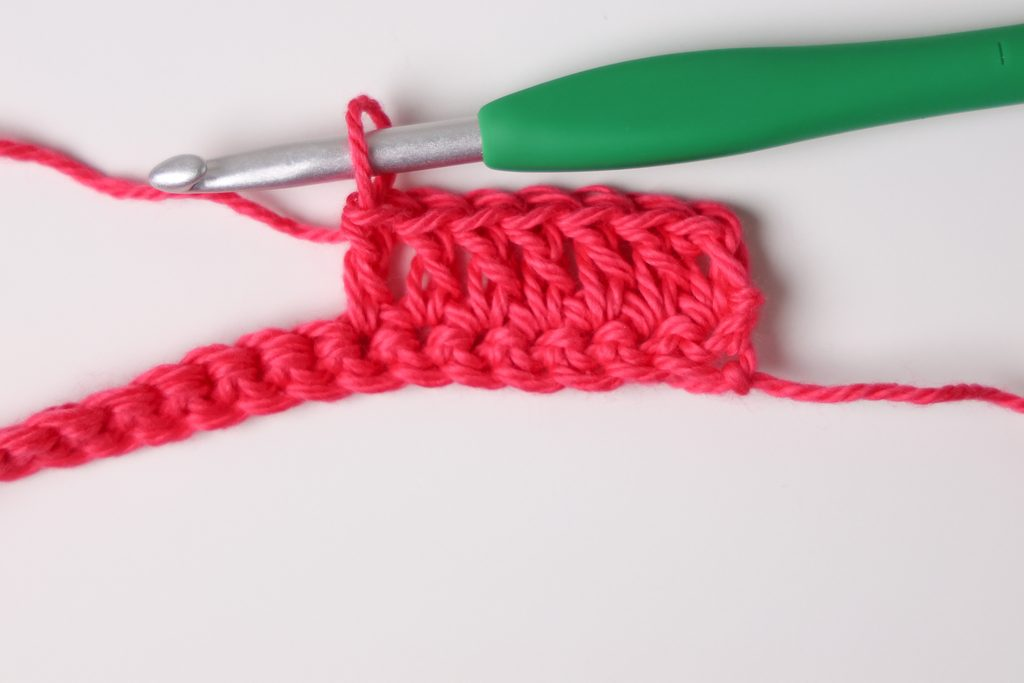
Double-check your width to make sure you are on track now and periodically as you work the body panel.
Row 3: Ch 1, sc in each st across, turn.
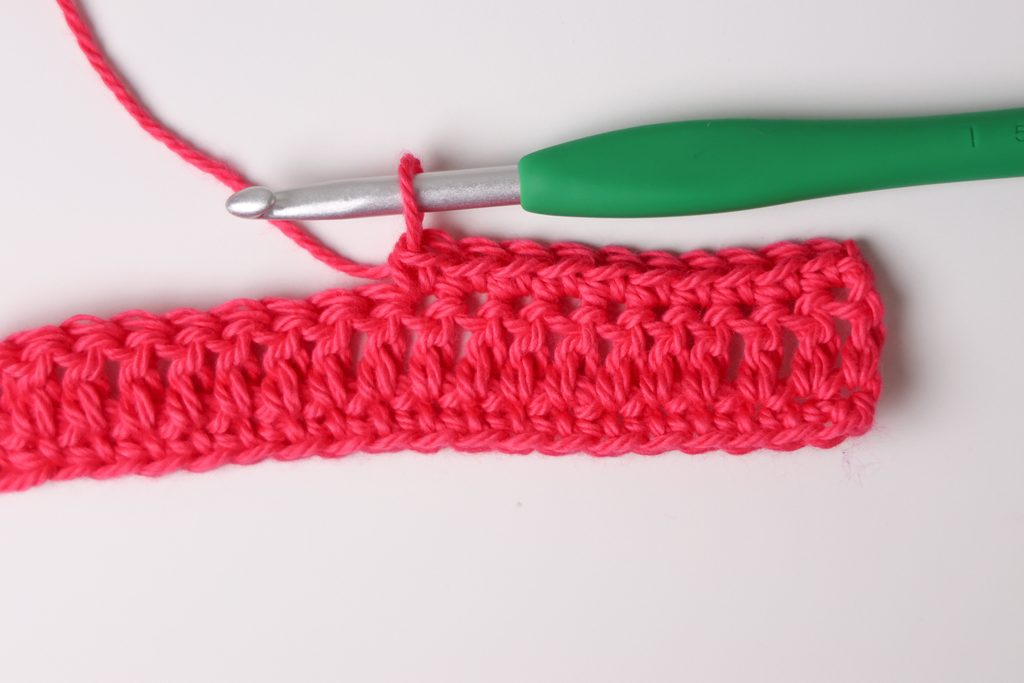
Row 4: STsc, {ch 1, sk 1, dc} rep across the row, turn.
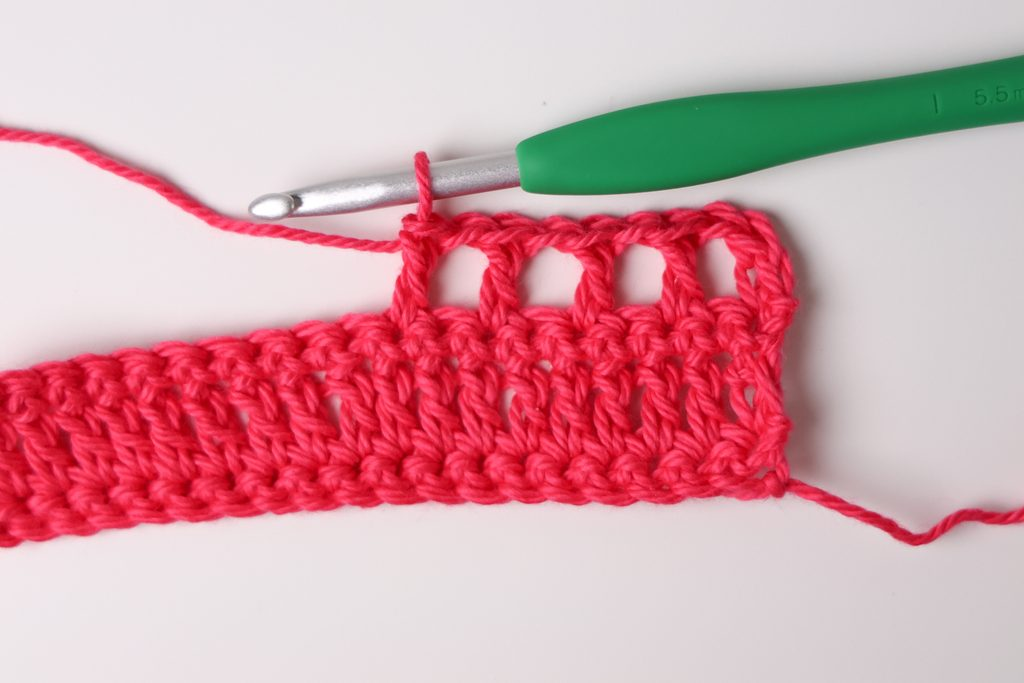
Row 5: Ch 1, sc in each st and ch sp across, turn.
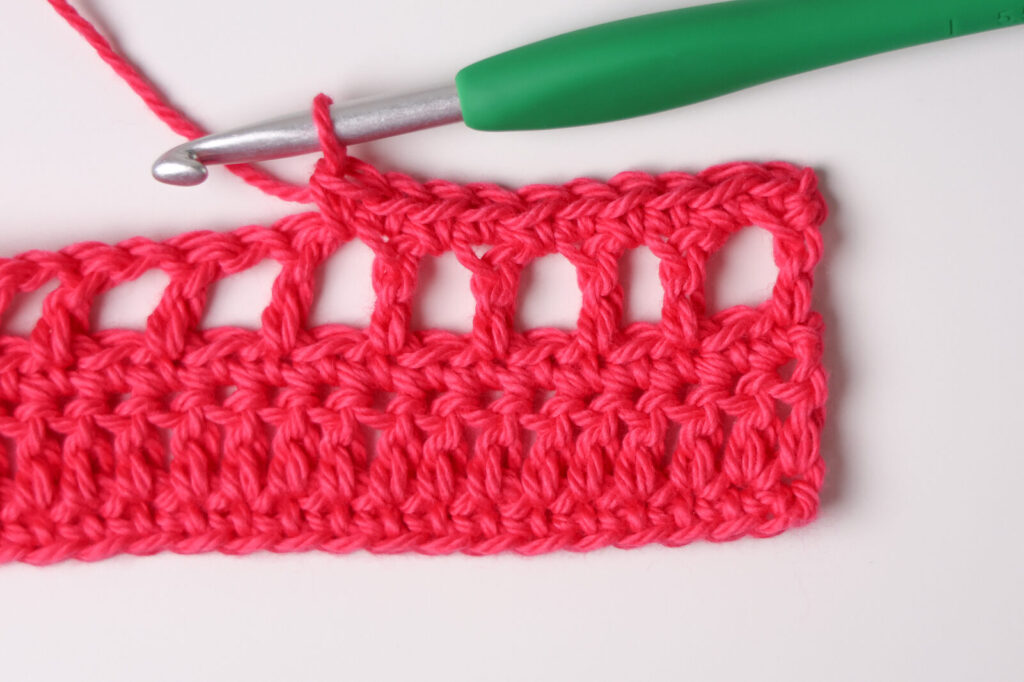
Rows 6-9: Repeat Rows 2-5.
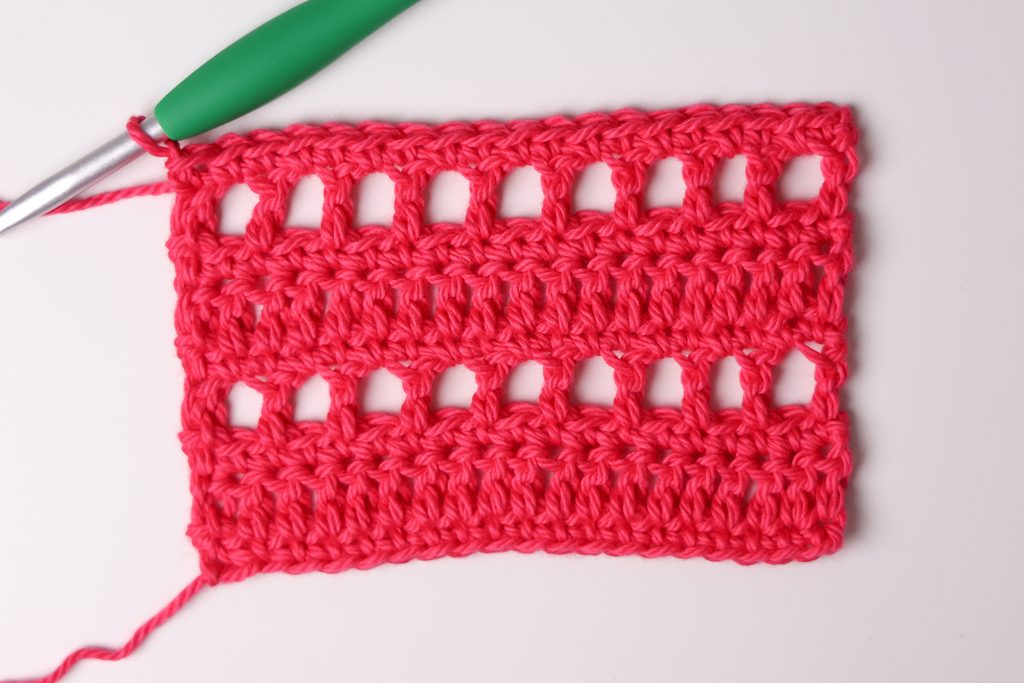
Rows 10-Neckline: Repeat Rows 2 & 3 until your project reaches where you want your neckline to be, ending on a Row 2 repeat.
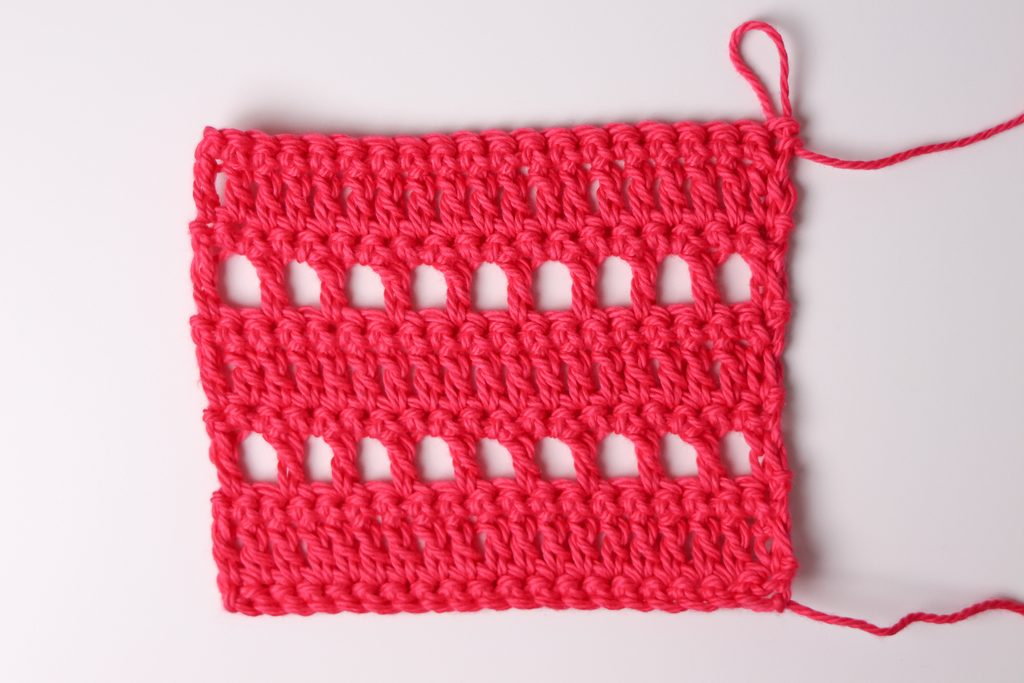
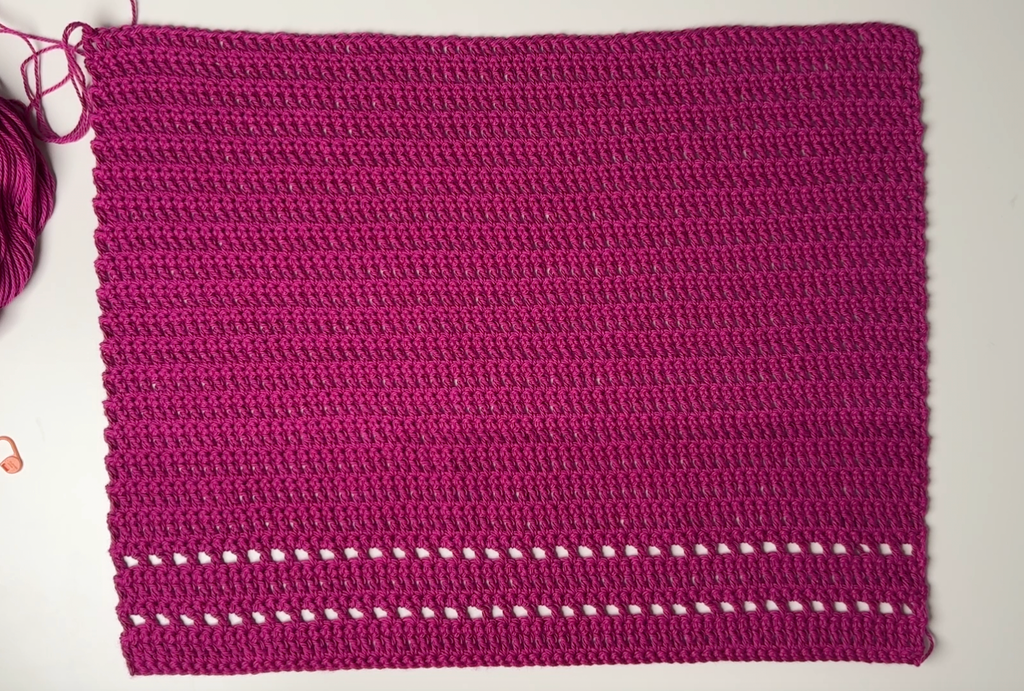
Do not cut yarn.
Measure the length of your body panel at this point and subtract that from your desired length.
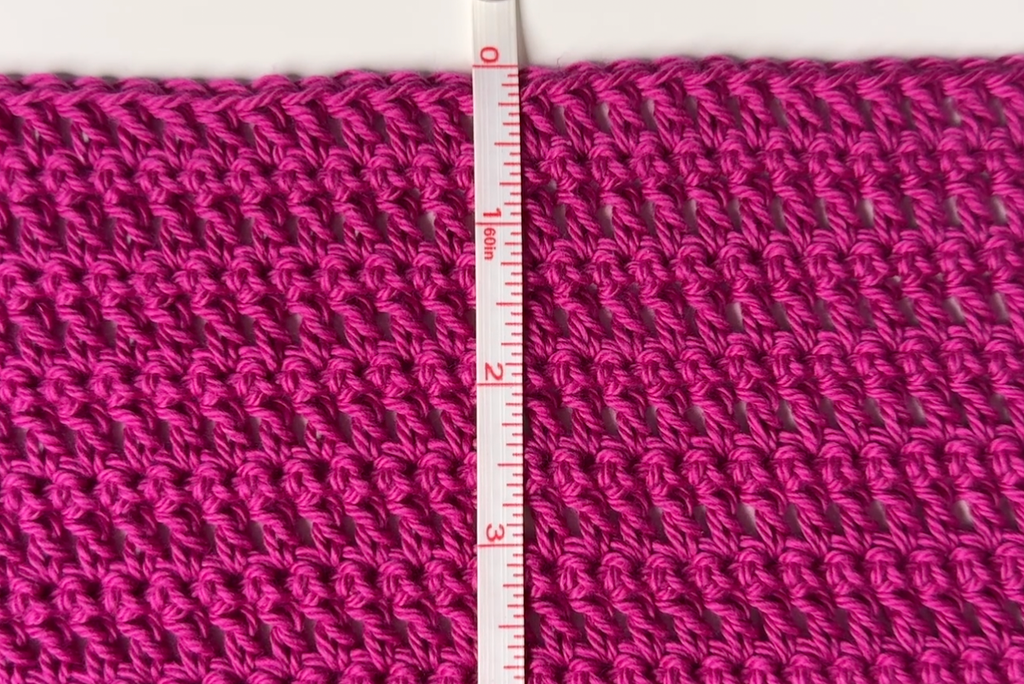
Then, use your body panel as a gauge to figure out how many rows you’ll need to reach your desired length. For example: my body panel measured 14.5″ and my desired length is 17″, so I will need 2.5″ of neckline rows. With my gauge, I will need to crochet 8 more rows.
Next, divide your top into 3 equal-ish sections and mark those stitches. The space between these markers will be your starting neckline width. Check this measurement and to adjust, move your stitch markers closer/farther apart, making sure they are even on both sides.
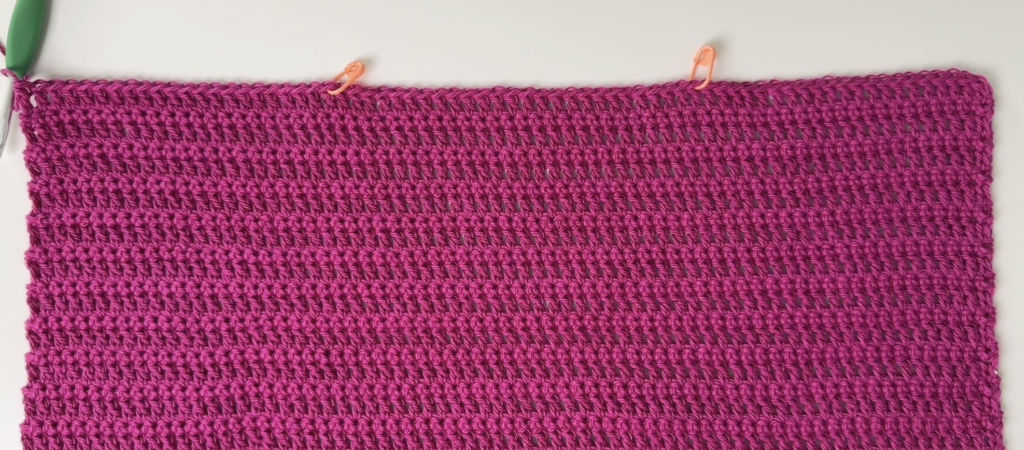
Neckline Side #1
Continue with the same yarn and begin shaping the first side of the neckline. Your stitch count will decrease by 1 stitch each row.
Row 1 (WS): Ch 1, sc in each st ending in the marked st, turn.
Row 2 (RS): STsc, dc2tog, dc in remaining sts, turn.
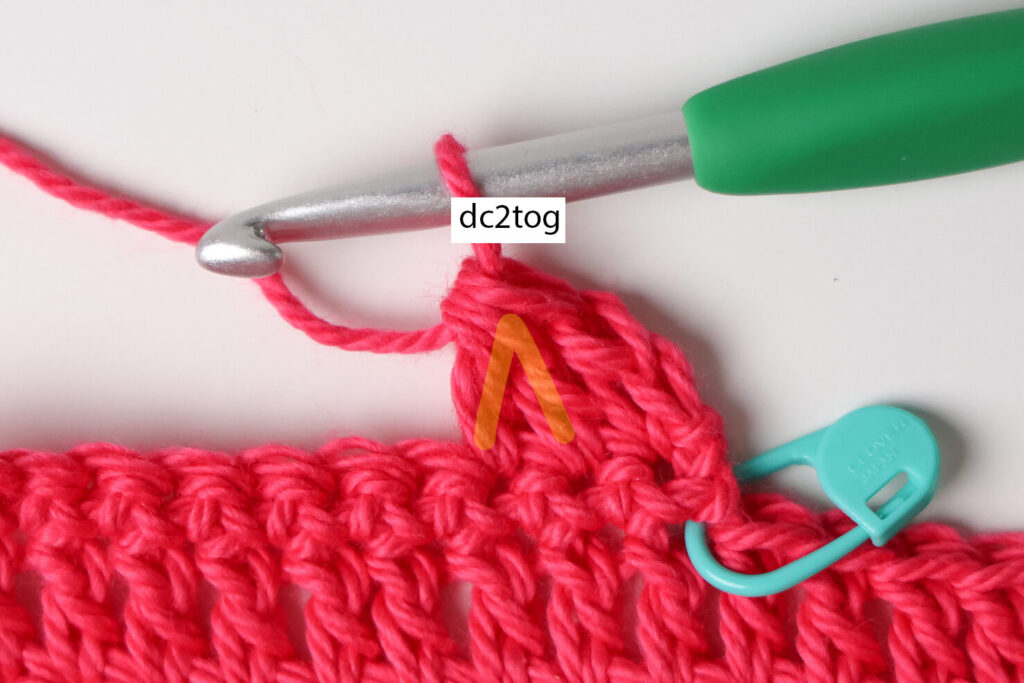
Row 3: Ch 1, sc until 3 sts remain, sc2tog, sc in last st, turn.
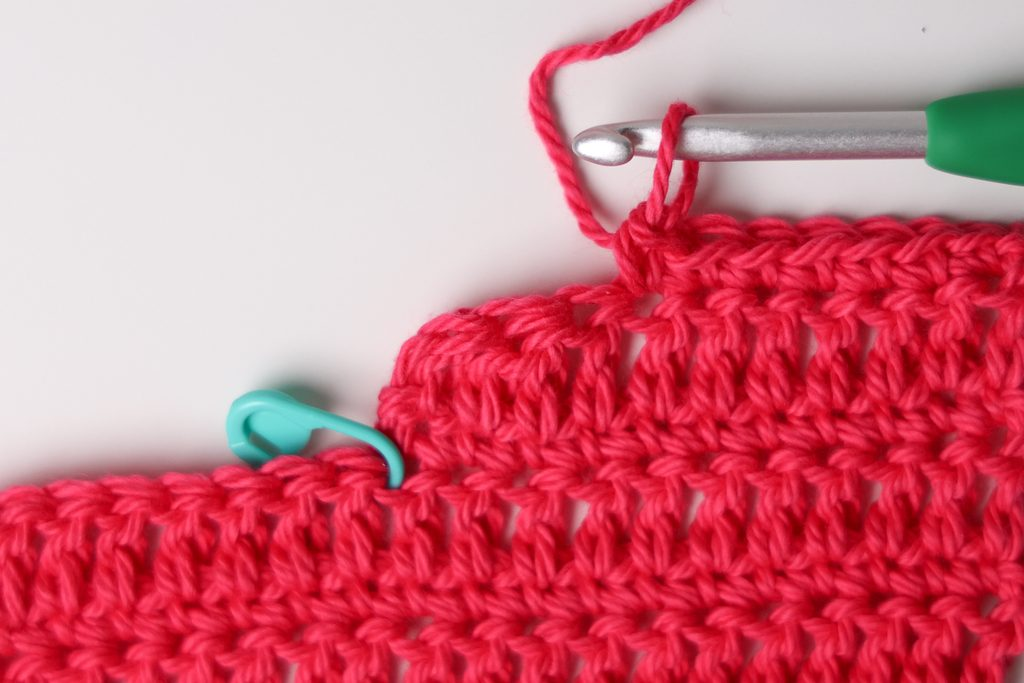
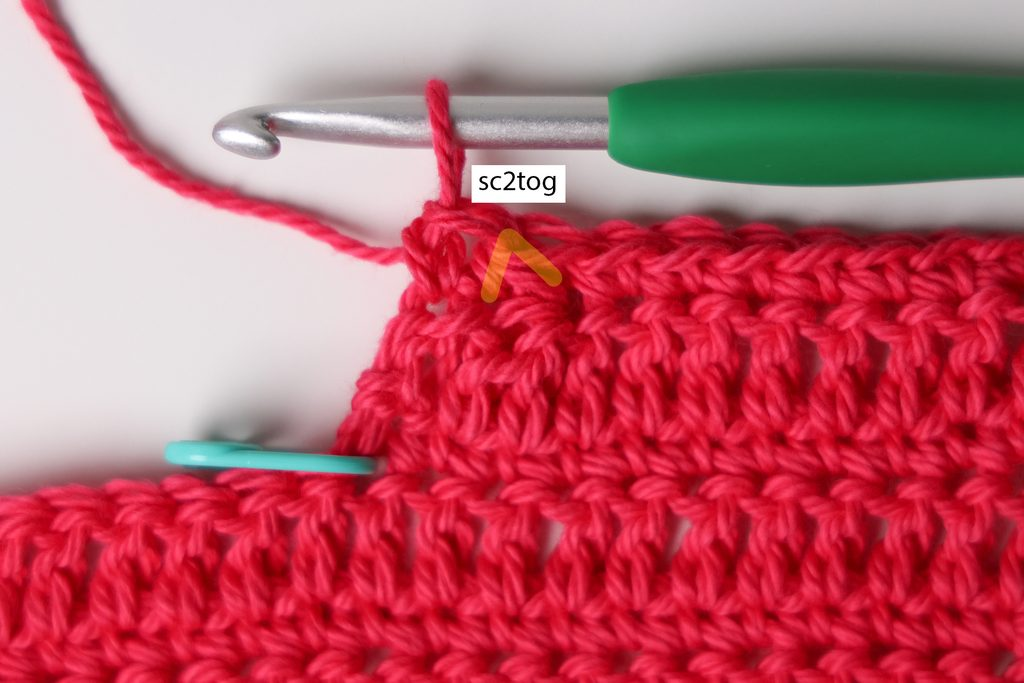
Row 4 and on: Repeat Rows 2 & 3 until you reach your desired length.
Cut yarn, leaving a tail for seaming.
Neckline Side #2
Make sure you’re on the WS and attach yarn in the next stitch marker.
Row 1 (WS): Sc in same st and in each st across, turn.
Row 2 (RS): STsc, dc until 3 sts remain, dc2tog, dc in last st turn.
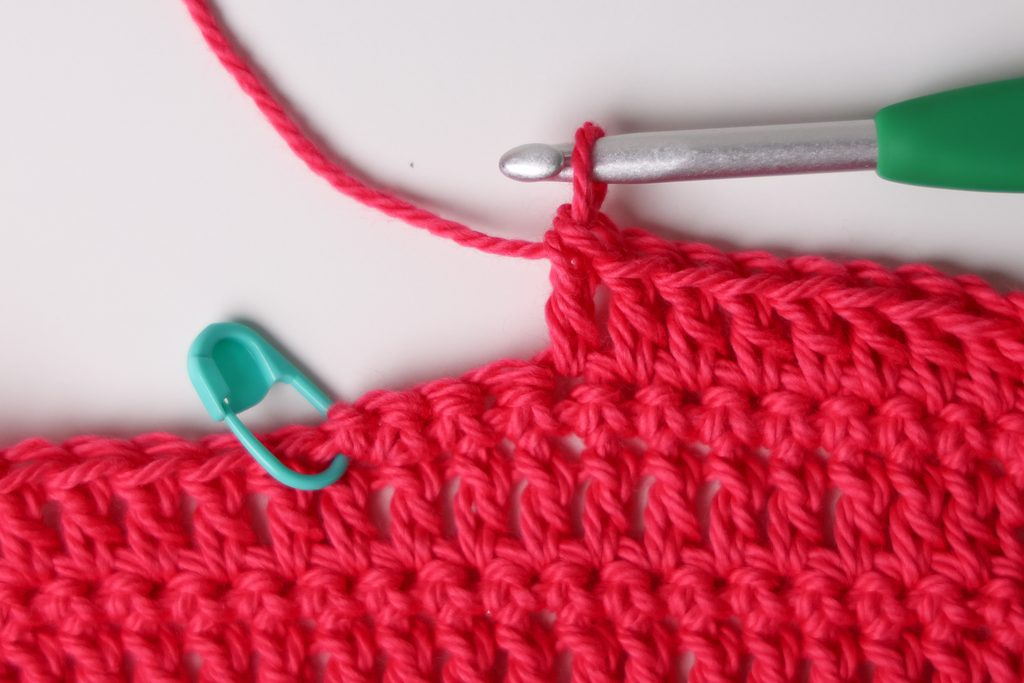
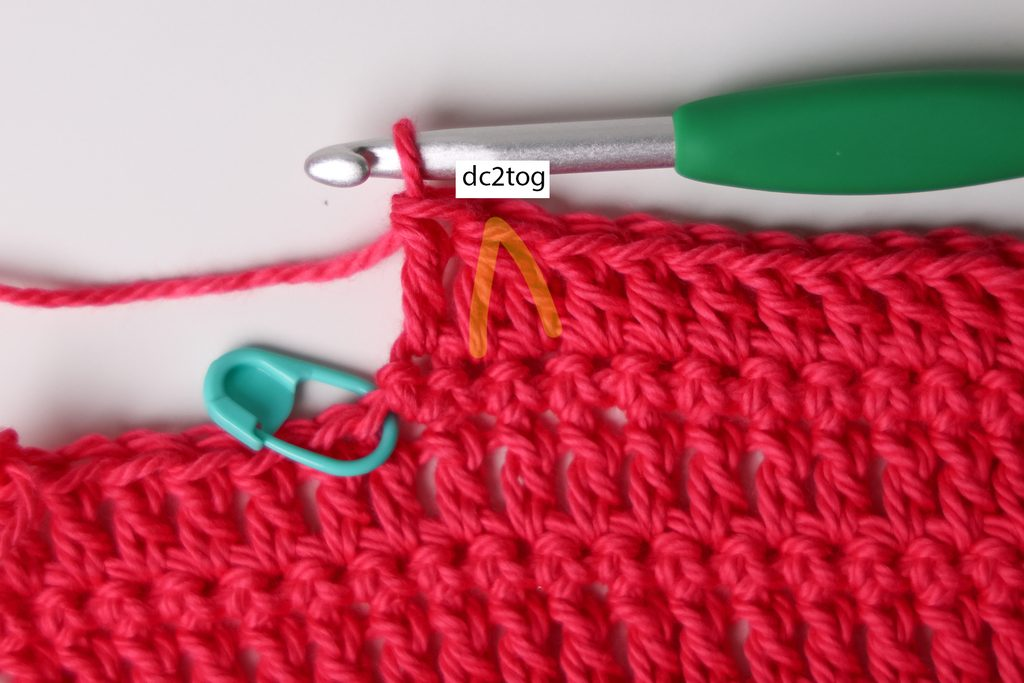
Row 3: Ch 1, sc, sc2tog, sc in remaining sts, turn.
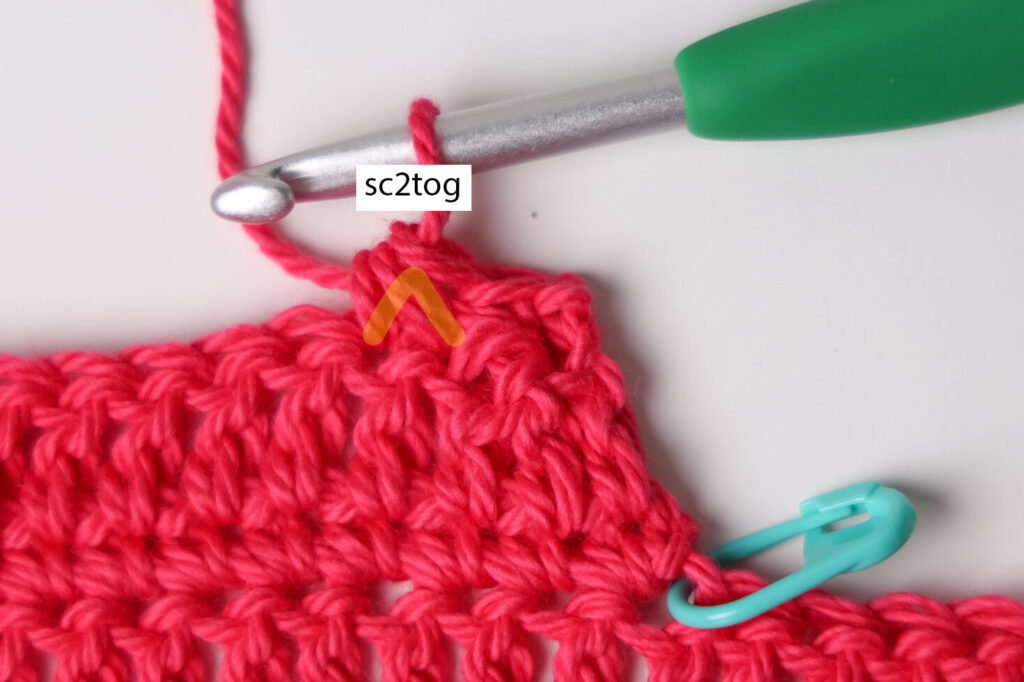
Row 4 and on: Repeat Rows 2 & 3 until you reach your desired length.
Cut yarn, leaving a tail for seaming.
Repeat all of the above to make your 2nd panel before continuing.
Seam at the Shoulders
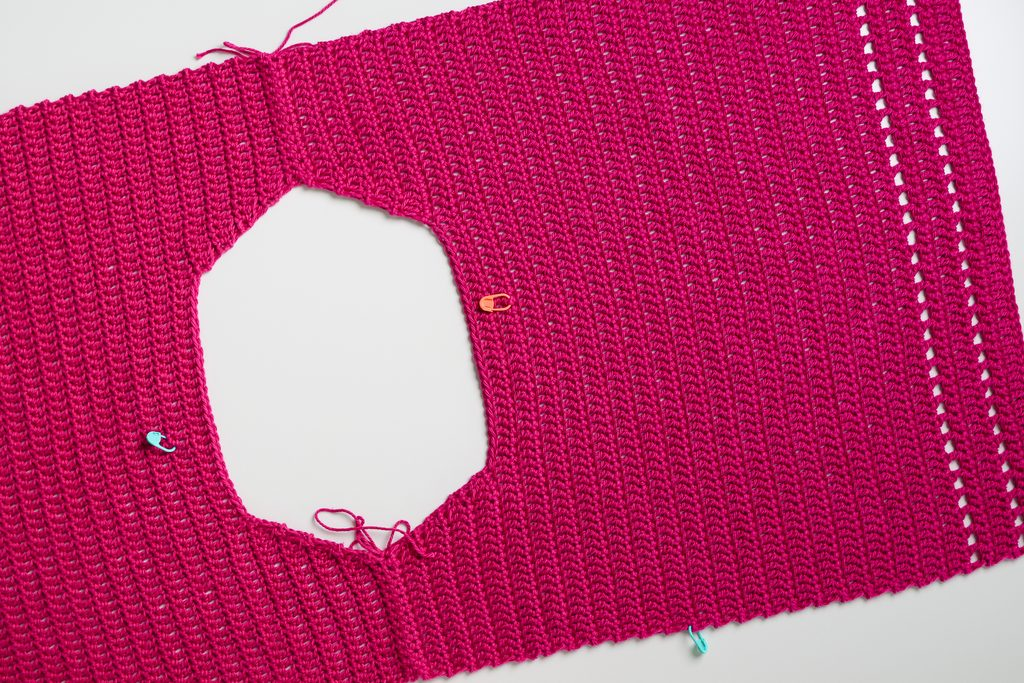
With RS facing each other, match up your panels at the shoulders. Use your darning needle and the tail left at the shoulder to seam with a whipstitch, or your preferred seaming method. Repeat for second shoulder.
Mark for your Armhole
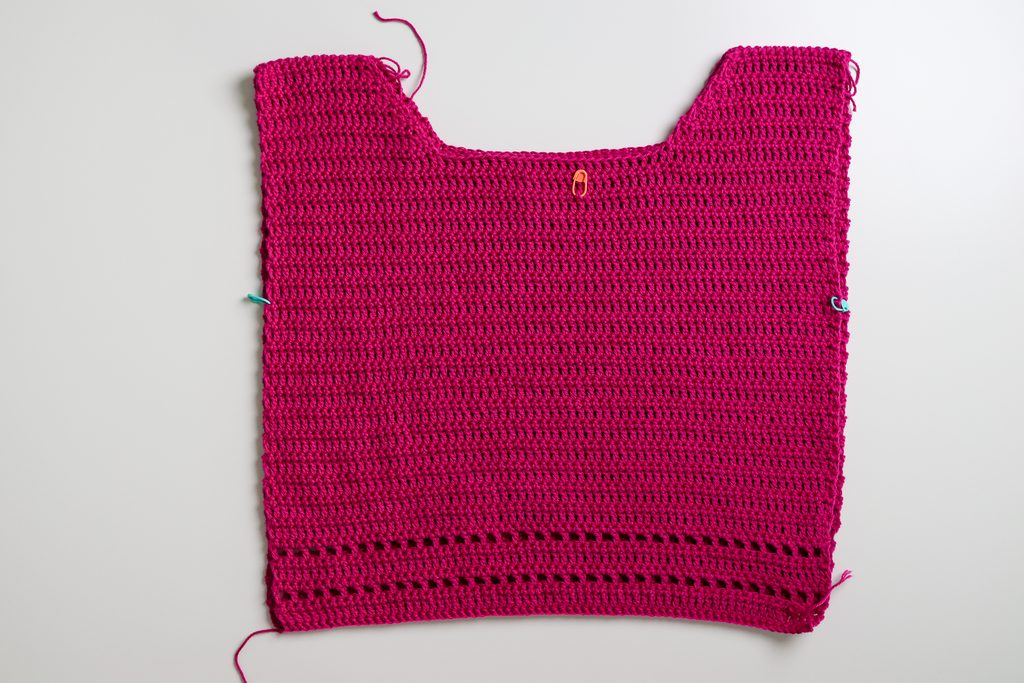
Try on your top and decide how big you want your armhole to be. Mark with stitch markers on both sides of both panels.
Seam at the Sides
With RS facing each other, fold your top at the shoulders. Cut a piece of yarn approximately 3 times the distance that you will seam. You will seam from the bottom to your armhole stitch marker.
If you made a longer top, you might want to leave a split at the bottom. In this case, just start seaming at least 3 inches from the bottom.
Use your darning needle to seam with a whipstitch, or your preferred seaming method. You might find it helpful to add extra stitch markers to keep the panels lined up. Repeat for the second side.
Neck Trim
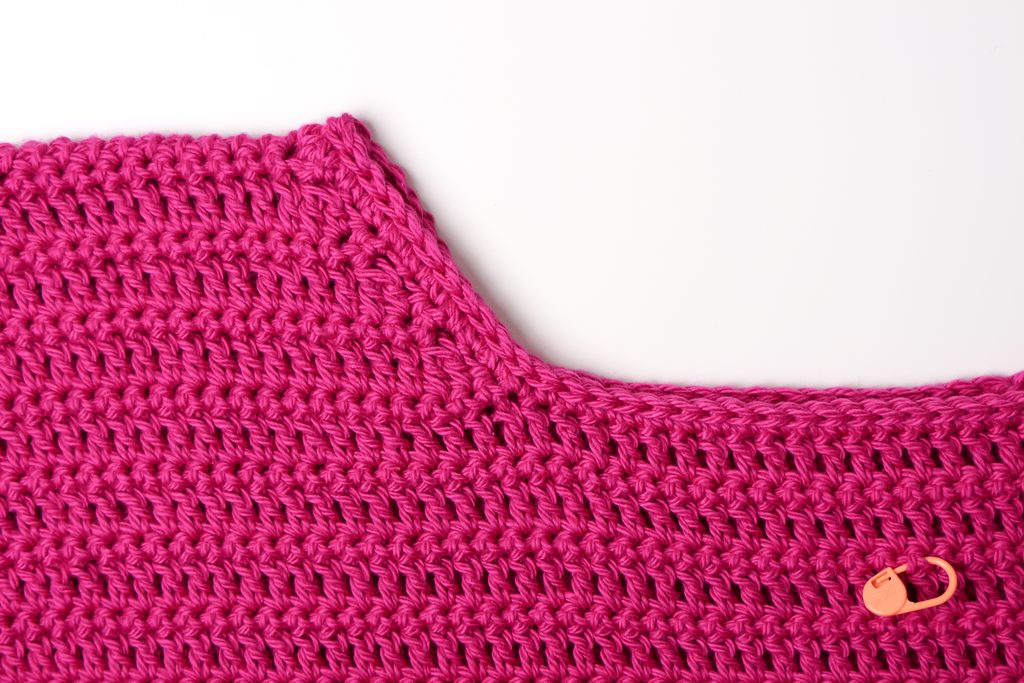
With RS facing, use the same hook (or go down one size) and attach yarn in any stitch along the back panel neckline with a sl st. Sc in same st and each st evenly around the neckline – 1 sc in each stitch, 1 sc in each sc row end, and 2 sc in each dc row end. Sl st to first sc to join. Optional: Work a second row of sl st. Do not turn. Sl st in each st around, sl st to first st to join.
Armhole Trim
With RS facing, use the same hook (or go down one size) and attach yarn in any stitch at the armhole with a sl st. Sc evenly around – 1 sc in each sc row end, and 2 sc in each dc row end. Sl st to first sc to join. Optional: Work a second row of sl st. Do not turn. Sl st in each st around, sl st to first st to join.
Fasten off and weave in all of your ends!
Looking for more beginner-friendly patterns and tutorials? Check these out:


No responses yet